Table of contents
When your phone opens a web page, it first asks a DNS server to turn the address into an IP address. By default, an Android phone uses the DNS server from your Wi-Fi router or mobile carrier. The Private DNS setting built into Android 9 and later lets the phone use a public DNS such as Google or Cloudflare instead. You enter the provider’s hostname, and Wi-Fi and mobile data both switch to that DNS. Every query is encrypted with DNS over TLS (DoT), which wraps DNS requests in a TLS connection. Changing DNS in Windows means entering IP addresses for each network connection, but Private DNS is set once for the whole phone.
I tested on a Samsung Galaxy S8 (Android 9, One UI 1.0) with Chrome.
Set Private DNS
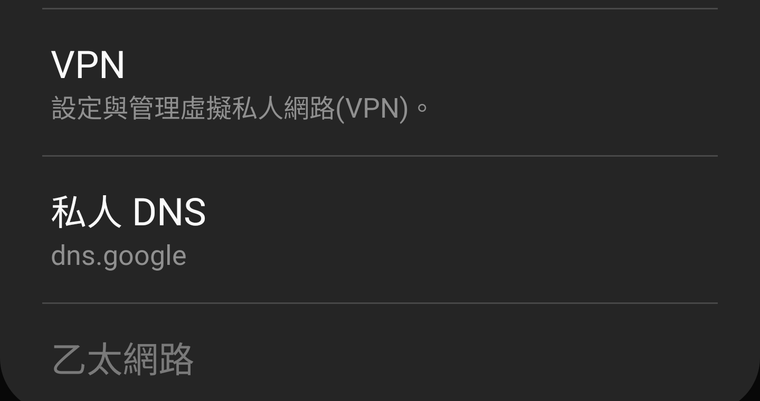
On a Samsung phone, open “Settings > Connections > More connection settings”. Private DNS is below VPN, and the small text under it shows the current setting.
The screenshots in this article are from a Traditional Chinese One UI. The page title 更多連線設定 is “More connection settings”, and 私人 DNS is “Private DNS”.
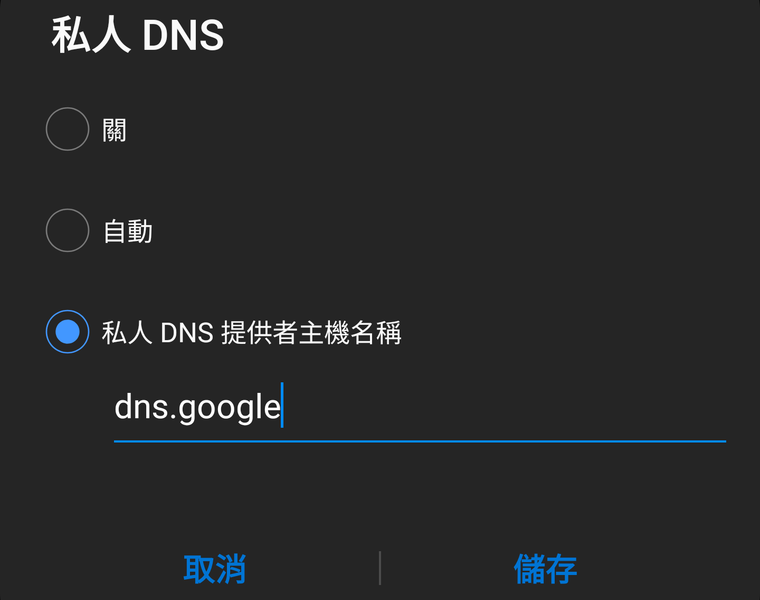
Tap Private DNS and you see three options. To use a public DNS, choose the third one. The options differ in which DNS the phone uses and whether queries are encrypted:
| Option | DNS used | Query encryption |
|---|---|---|
| Off | The DNS from your router or carrier | Not encrypted |
| Automatic | The DNS from your router or carrier | Encrypted only if that DNS supports it |
| Private DNS provider hostname | The provider you enter | Always encrypted; if it cannot connect, the phone does not fall back to the original DNS |
According to Android’s official announcement, Android 9 defaults to Automatic, but my S8 was set to Off. Choose “Private DNS provider hostname”, type the hostname in the box, and tap Save. Enter the hostname exactly as the provider publishes it. An IP address such as 8.8.8.8 does not work.
In the screenshot below, the Traditional Chinese dialog lists 關 (Off), 自動 (Automatic), and 私人 DNS 提供者主機名稱 (Private DNS provider hostname), with dns.google in the box. The buttons are 取消 (Cancel) and 儲存 (Save).
Google and Cloudflare publish these hostnames for Android, and I set up both:
| Provider | Hostname | Official guide |
|---|---|---|
| Google Public DNS | dns.google |
Setup for Android 9 and later |
| Cloudflare | one.one.one.one |
Setup for Android |
After you save and go back to More connection settings, the text under Private DNS changes from Off to the hostname you entered, like dns.google in the first screenshot.
Check that it works
If you entered Cloudflare’s one.one.one.one, open one.one.one.one/help in the phone’s browser. When “Connected to 1.1.1.1” and “Using DNS over TLS (DoT)” both show Yes, the phone is using Cloudflare’s DNS over an encrypted connection.
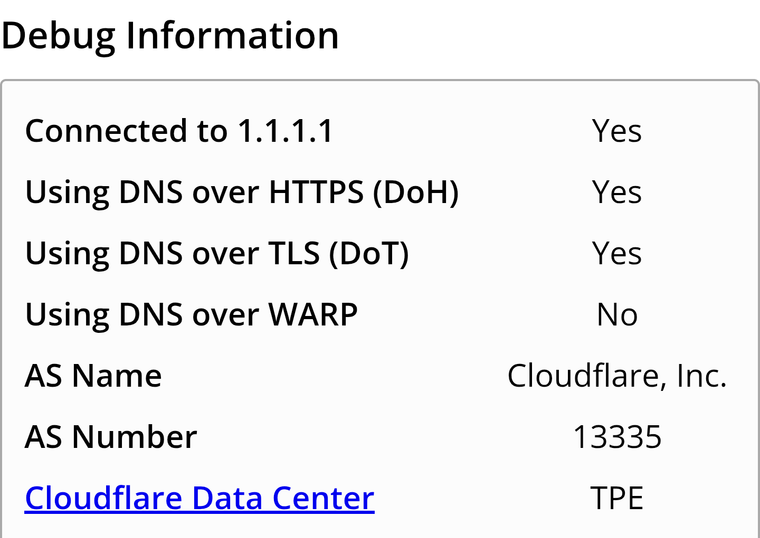
I also turned off Wi-Fi, switched to mobile data, and opened the page again. DoT still showed Yes. Google has no similar check page. With dns.google, all I could confirm was that Private DNS showed dns.google and web pages opened normally.
If you cannot get online after the change
If the hostname is mistyped or that DNS cannot be reached, the phone does not fall back to the original DNS, and the network stops working. To test this, I mistyped dns.google as dns.gogle. A warning appeared on the Wi-Fi icon in the status bar, and the connected network on the Wi-Fi page showed a message that the internet may not be available.
The screenshot below is from the Traditional Chinese interface. Under 目前網路 (Current network), it says 網際網路可能無法使用, which is “Internet may not be available”.
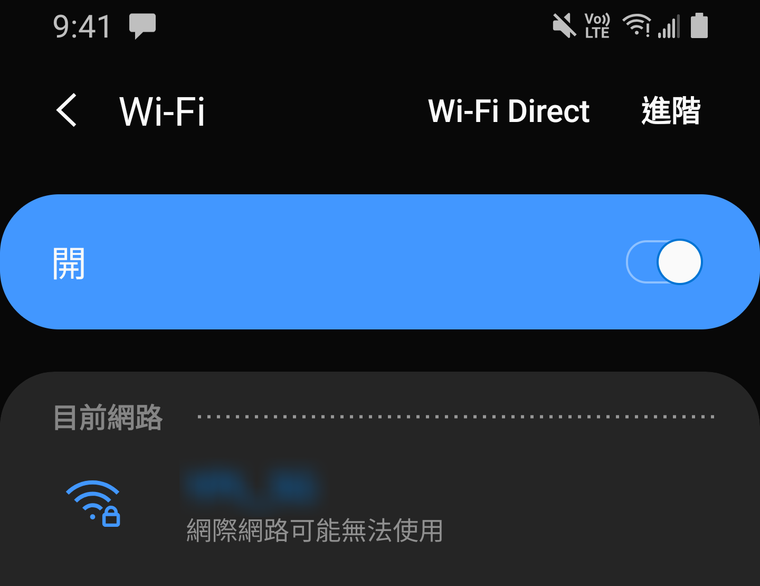
To recover, go back to Private DNS and fix the hostname, or set it back to Off and save. The network comes back.
Summary
To use a public DNS on Android, choose “Private DNS provider hostname” under Private DNS and enter the hostname the provider publishes. Wi-Fi and mobile data then both use encrypted DNS. In my test on a Galaxy S8 with Cloudflare’s hostname, the check page showed DoT as Yes on both Wi-Fi and mobile data.
Further reading