Table of contents
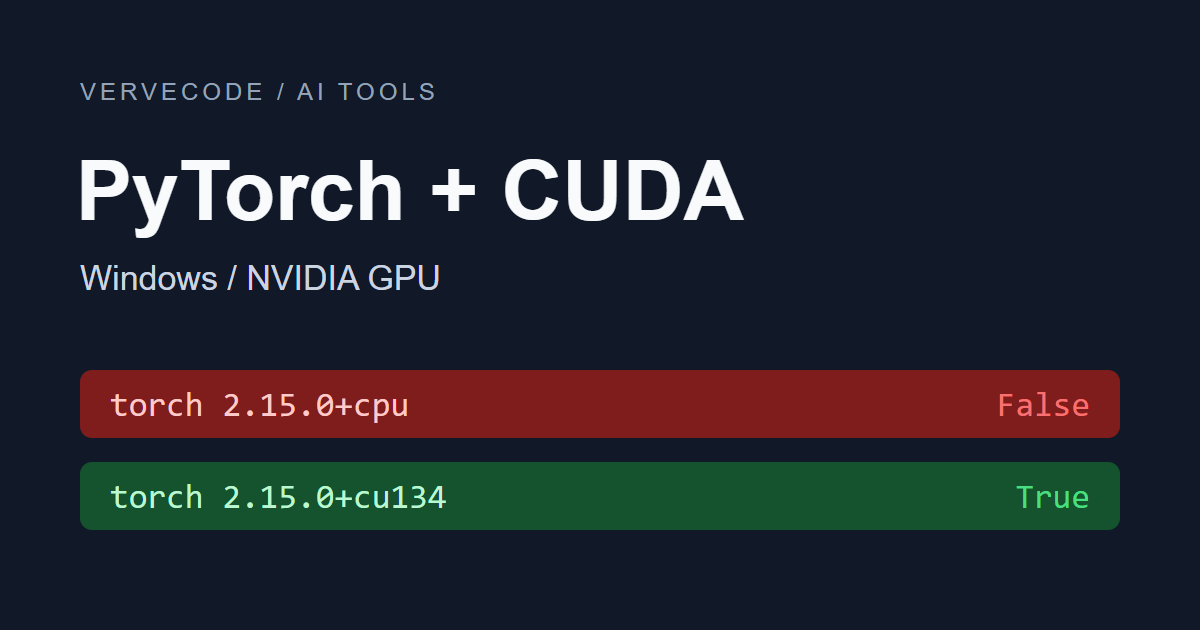
PyTorch is a Python framework widely used to run and train AI models, and when your computer has an NVIDIA GPU, PyTorch can hand the computation to it. On Windows, though, if you follow a common tutorial and run pip install torch, you get a CPU-only build. Your program does not use the GPU, and torch.cuda.is_available() keeps returning False.
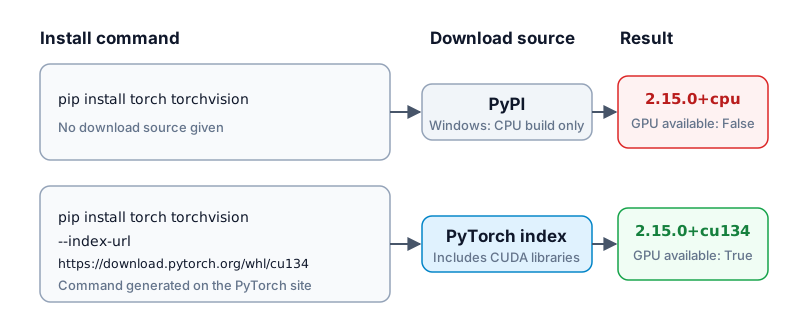
Nothing is wrong with your GPU or driver. pip downloads from PyPI by default, and the Windows build of PyTorch on PyPI is the CPU build. Check which CUDA version your driver supports, then reinstall the CUDA build from PyTorch’s own download site. PyTorch then uses the GPU, and you do not need to install the CUDA Toolkit or cuDNN on your computer.
I tested on Windows 11 with a GeForce RTX 3070 (8 GB), NVIDIA driver 621.01, and Python 3.15.1, and installed PyTorch 2.15.0.
Check which build is installed
First, check which kind of PyTorch is installed. Save the program below as check_gpu.py with Notepad or VS Code, then run python check_gpu.py in the same terminal or virtual environment where you normally run your programs:
1import sys
2import torch
3
4print("Python:", sys.executable)
5print("PyTorch:", torch.__version__)
6print("CUDA:", torch.version.cuda)
7print("GPU available:", torch.cuda.is_available())
8if torch.cuda.is_available():
9    print("GPU name:", torch.cuda.get_device_name(0))
Here is how the output of the CPU build and the CUDA build differs:
| Field | CPU build | CUDA build |
|---|---|---|
| PyTorch | 2.15.0+cpu |
2.15.0+cu134 |
| CUDA | None |
13.4 |
| GPU available | False |
True |
If the version ends in +cpu and CUDA is None, you have the CPU build, so follow the steps below to switch to the CUDA build. The version of a CUDA build ends in +cu followed by the CUDA version. For example, CUDA 13.4 is +cu134 and CUDA 13.2 is +cu132. If the version already ends in +cu but the GPU is still unavailable, go straight to “Why the GPU is still unavailable”.
The CUDA version your driver supports
Before reinstalling, check which CUDA version your GPU driver supports. Run nvidia-smi in a terminal. The number at the top right of the table is the highest CUDA version the driver supports. Newer drivers label it “CUDA UMD Version”, and older ones label it “CUDA Version”:
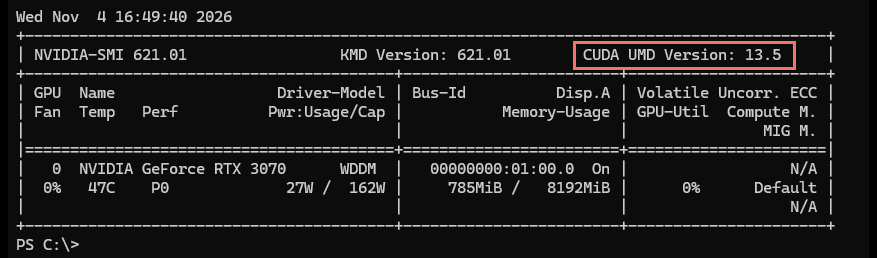
nvidia-smi. If the number is lower than 13.2, update the driver first on the NVIDIA driver download page, then run nvidia-smi again and check that the number went up.
Reinstall the CUDA build
Once you know the version, go to the official PyTorch install page and select Stable, Windows, Pip, and Python in turn, then choose a CUDA version that does not exceed the driver’s limit. The page generates the install command below. The command from the official page differs from the common tutorial only in the --index-url at the end. This argument makes pip download the build with the CUDA components bundled from PyTorch’s download site, so you do not need to install the CUDA Toolkit separately:
Requirement already satisfied and skips the install, even if you add --index-url. This command removes only PyTorch and torchvision, and other packages such as NumPy and your own programs are not affected. If torchvision is not installed, pip prints WARNING: Skipping torchvision as it is not installed., which only means the package was not there, and you can ignore it:
1pip uninstall -y torch torchvision
After the removal finishes, run the command generated by the official install page. I chose CUDA 13.4. If you choose 13.2, the URL ends in cu132. The CUDA build is about 2.2 GB to download and takes about 3.1 GB of disk space once installed, while the CPU build is only a 126 MB download:
1pip install torch torchvision --index-url https://download.pytorch.org/whl/cu134
When the install finishes, run python check_gpu.py again. If the version has changed to 2.15.0+cu134, GPU available shows True, and the name of the GPU is printed, PyTorch can now use your GPU.
The screenshot below comes from the Chinese version of the check script, so two of its labels are in Chinese: “GPU 可用” means GPU available, and “顯示卡” means GPU name. The other lines are the same as in the script above:

Why the GPU is still unavailable
If the install fails, or the GPU is still unavailable after reinstalling, compare the message on the screen and the output of the check script with the table below:
| What you see | Cause | What to do |
|---|---|---|
pip reports No matching distribution found for torch |
The command used the URL of an older CUDA version, such as cu118, which has no install file for a newer Python |
Use the command generated by the official install page |
The version still ends in +cpu |
The CPU build was not removed before installing, so pip skipped the install | Run pip uninstall -y torch torchvision and install again |
| It is True in the terminal but False in the editor or Jupyter | The editor uses a different Python environment | Compare the Python paths printed on both sides and switch the editor’s interpreter to the environment with the CUDA build |
The version ends in +cu but GPU available is False |
The installed CUDA version is higher than the limit shown by nvidia-smi |
Update the driver, or install a CUDA version that does not exceed the limit |
Summary
To make PyTorch use the GPU on Windows, check which CUDA version your driver supports, remove the CPU build, and install the CUDA build from PyTorch’s download site. In my test, after switching to the CUDA 13.4 build, torch.cuda.is_available() changed from False to True.