Table of contents
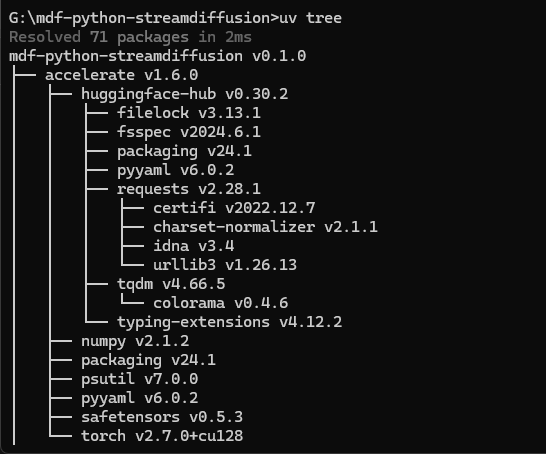
When you move a Python project to another computer, rebuilding the environment usually takes the most time. You have to remember which Python version to install, where the virtual environment lives, and which packages you ran pip install for. With uv managing the project, all three are recorded in the project folder. VS Code finds the .venv inside the project when you open the folder, and on a new computer one uv sync brings the environment back.
uv is a Python package and project manager from Astral. It can download a specific Python version, create a virtual environment, and write dependencies into pyproject.toml and uv.lock. You do not need to install Python separately first. The steps below are on Windows.
Install uv
According to the uv installation documentation, on Windows you can run the official install script in PowerShell:
1powershell -ExecutionPolicy ByPass -c "irm https://astral.sh/uv/install.ps1 | iex"
If you prefer a package manager, you can also install with winget install --id=astral-sh.uv -e.
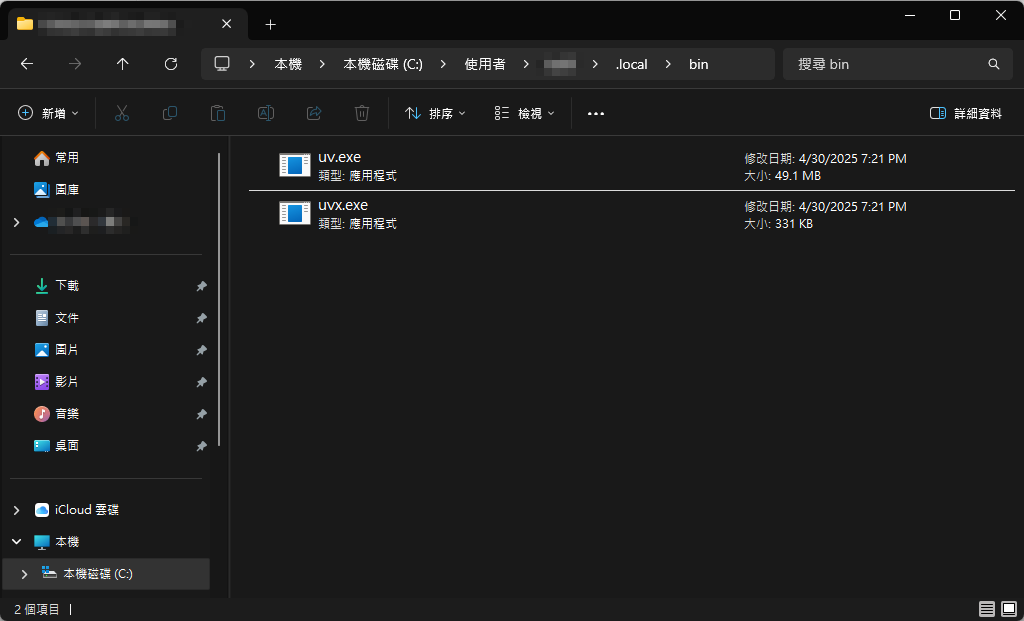
The install script puts uv.exe and uvx.exe in .local\bin under your user folder and adds that folder to PATH.
The screenshot below is File Explorer on Traditional Chinese Windows. The address bar shows the .local\bin folder under your user folder, with uv.exe and uvx.exe inside.
1uv --version
If it prints a version number, the installation is done.
Open the project folder in VS Code
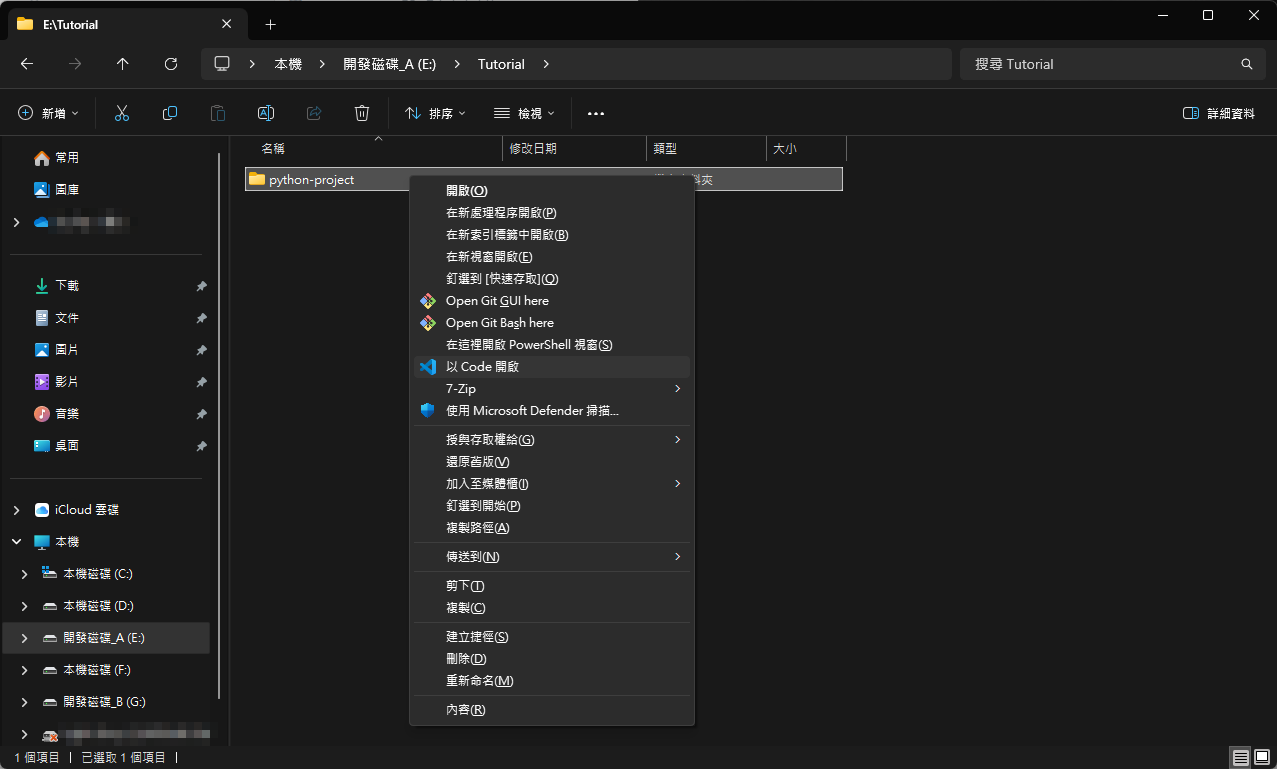
VS Code uses a folder as its workspace, and the Python interpreter, virtual environment, and settings follow that folder. Create an empty folder, for example python-project, right-click it, and choose “Open with Code”. In the Windows 11 context menu, if that item is missing, click “Show more options” first, or hold Shift while you right-click.
The File Explorer screenshot below uses a Traditional Chinese interface. The right-click menu on the python-project folder contains the “Open with Code” item (shown in Chinese as 以 Code 開啟).
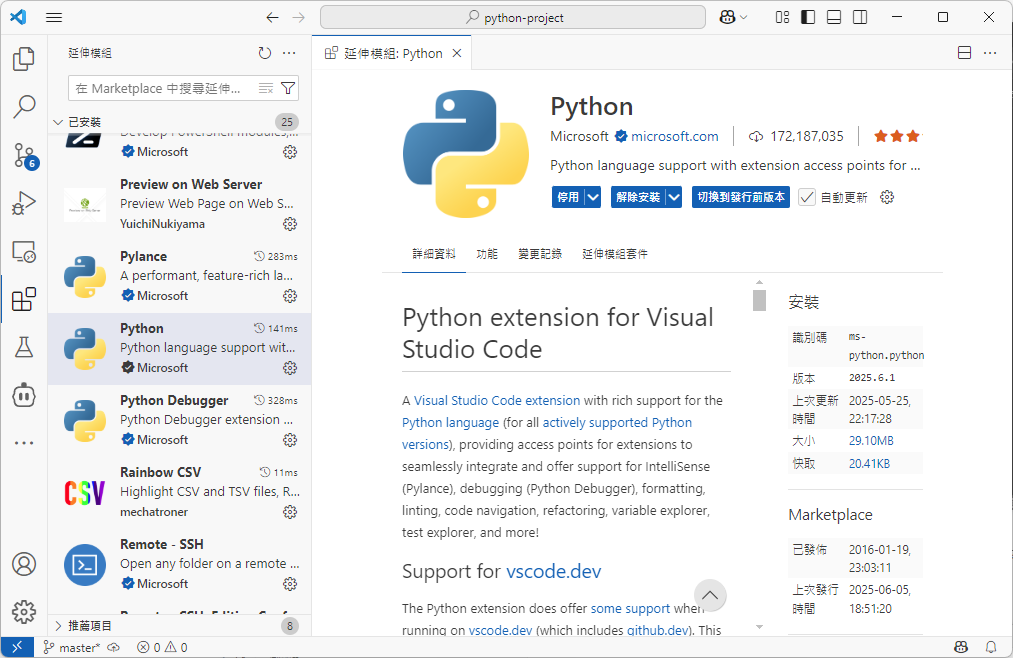
Python, and install the Python extension published by Microsoft. It provides IntelliSense, debugging, and interpreter switching, and it installs Pylance, Python Debugger, and Python Environments along with it.
This VS Code screenshot uses a Traditional Chinese interface. The Installed list shows Pylance, Python, and Python Debugger, and the right side shows the details of the Python extension published by Microsoft.
Create the project and pin the Python version
Press Ctrl + ` to open the VS Code terminal and check that its path is the project folder. First list the Python versions uv can use:
1uv python list
Entries marked <download available> are versions uv can download. Entries with a path are Pythons already on the computer, including versions uv downloaded earlier.
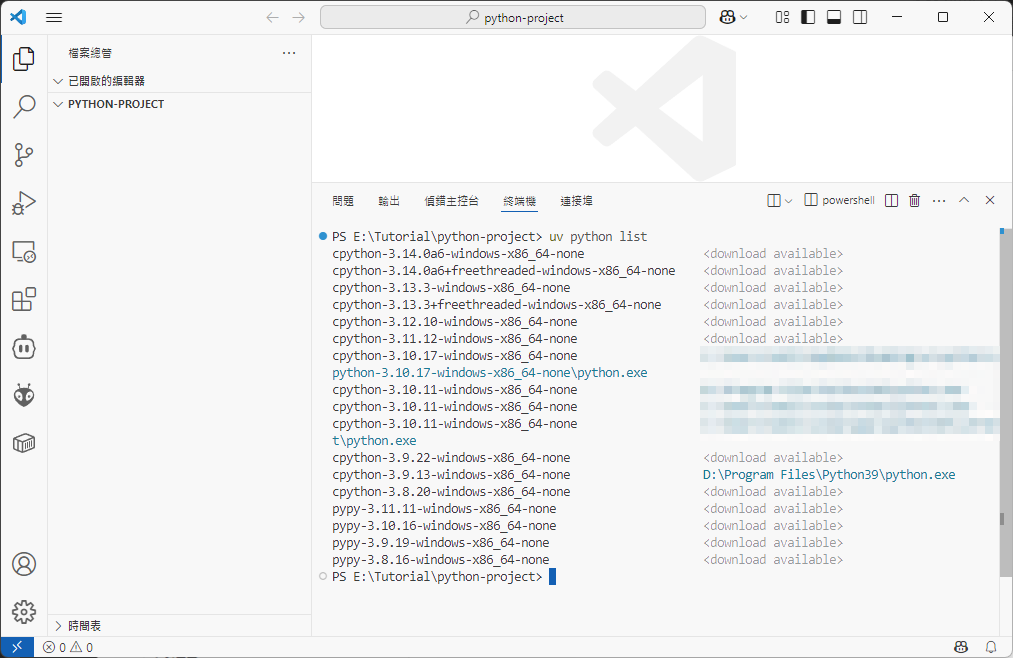
--python. Starting with uv 0.12, uv init by default creates a project with a src/ directory and packaging settings, and it no longer generates main.py, so this guide adds --no-package to keep a simple single-file layout. The screenshots use 3.10. For another version, use the matching version number:
1uv init --no-package --python 3.10
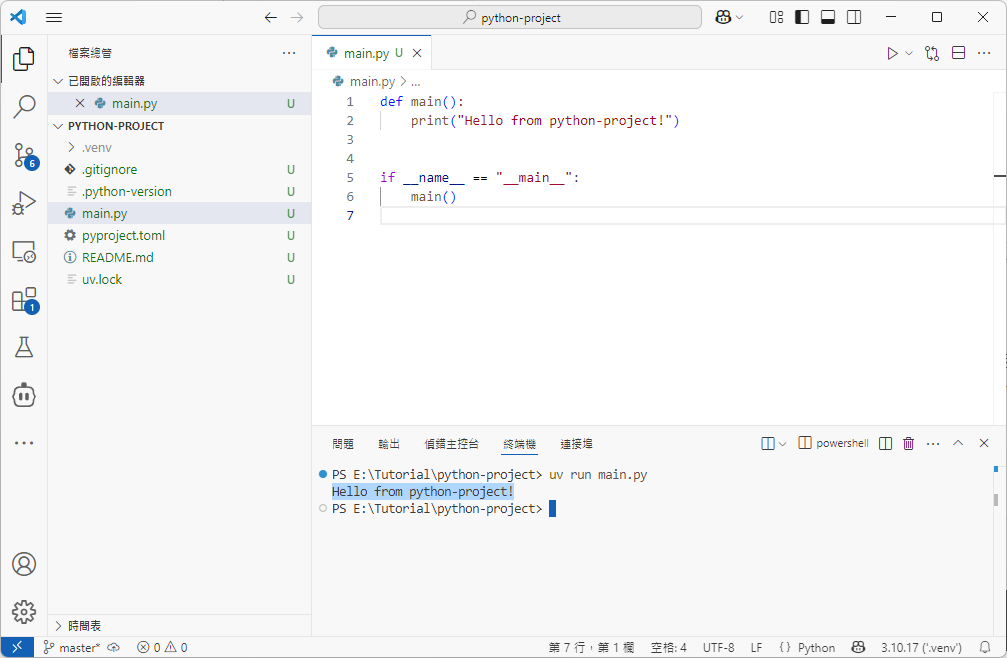
uv init --no-package creates pyproject.toml, .python-version, main.py, README.md, and .gitignore. If the folder is not yet a Git repository, it also initializes Git. .python-version records the Python version the project uses. If the computer does not have that version, uv downloads it when it is needed.
The .venv is not created until the first time you run uv run, uv sync, or uv add, and by default it sits inside the project folder. Run the sample program once to build the environment:
1uv run main.py
The terminal prints Hello from python-project!, and .venv and uv.lock appear in the folder.
Make VS Code use the .venv in the project
VS Code automatically searches the workspace for .venv, so you usually do not need to configure anything. Look at the Python version in the status bar at the bottom right. If it shows ('.venv'), it is already connected to the project environment.
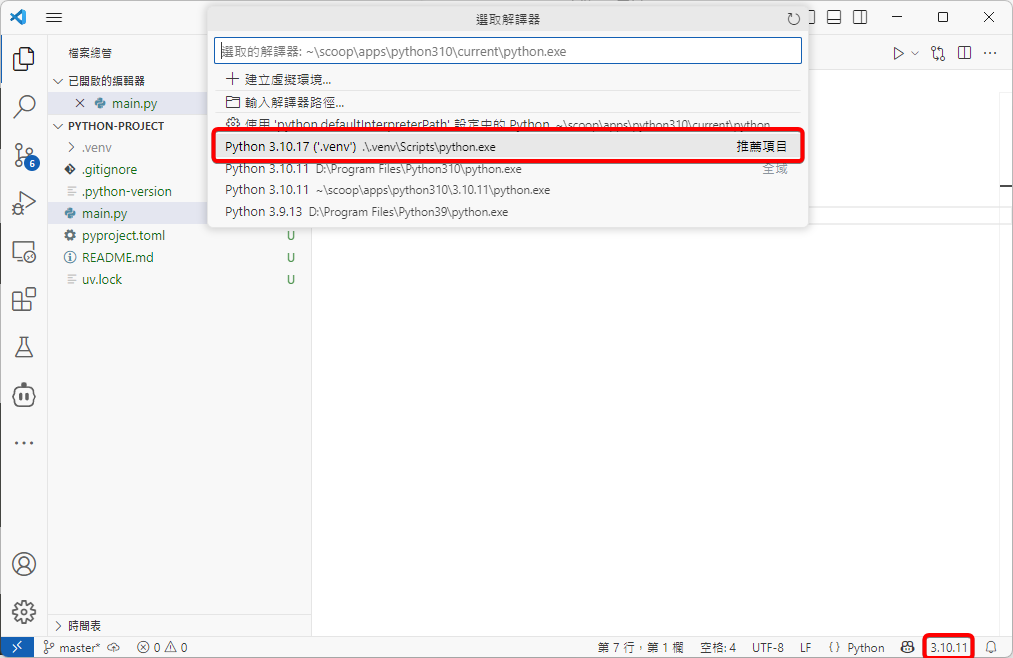
If you already have another Python installed, the status bar may still show the old version. In the screenshot below, the bottom right shows 3.10.11. In that case, press Ctrl + Shift + P, run “Python: Select Interpreter”, and choose the entry whose path is .\.venv\Scripts\python.exe. VS Code also marks it as “Recommended”.
In this Traditional Chinese interface, the interpreter list has the Python 3.10.17 (‘.venv’) entry boxed as the recommended one, and the status bar at the bottom right still shows a different Python, 3.10.11.
uv run, but the editor underlines imports with a red squiggle as if the module cannot be found. Pylance is still analyzing the code with a different Python. The squiggles disappear once you switch back to .venv.
Manage packages with uv
With uv, you install packages with uv add. It installs the package into .venv, writes it into pyproject.toml, and updates uv.lock, so the project keeps a record of every package it uses:
1uv add requests
To remove a package you no longer need, use uv remove. pyproject.toml, uv.lock, and .venv are all updated together:
1uv remove requests
When you run a program, prefer uv run. It first checks that .venv matches pyproject.toml and uv.lock, then runs the command, and you do not need to activate the virtual environment by hand.
Rebuild the environment on another computer
When you push the project to Git, commit pyproject.toml, uv.lock, and .python-version together, and do not commit .venv (the .gitignore generated by uv init already excludes it). On the other computer, clone the project and run:
1uv sync
uv prepares Python from .python-version, then installs the exact package versions recorded in uv.lock. After you edit pyproject.toml by hand, uv sync also brings the environment back in line.
Convert from requirements.txt
If an existing project has only a requirements.txt, first run uv init --no-package, then import the list:
1uv add -r requirements.txt
From then on, add packages with uv add, and the dependencies are recorded in pyproject.toml.
Summary
uv manages the Python version, .venv, and packages, and VS Code only needs to point at the .venv inside the project. As long as pyproject.toml, uv.lock, and .python-version travel with the project, running uv sync on a new computer rebuilds the environment.