Table of contents
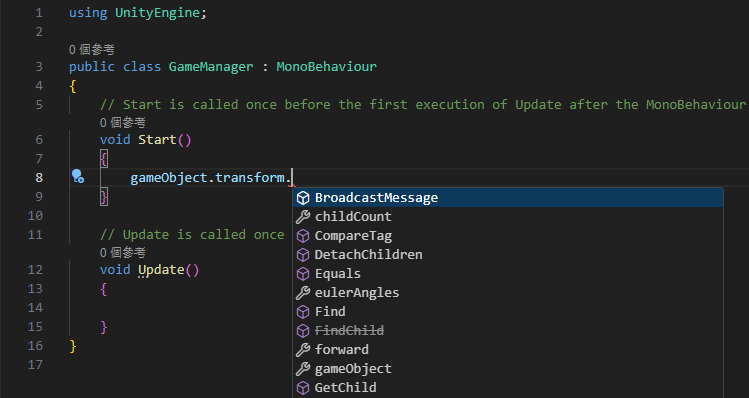
To connect Unity to VS Code, install the Visual Studio Editor package in Unity, set External Script Editor to VS Code, and then install the Unity extension and the .NET SDK in VS Code. Cursor works in a similar way, but the Unity extension is licensed only for Microsoft’s own editors. In Cursor you install the community-maintained Cursor Editor package and the open-source C# extension instead.
The Unity team maintains the VS Code integration, and the setup is described in the Unity IDE support documentation. The Cursor integration is maintained by an open-source community, and its features and compatibility are outside Unity’s official support. Before you start, make sure you can open your Unity project normally.
VS Code
Install the Visual Studio Editor package
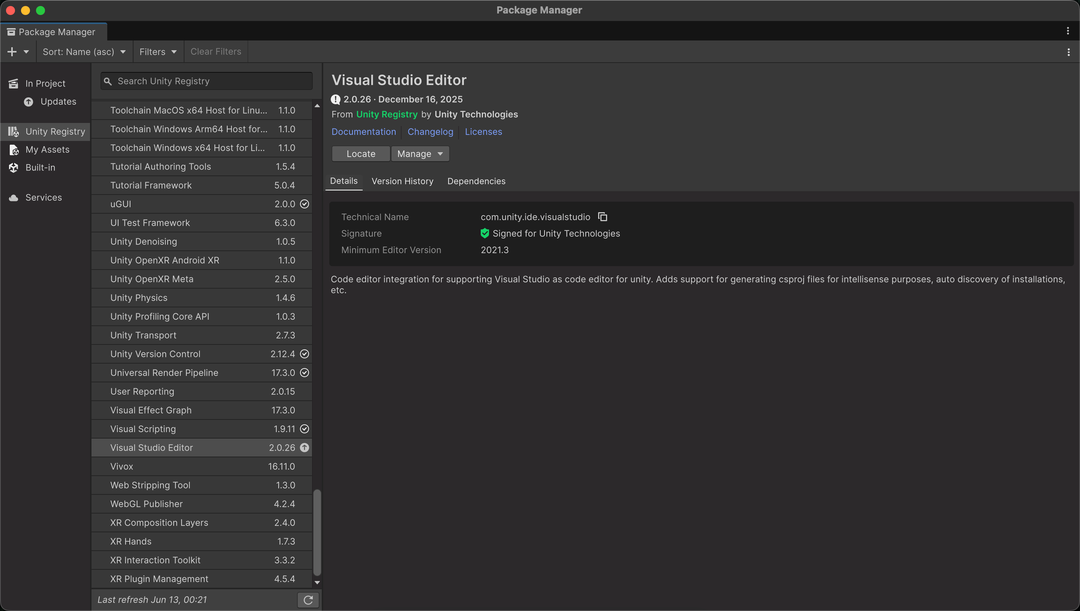
In Unity, open the Package Manager from the top menu with Window > Package Management > Package Manager. In the Unity Registry tab on the left, find the Visual Studio Editor package. New Unity projects usually have it installed already. If yours does not, click Install.
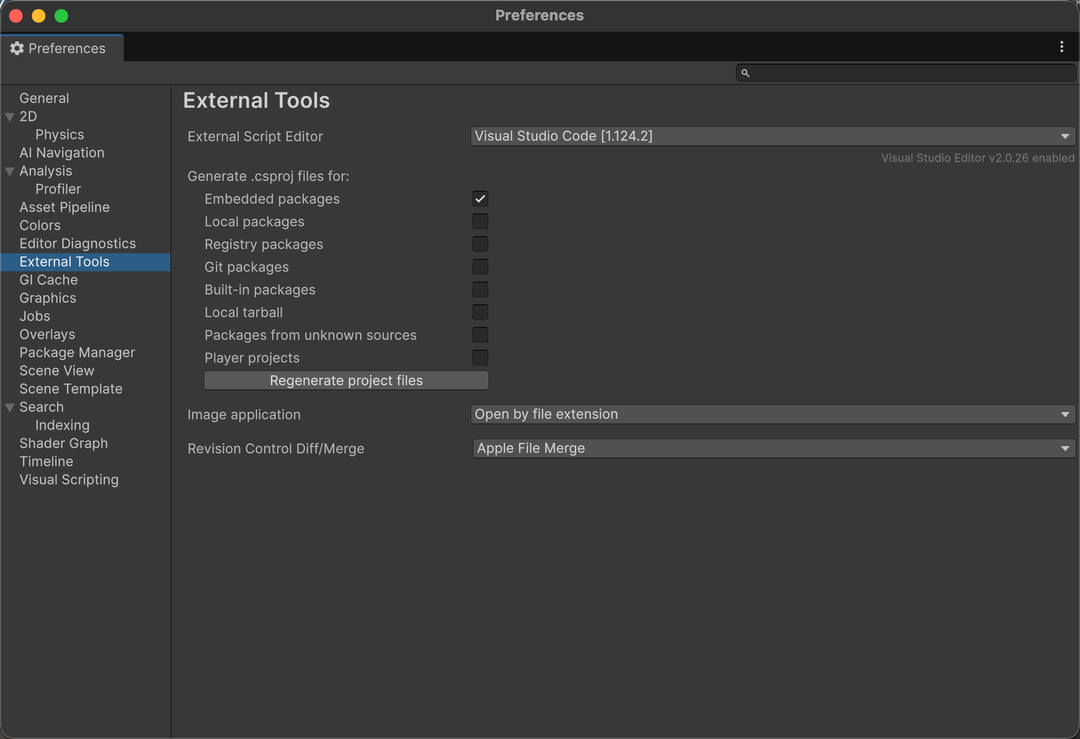
Unity > Settings (macOS) or Edit > Preferences (Windows and Linux). In the External Tools tab on the left, set External Script Editor to Visual Studio Code.
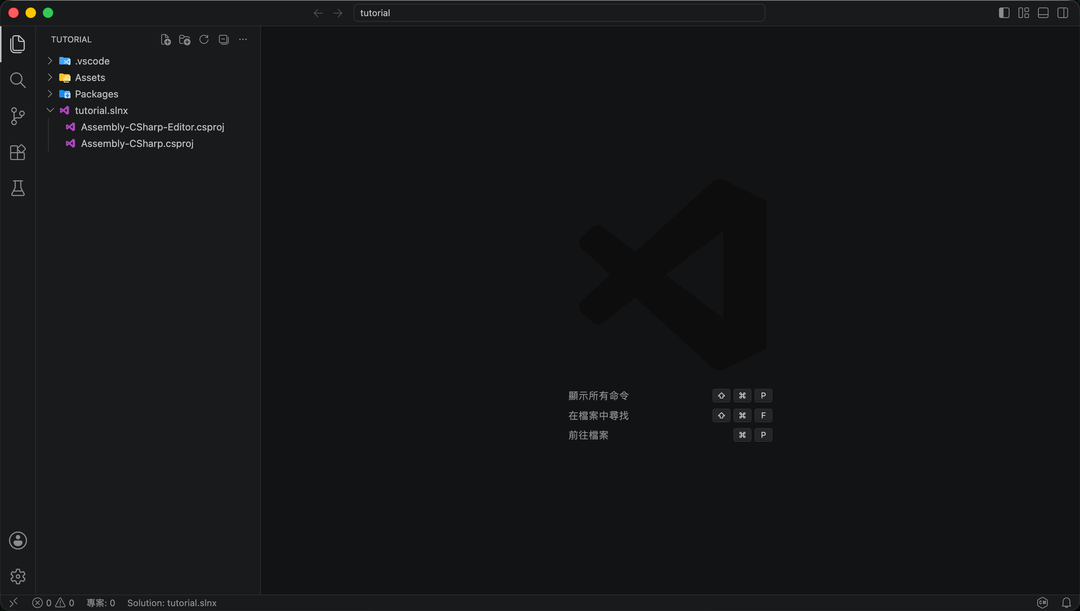
Assets > Open C# Project from the top menu, and VS Code opens the workspace for your Unity project.
The VS Code screenshots in this article use the Traditional Chinese interface. The labels in them map to English as follows: 延伸模組 is Extensions, 命令選擇區 is Command Palette, 問題 is Problems, and 輸出 is Output. The welcome hints in the middle of the window (顯示所有命令, 在檔案中尋找, 前往檔案) are Show All Commands, Find in Files, and Go to File.
Install the Unity extension
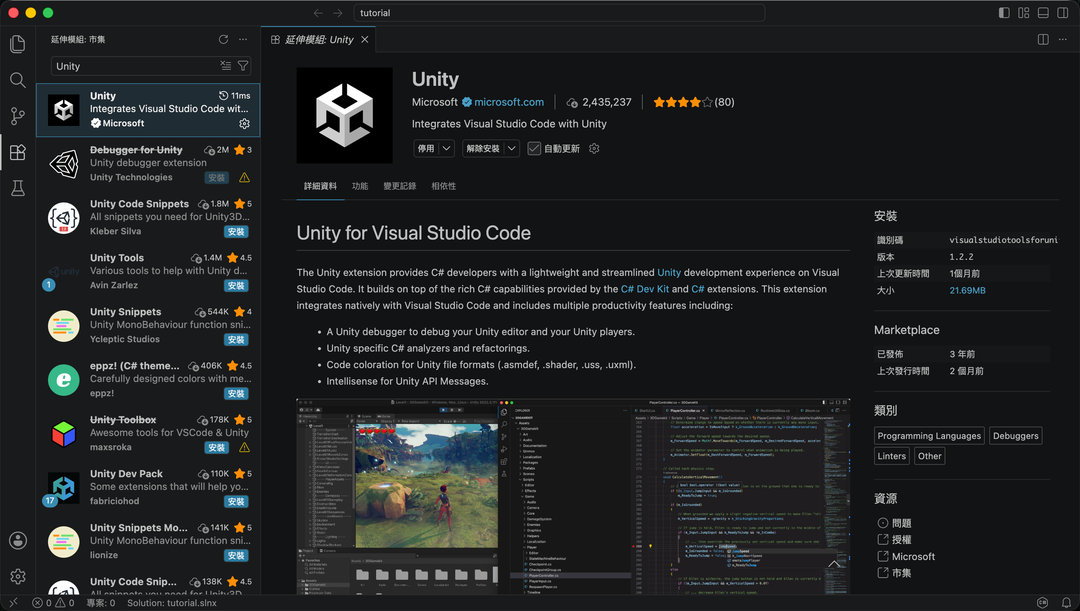
In the Extensions view on the left, search for Unity and install it. It also installs the .NET Install Tool and C# Dev Kit. According to VS Code’s Unity development guide, the Unity extension installs the dependencies you need to write C# and also provides debugging against the Unity Editor. VS Code uses English by default. To switch the display language, for example to Traditional Chinese with the Chinese (Traditional) Language Pack, see Change the VS Code display language.
In the next screenshot, the sidebar header 延伸模組: 市集 is Extensions: Marketplace, and the page shows the Unity extension published by Microsoft.
Install the .NET SDK
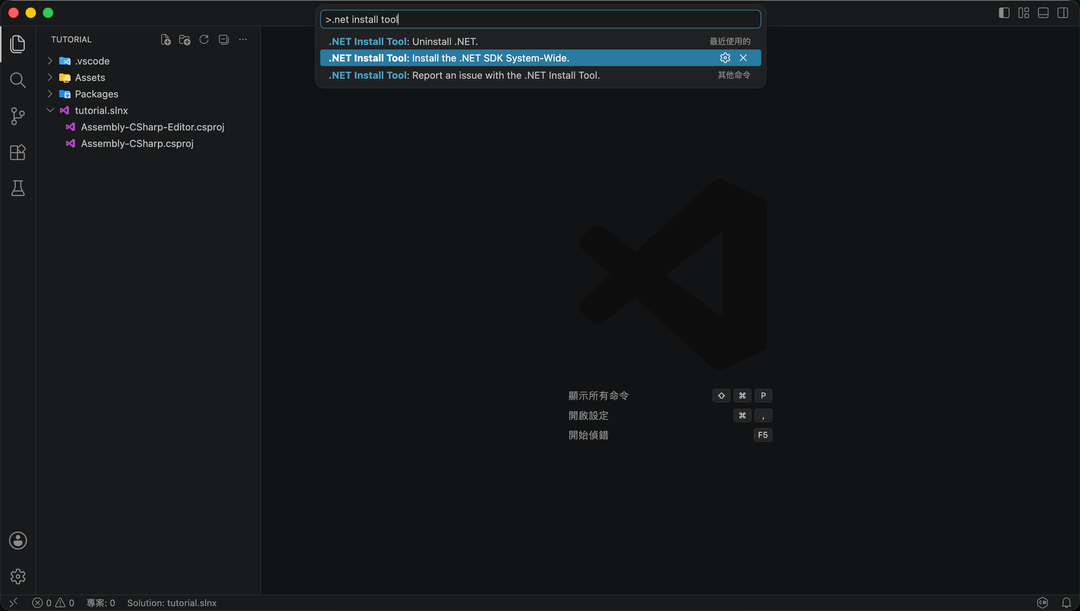
From the top menu, open the Command Palette with View > Command Palette..., type “.NET Install Tool: Install the .NET SDK System-Wide”, and press Enter.
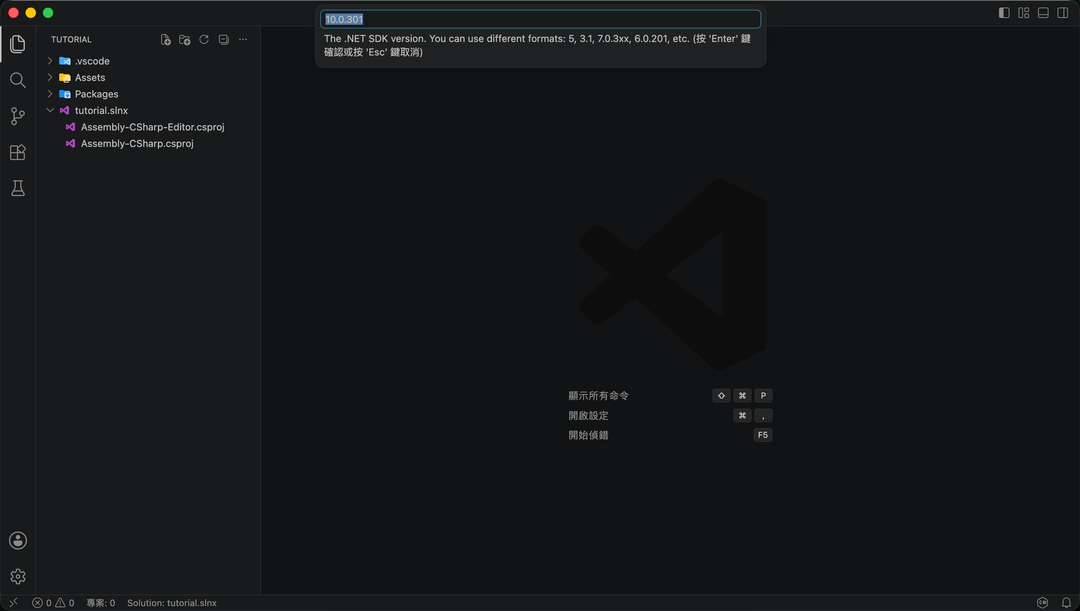
按 'Enter' 鍵確認或按 'Esc' 鍵取消, is Chinese. It means “Press ‘Enter’ to confirm or ‘Esc’ to cancel”.
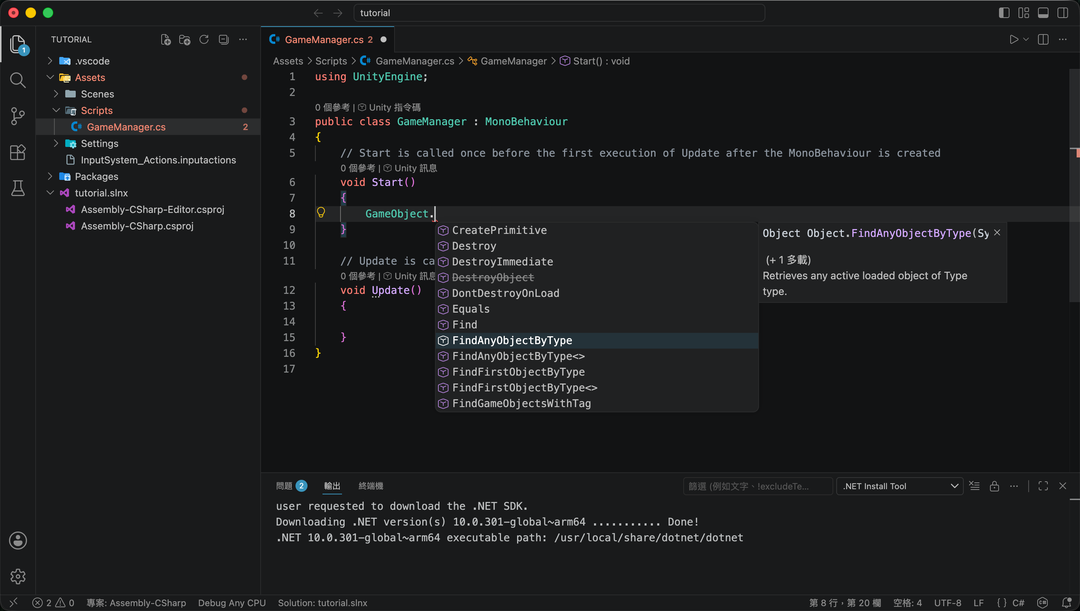
問題 and 輸出.
Cursor
Install the Cursor Editor package
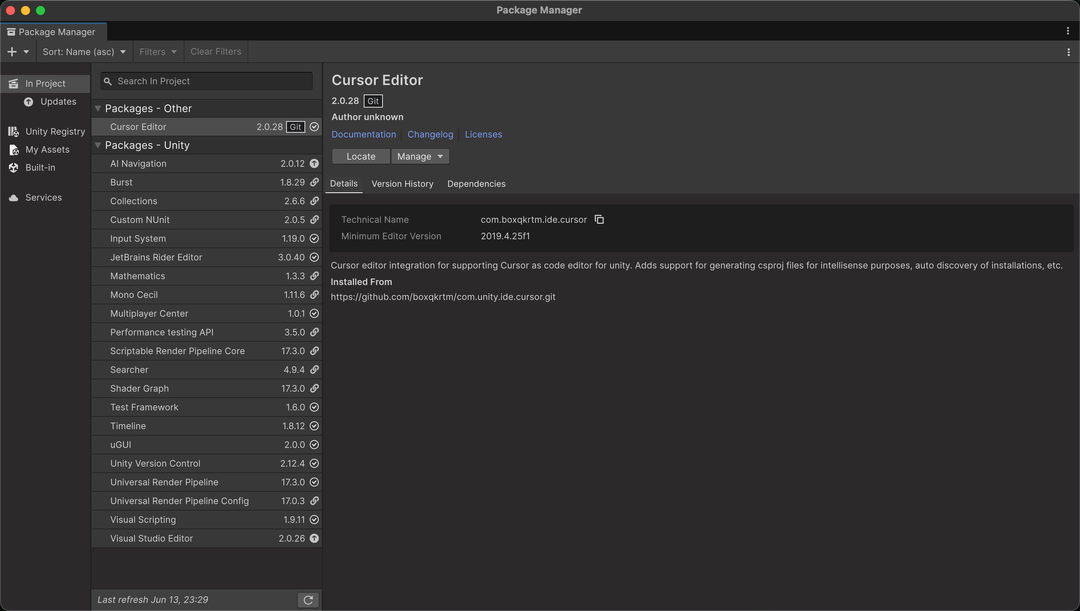
In Unity, open the Package Manager from the top menu with Window > Package Management > Package Manager. Click the + button in the upper left, choose Install package from git URL, paste the URL below, and press Enter to install Cursor Editor:
1https://github.com/boxqkrtm/com.unity.ide.cursor.git
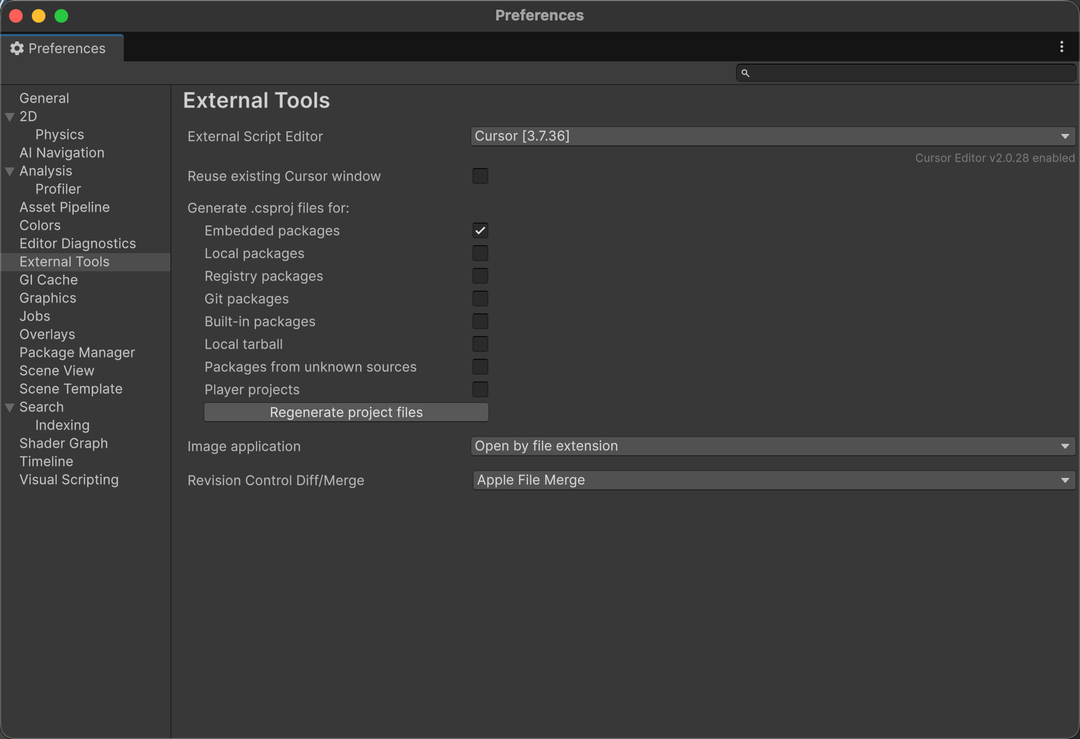
Unity > Settings (macOS) or Edit > Preferences (Windows and Linux). In the External Tools tab on the left, set External Script Editor to Cursor.
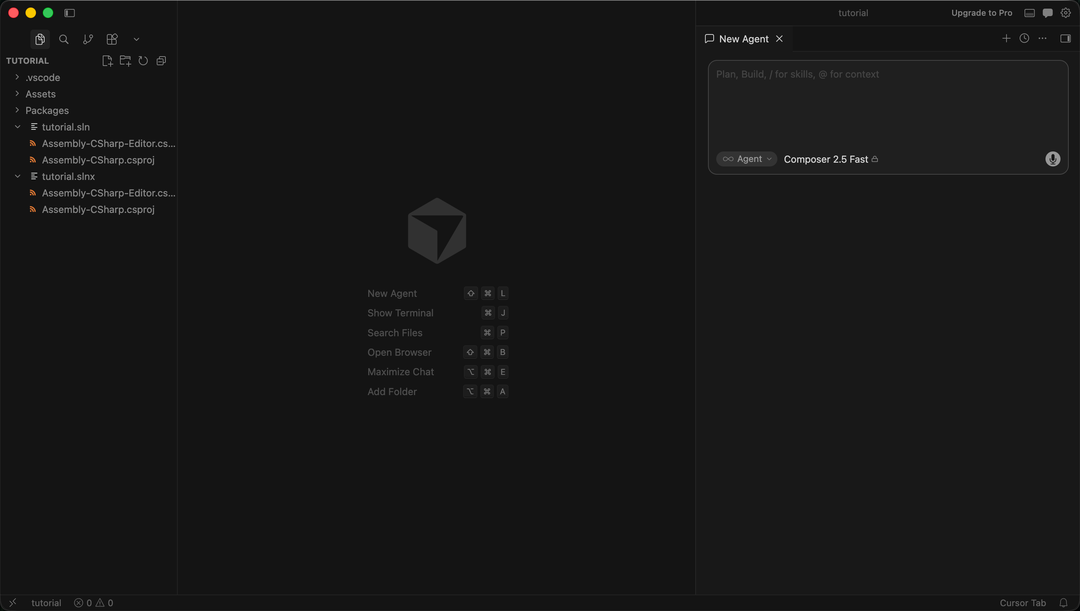
Assets > Open C# Project from the top menu, and Cursor opens the workspace for your Unity project.
Why Cursor can’t install the Unity extension
If you search for Unity or C# Dev Kit in Cursor, you will not find the VS Code extensions. The reason is Microsoft’s license. The license terms of the Unity extension for VS Code are the same as those of C# Dev Kit. They allow installation and use only in Microsoft products such as Visual Studio Code, vscode.dev, and GitHub Codespaces, and Cursor is not one of them.
After Microsoft updated these extensions in April 2025, Cursor showed the message “The C# Dev Kit extension may be used only with Microsoft Visual Studio Code” when it opened a C# project. Cursor CEO Michael Truell explained in a reply on the official forum that the new versions of Microsoft’s closed-source extensions for remote connections, Pylance, C/C++, and C# can no longer be used in non-Microsoft editors. Cursor therefore switched to open-source replacements. Cursor now installs extensions from Open VSX, and Anysphere, the company behind Cursor, provides replacement versions of some extensions that are published only on the Microsoft marketplace.
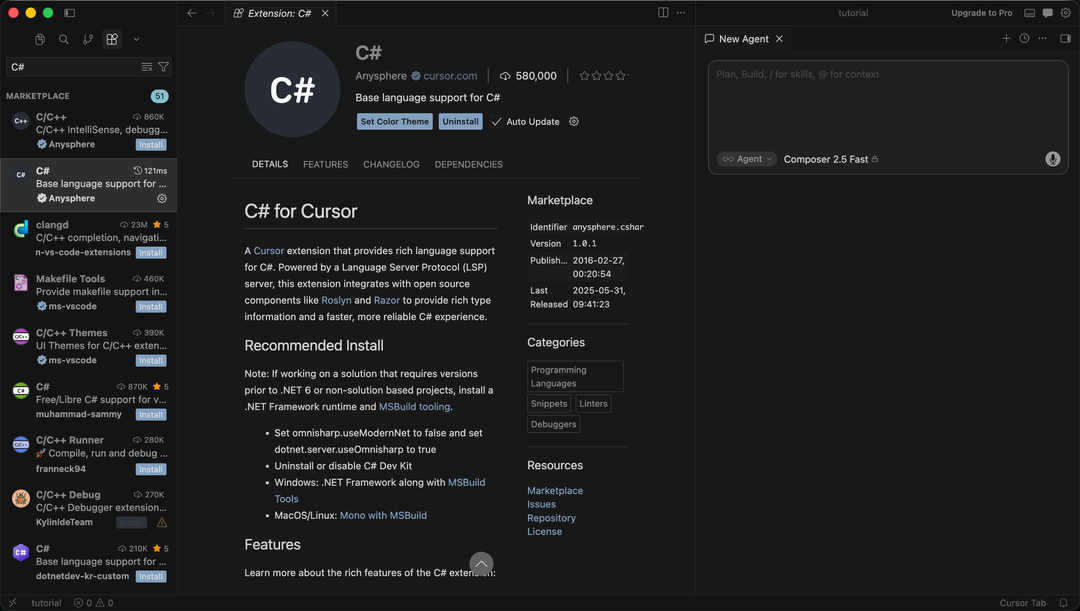
In Cursor you can install only the open-source C# extension. Writing code and autocomplete work normally, but you lose the Unity Editor debugging connection that the Unity extension provides.
Install the C# extension
In the Extensions view on the left, search for C# and install it.
Confirm the integration works
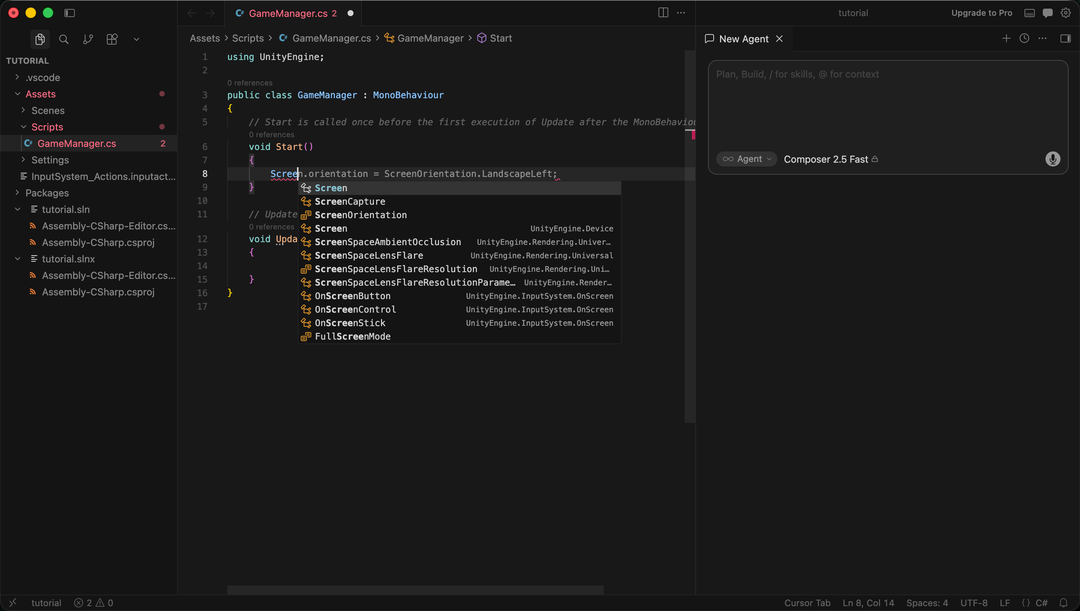
After you run Assets > Open C# Project in Unity, the editor should open the same project. Open a C# script and type transform.. The C# workspace has loaded when you see Unity API autocomplete, can jump to definitions, and the Problems panel shows no parse errors for the whole project.
When C# fails to resolve
First go back to External Tools in Unity and check that the right editor is selected. Close the editor, and run Assets > Open C# Project again. If VS Code still fails to resolve C#, check the Visual Studio Editor package, the Unity extension, and the .NET SDK in that order. For Cursor, check the Cursor Editor package and the C# extension. Reinstall one component at a time, so that you know which one caused the problem when things recover.
To go back to your previous editor, select the previous option in External Tools and reopen the C# Project. If you stop using Cursor, you can remove the Cursor Editor package from the Package Manager. The C# code in your project is not affected.
Summary
VS Code follows the path Unity officially supports. Install the Visual Studio Editor package, the Unity extension, and the .NET SDK to write C# and use Unity debugging. Cursor cannot install the Unity and C# Dev Kit extensions because of Microsoft’s license, so it uses the community Cursor Editor package with the open-source C# extension, which gives you coding and autocomplete but no debugging connection from the Unity extension.