Table of contents
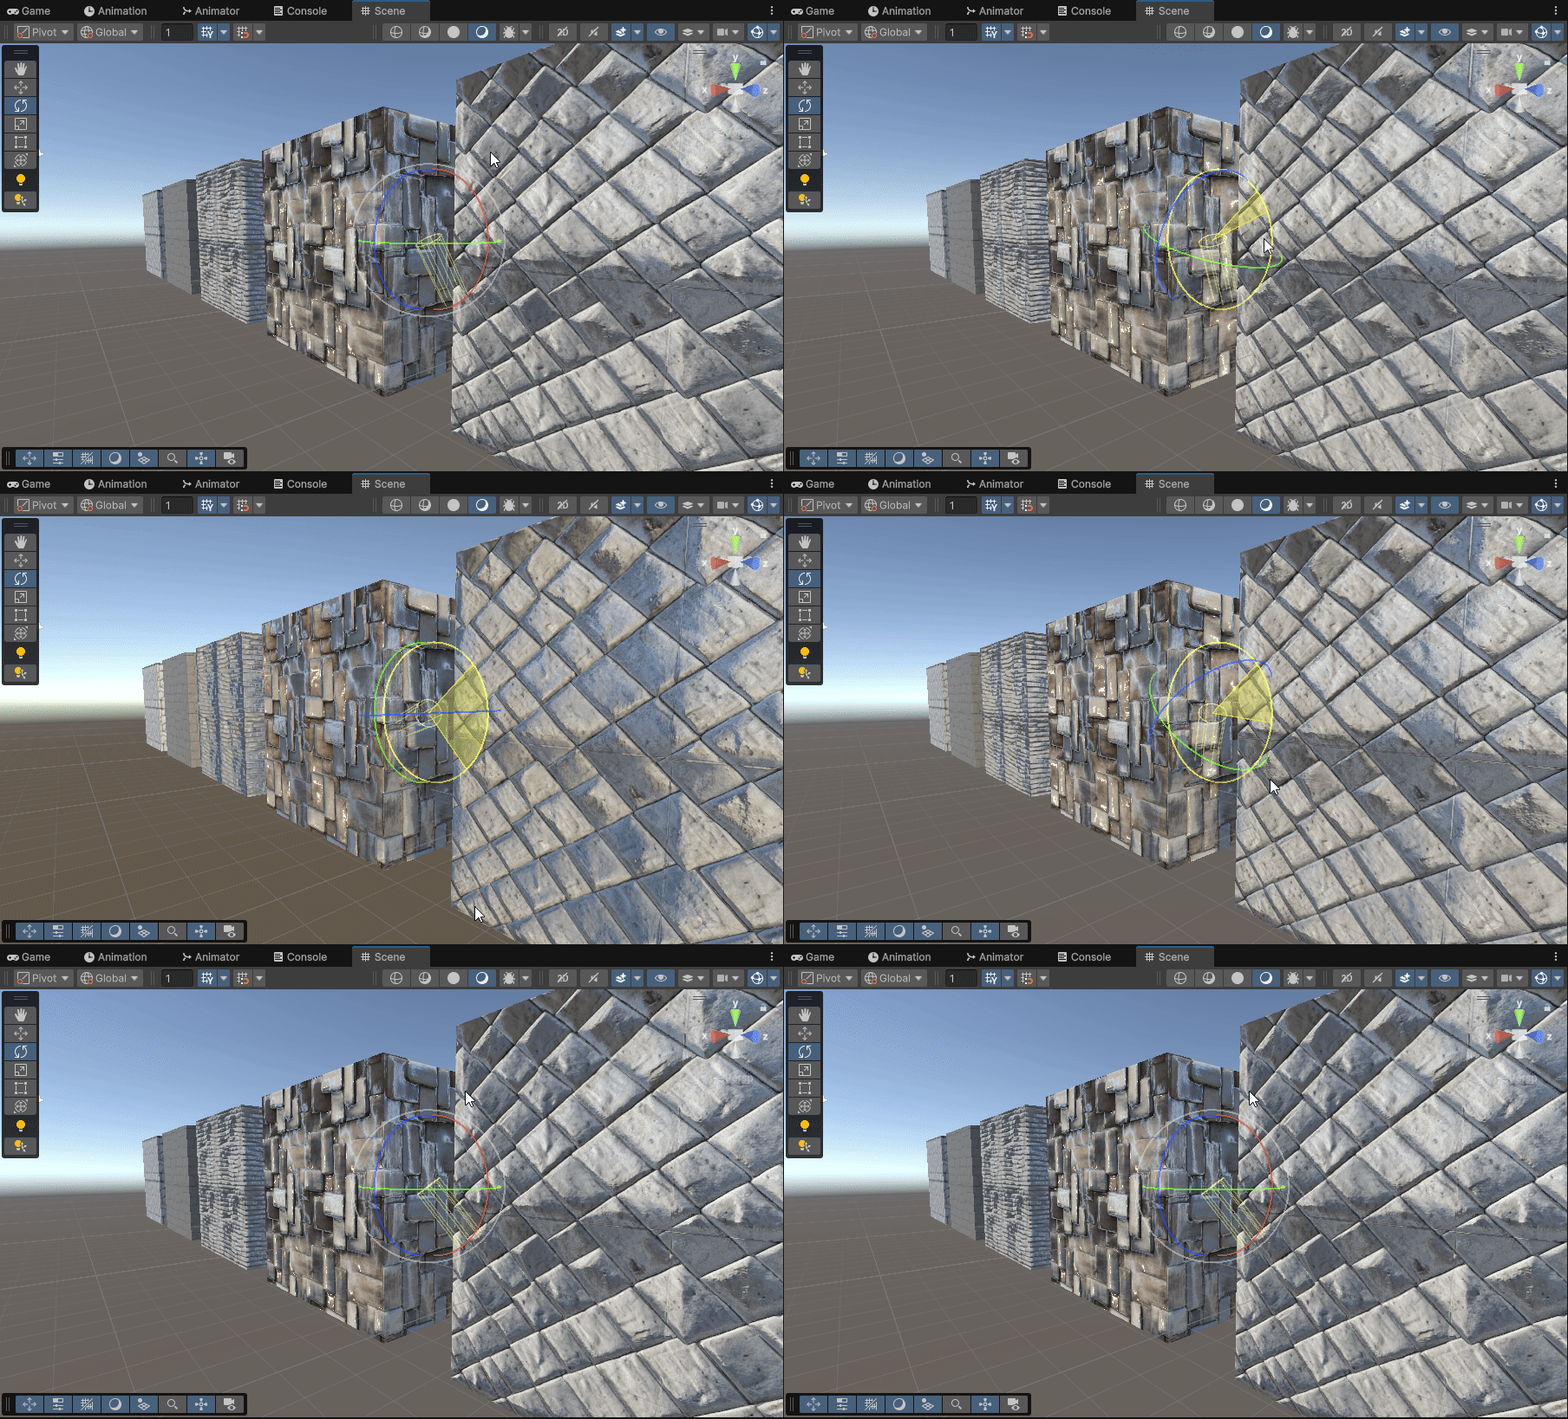
Stable Diffusion is a free, open-source AI image generation tool. You type prompts to make it generate the color, normal, and height maps that game development uses, and you can download different models to get different styles. The example at the top of this page uses a seamless texture on a 3D model, the kind you put on walls, floors, and other surfaces that tile continuously. The usual way to get one is to find a texture and retouch it by hand until the seams disappear. With AI you skip both the searching and the retouching.
This article starts with installing the Stable Diffusion main program, including the system settings and an extension. Then it generates the three maps you will use most, a Color Map, a Normal Map, and a Height Map, and imports them into a Unity scene.
The installation steps follow the AUTOMATIC1111 Stable Diffusion Web UI repository and the source code of the Depth Maps extension. The screenshots and install flow come from a test environment with Windows, an NVIDIA GPU, and a Web UI updated from v1.0.0-pre to v1.10.1 with update.bat, so the latest interface may look different. Keep enough disk space before you start, and get the program only from the official GitHub release or repository.
Install Stable Diffusion
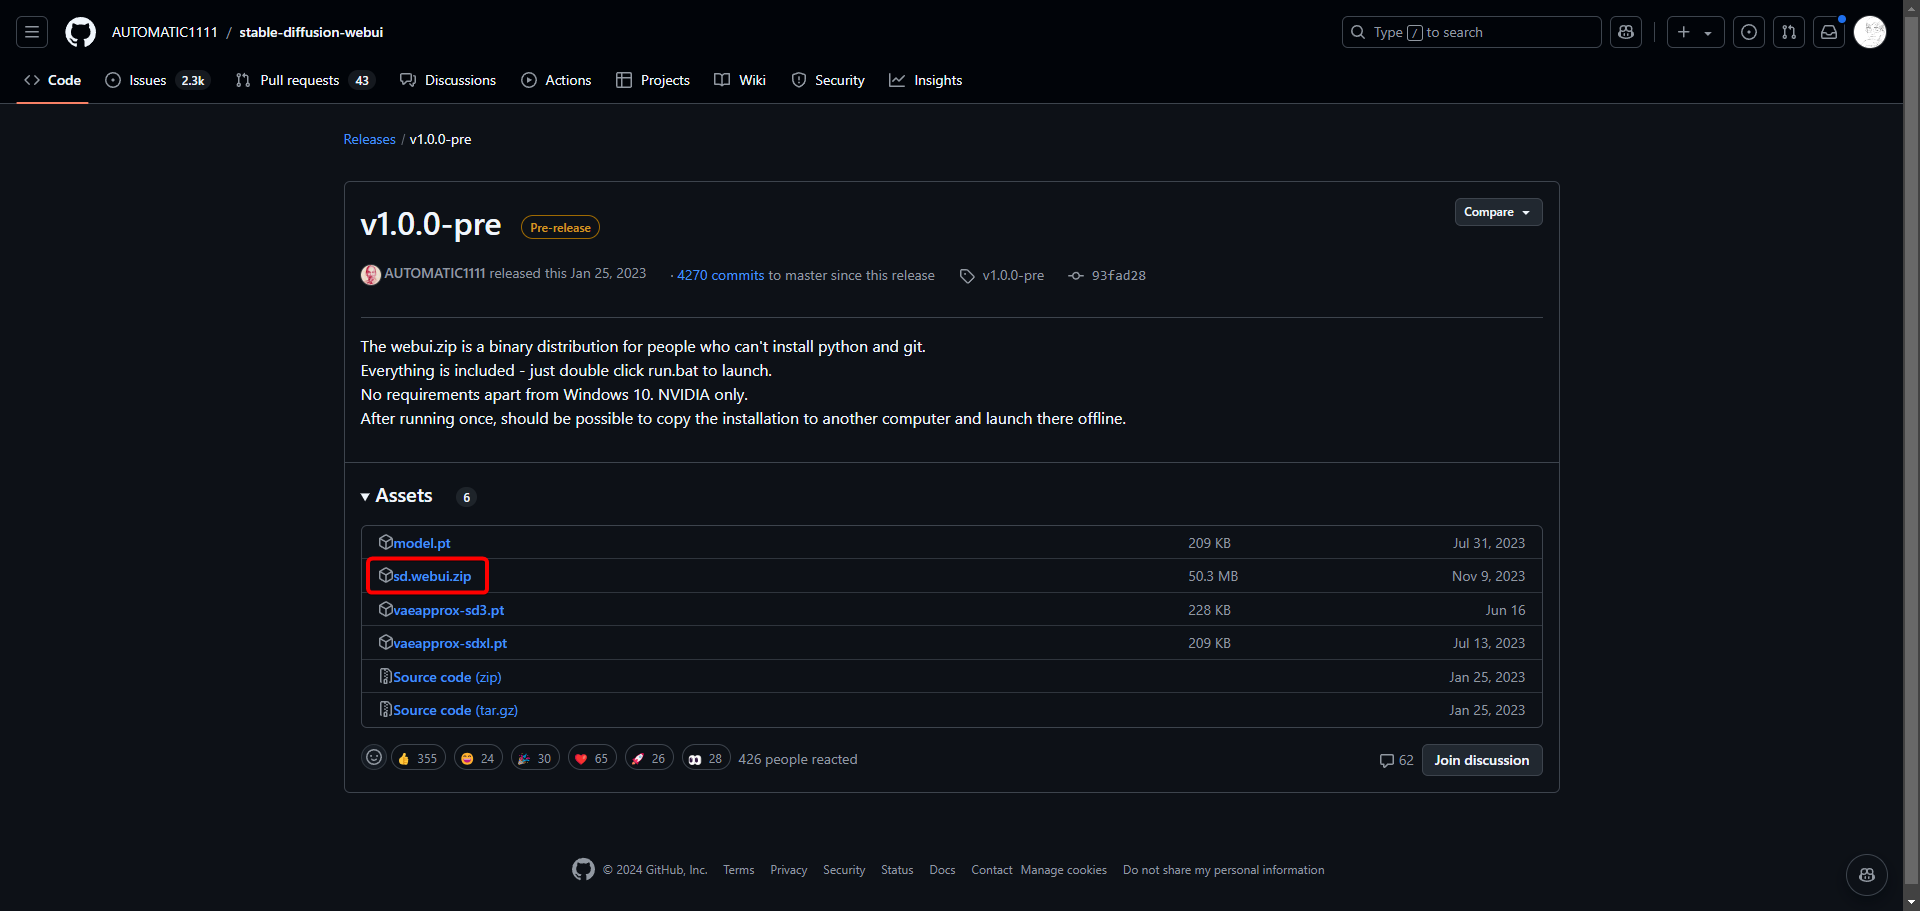
Go to the v1.0.0-pre page of Stable Diffusion Web UI and click sd.webui.zip in the red box to download the main program.
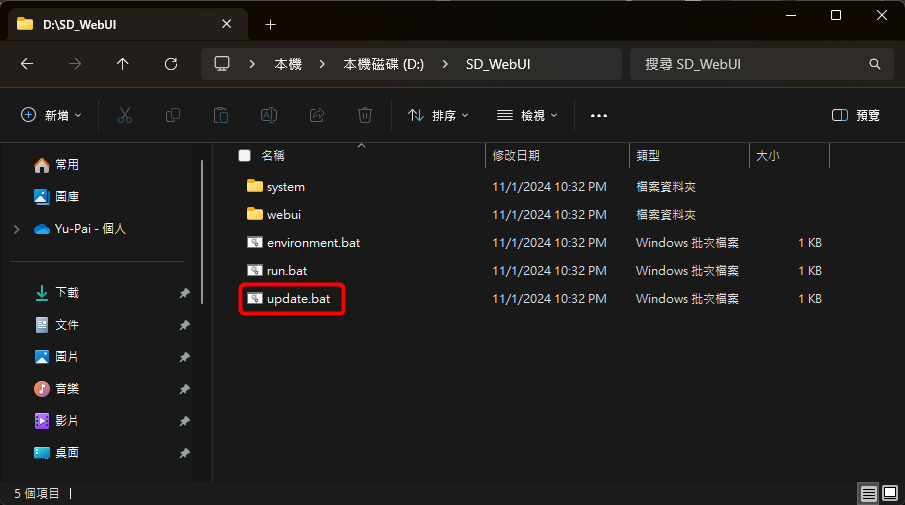
update.bat to update to the latest version.
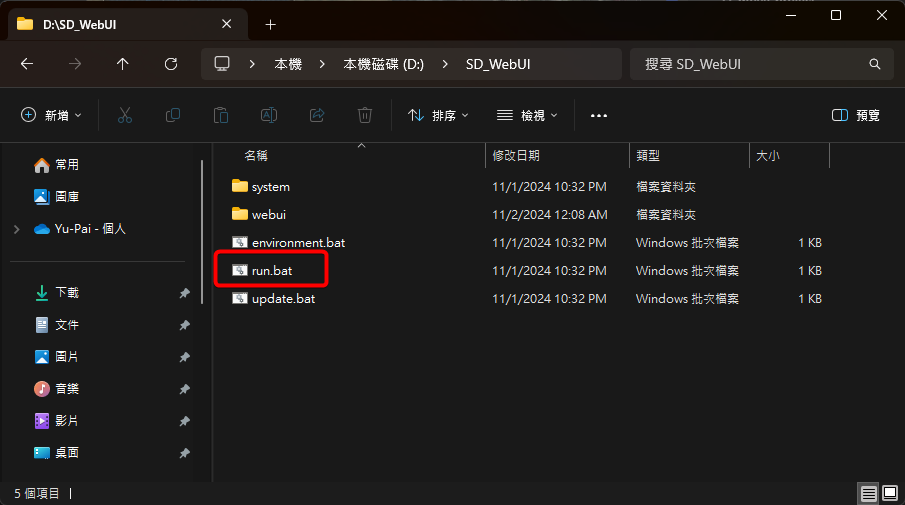
The Windows screenshots in this article come from a Traditional Chinese version of Windows. The Explorer window below is File Explorer at D:\SD_WebUI, and update.bat is the file in the red box:
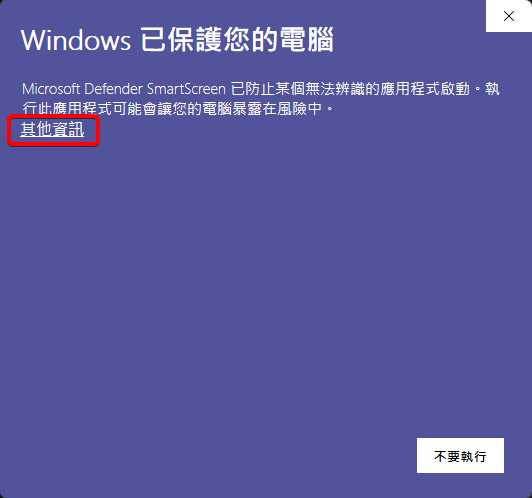
More info > Run anyway. In the Chinese version of Windows these are 其他資訊 and 仍要執行:
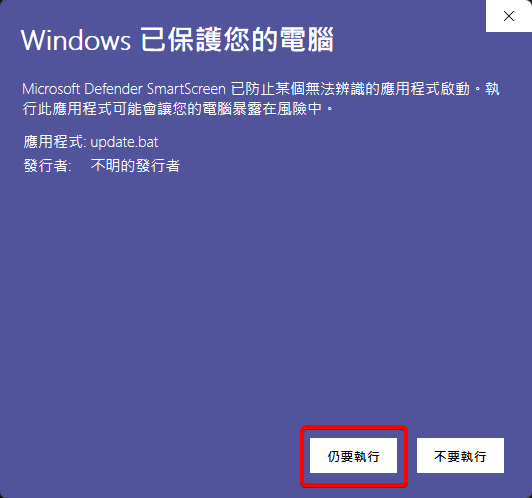
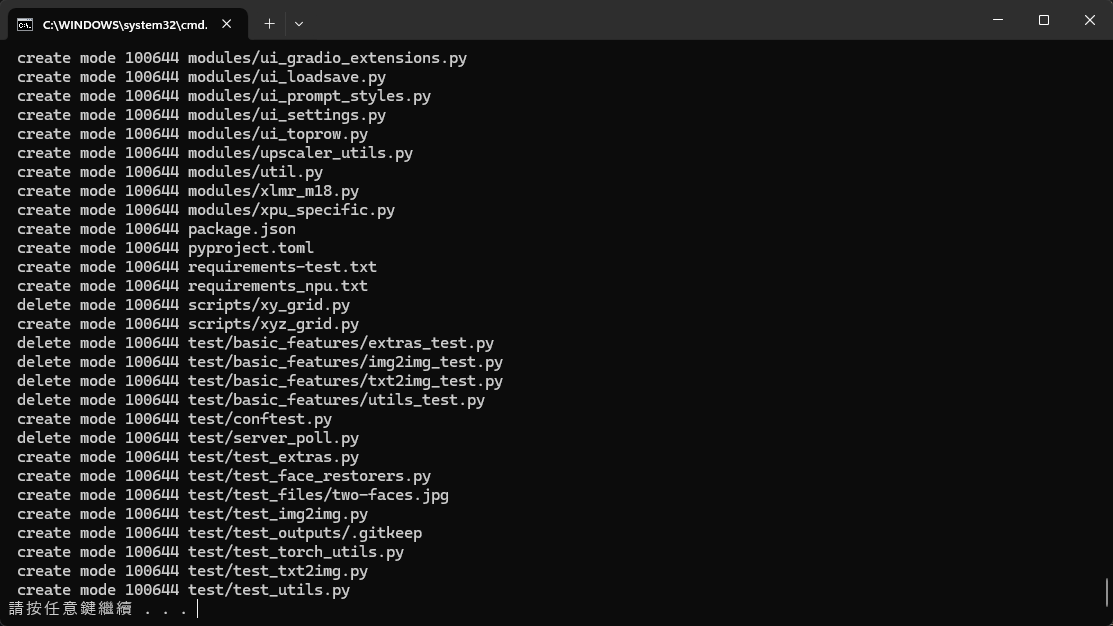
run.bat to start Stable Diffusion Web UI. It may show the same Windows protected your PC warning, and you click More info > Run anyway again to start it.
run.bat starts, Stable Diffusion Web UI needs some time to initialize. It downloads and installs many libraries it depends on automatically, which takes longer on a slow network.
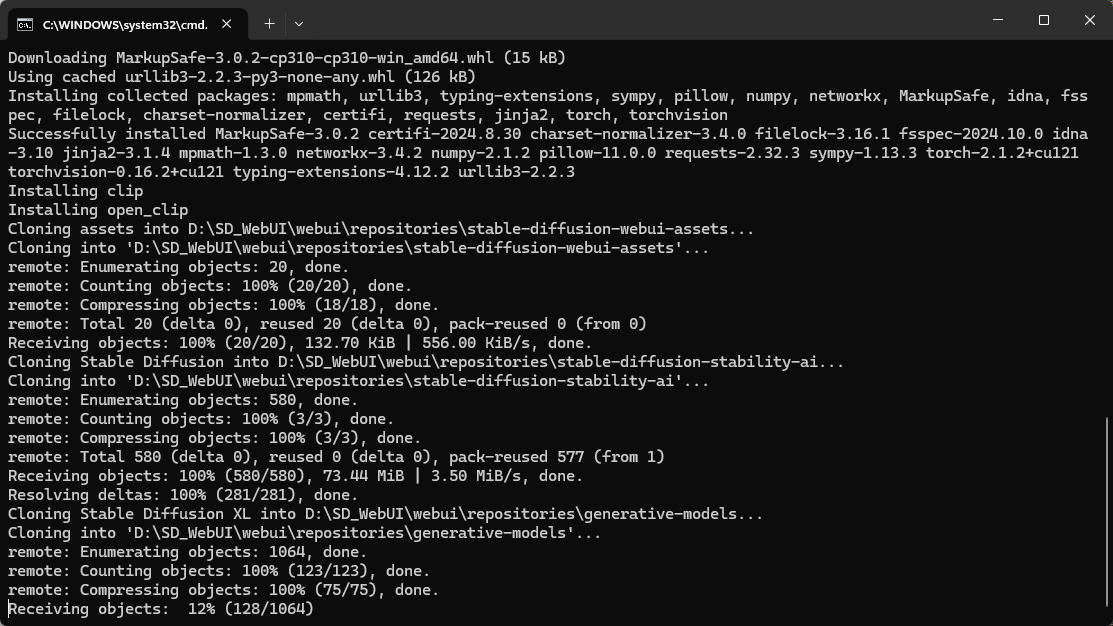
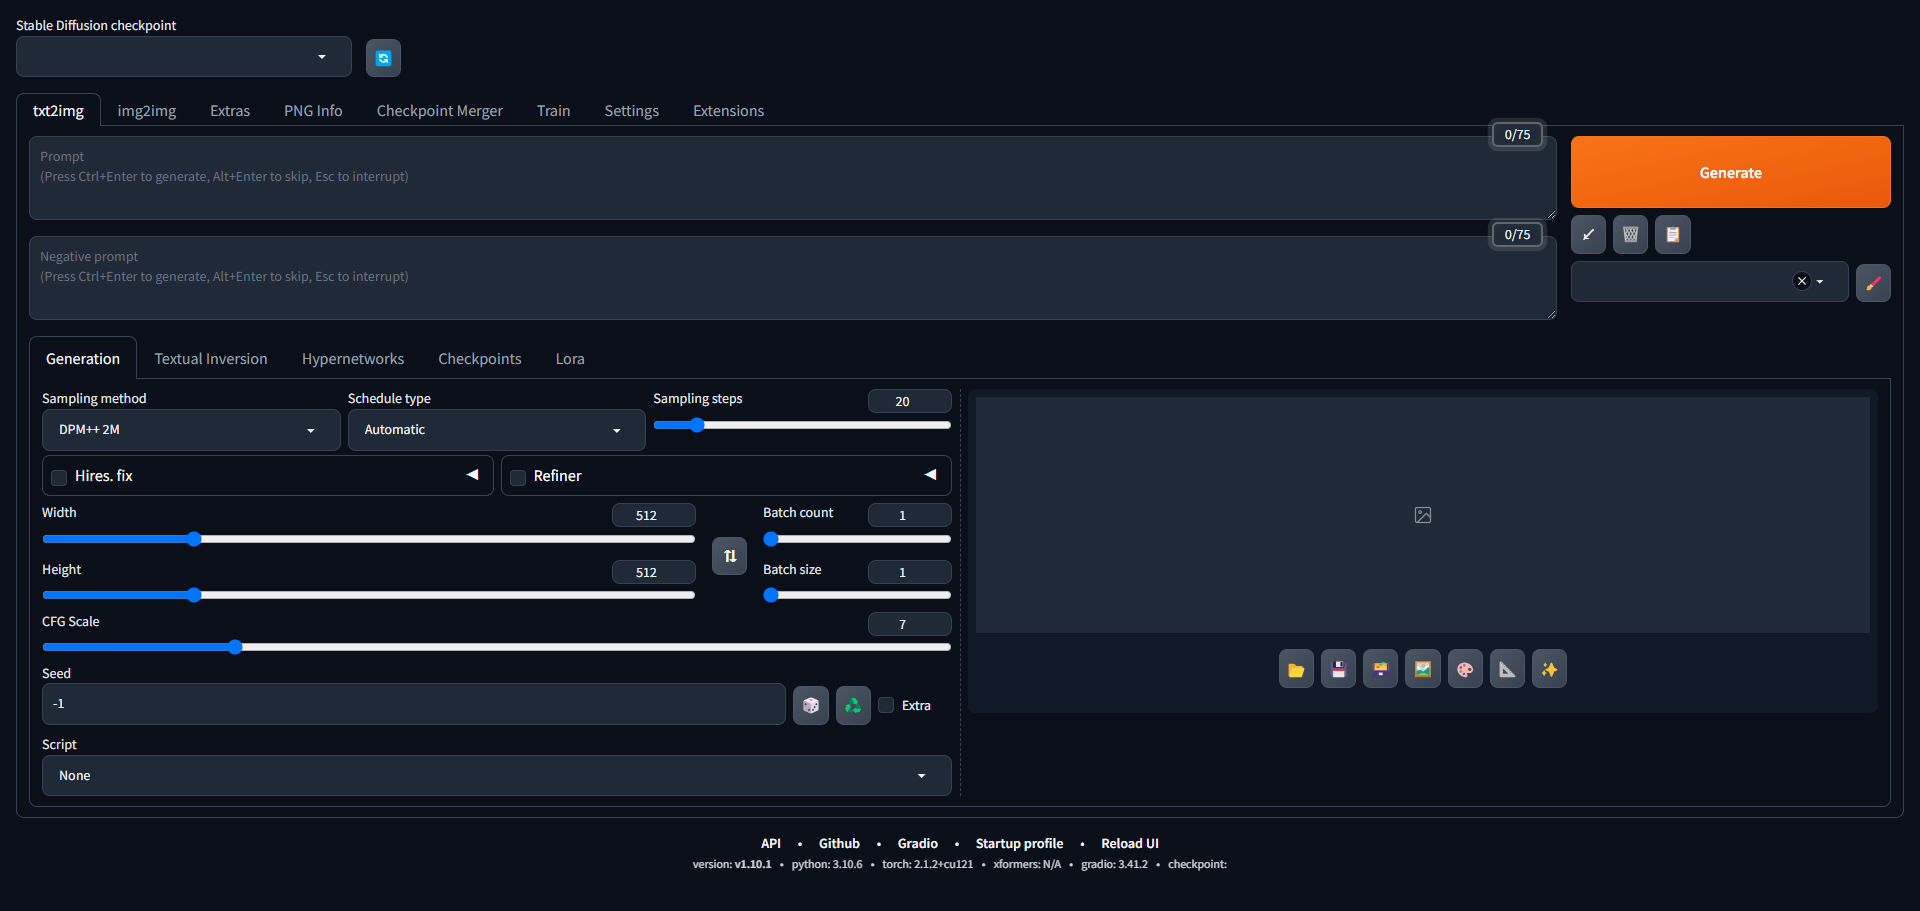
run.bat to open the web interface quickly, and run update.bat once in a while to update the main program.
Next, start with the simplest case, generating a color map.
The basic workflow
Write the prompts
The goal is to use prompts to generate a color map. Prompts come in two kinds, the positive prompt and the negative prompt. The positive prompt is what you want it to generate, and the negative prompt is what you do not want it to generate.
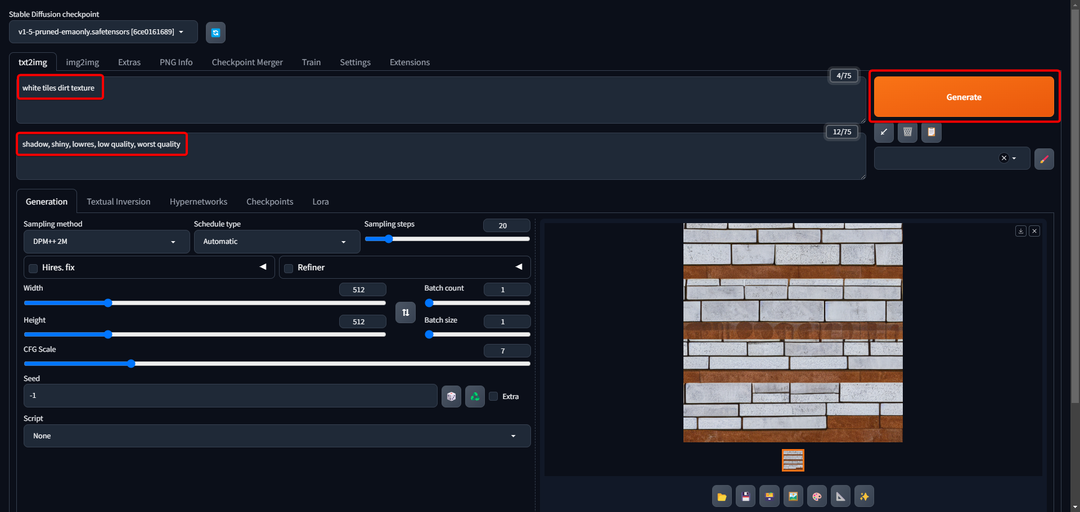
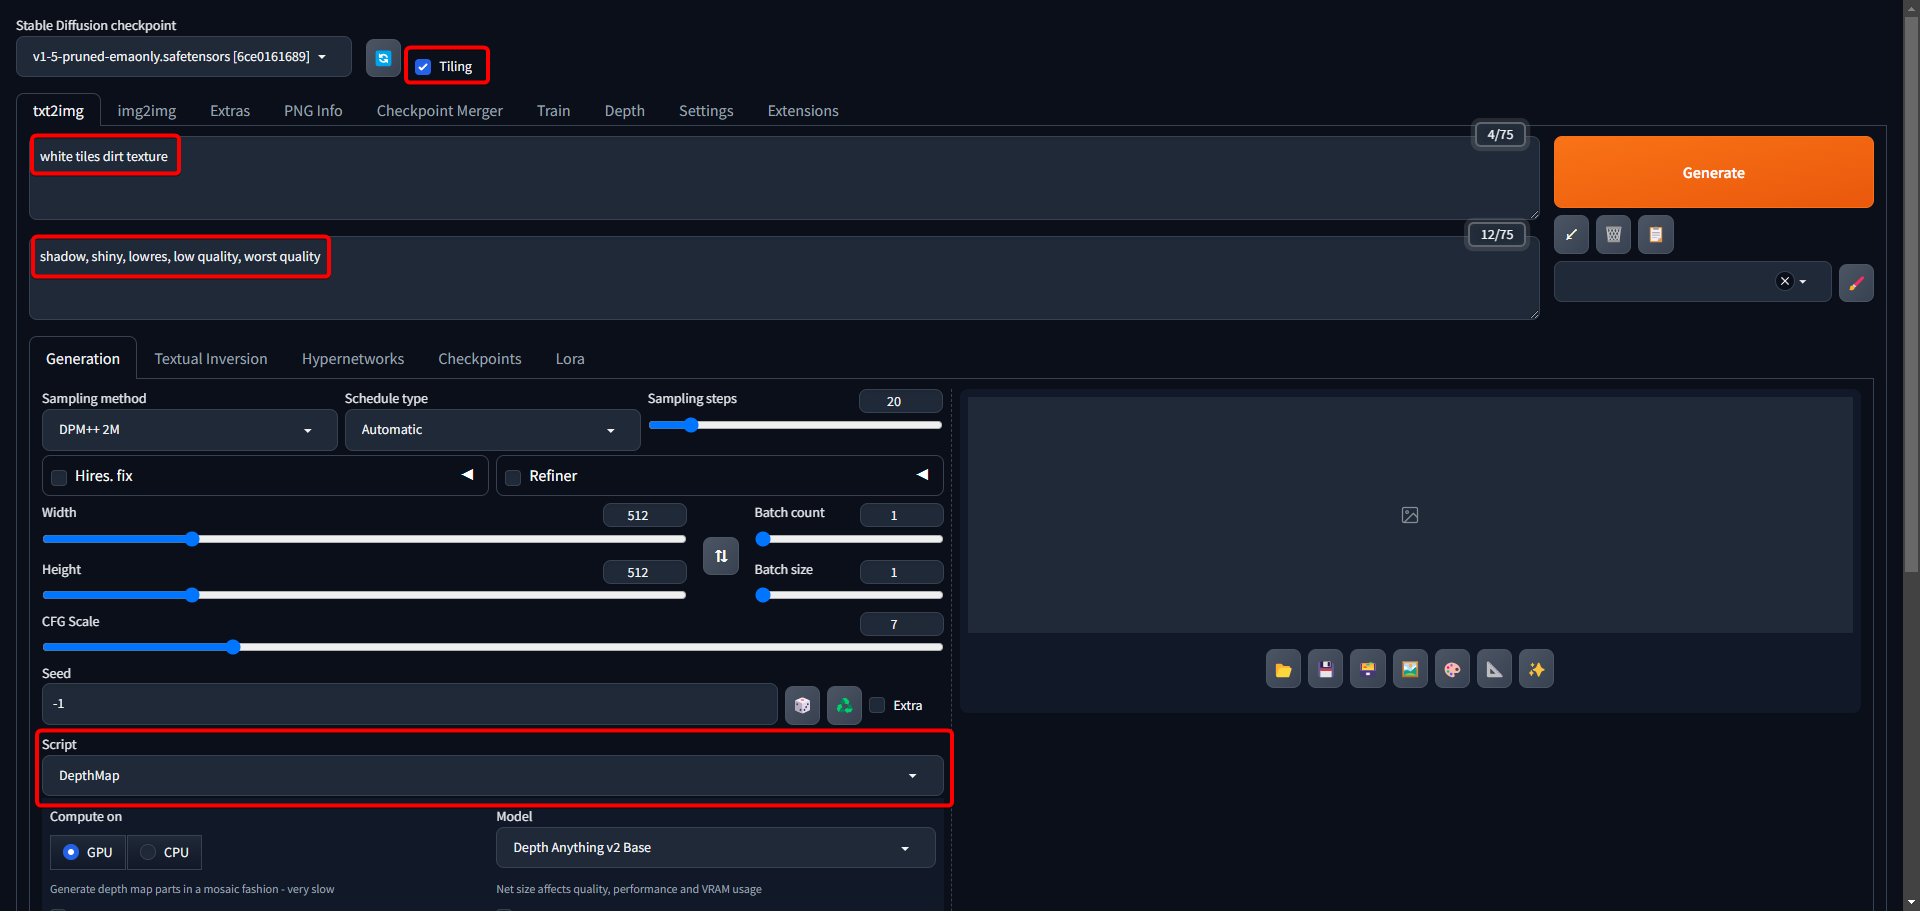
I followed the text tutorial from Next Diffusion for the prompts. The core of the positive prompt is to pile up adjectives that describe the word “texture”. The core of the negative prompt is to remove shadows and glare and to keep it from producing low-quality results.
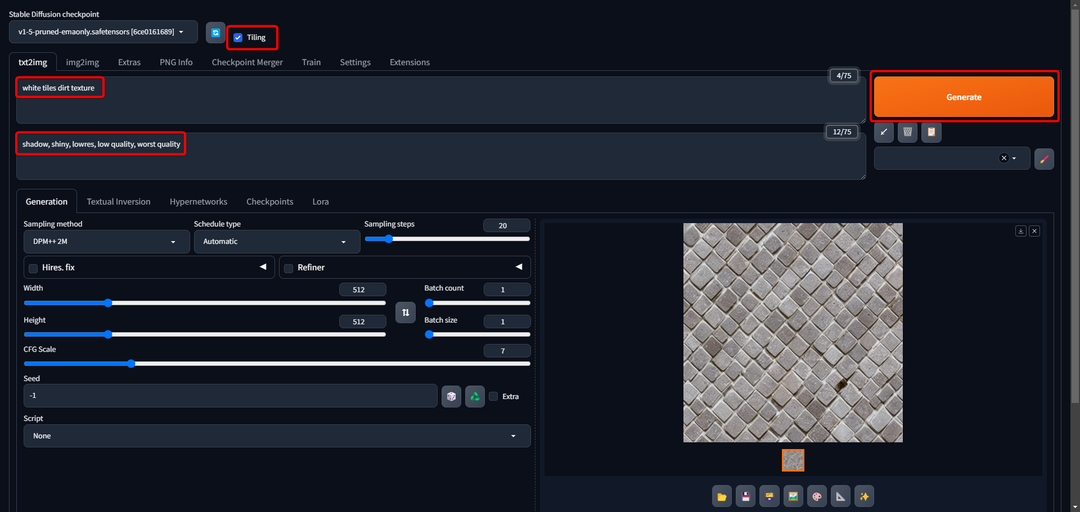
You can also experiment with other combinations of prompts until the output looks like a color map for game development. These are the prompts I used, based on Next Diffusion:
- Positive prompt: white tiles dirt texture
- Negative prompt: shadow, shiny, lowres, low quality, worst quality
First, test what these prompts produce, and click Generate to start. Depending on your computer, this can take anywhere from 2 seconds to more than 5 minutes. My GPU is an RTX 3070, and it took about 2.8 seconds.
None of the textures it generates is seamless. I fix that later, and for now I will quickly go through the flow of importing a texture into a Unity scene.
Import into Unity
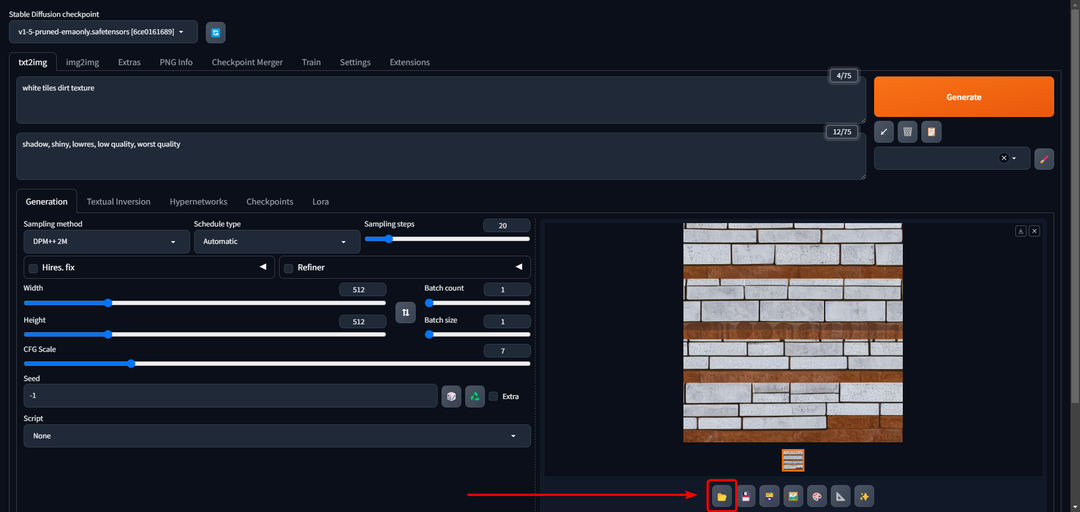
Click the button in the red box below the image on the right to open the output folder, which holds the texture you just generated.
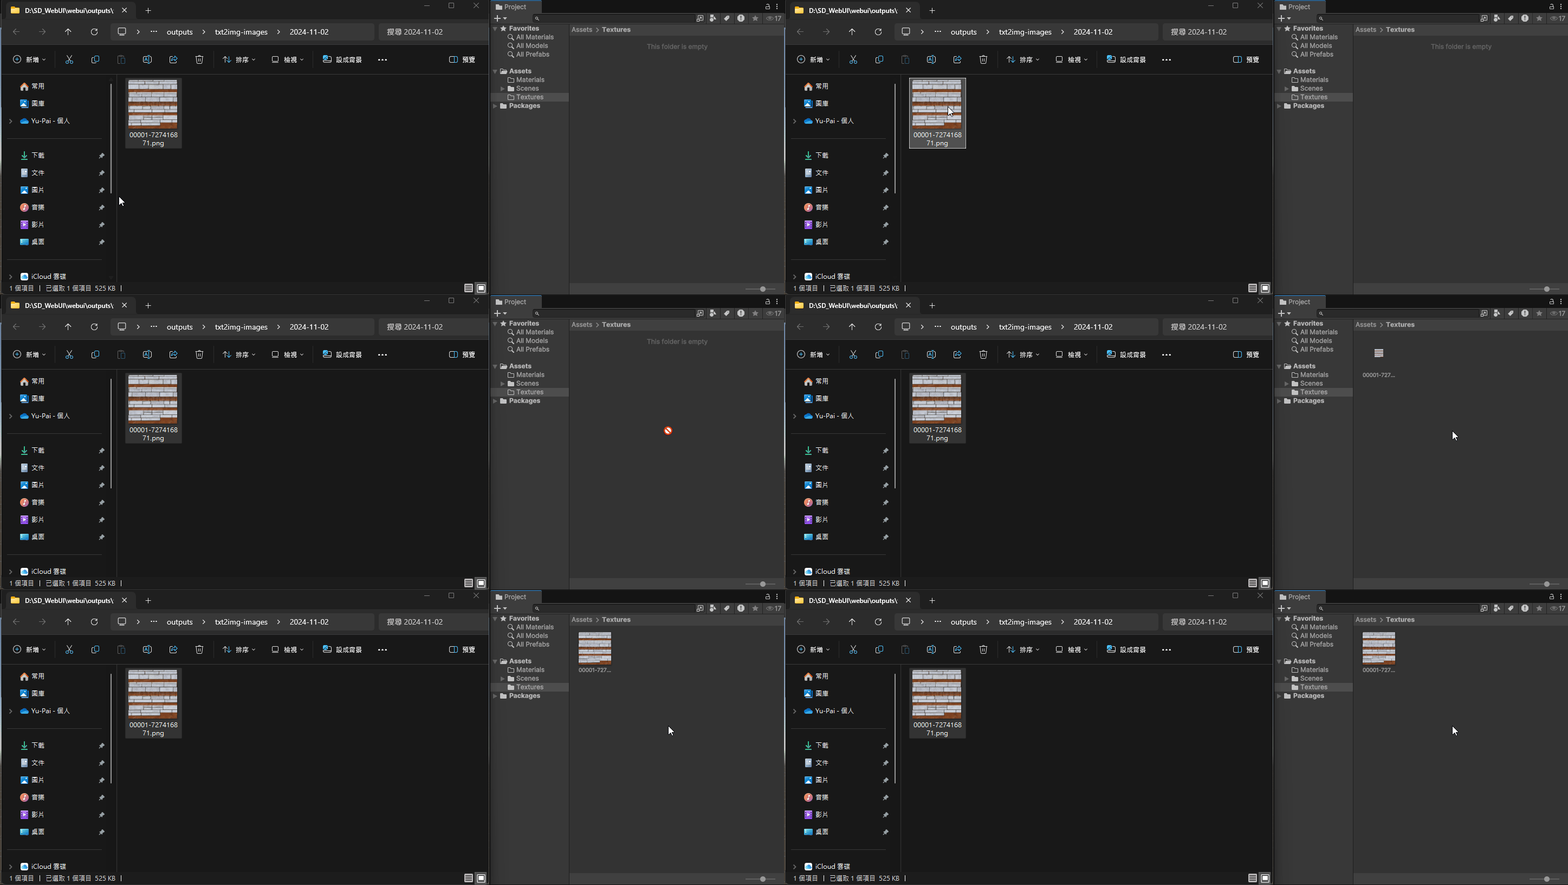
Then drag the new material onto the other 3 cubes.
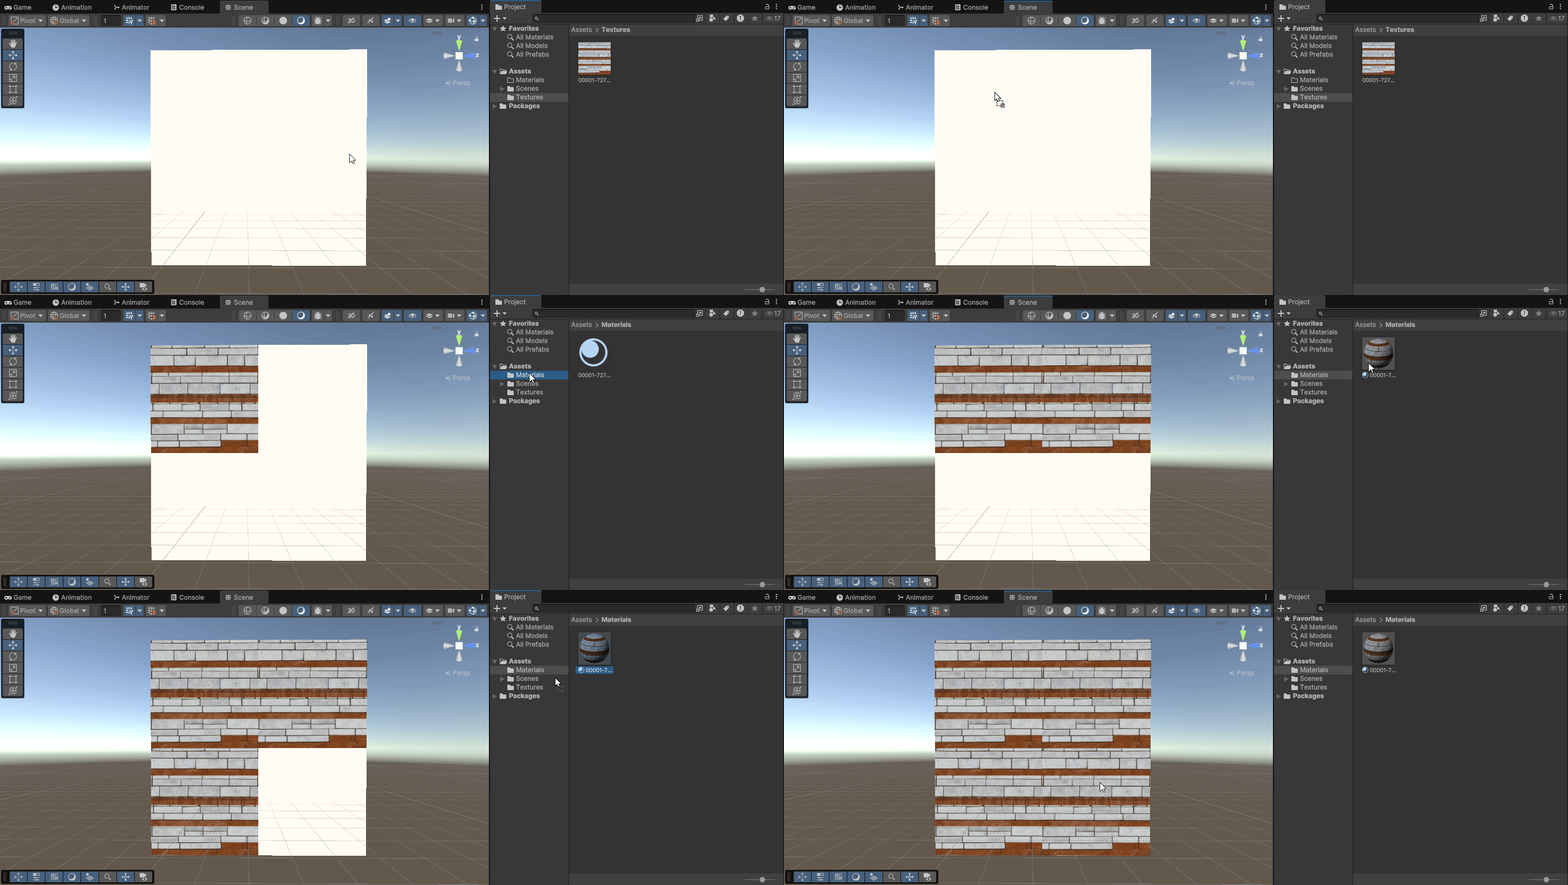
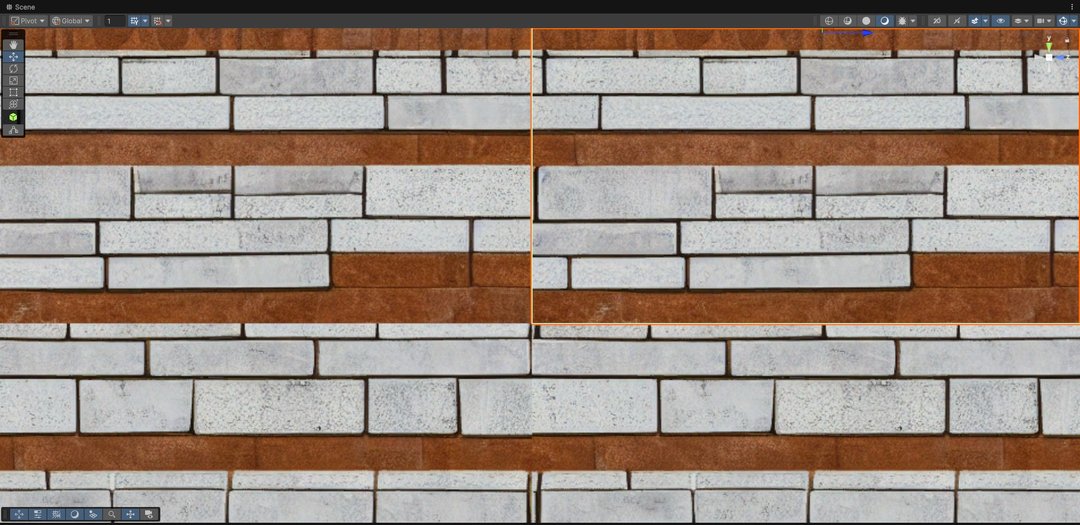
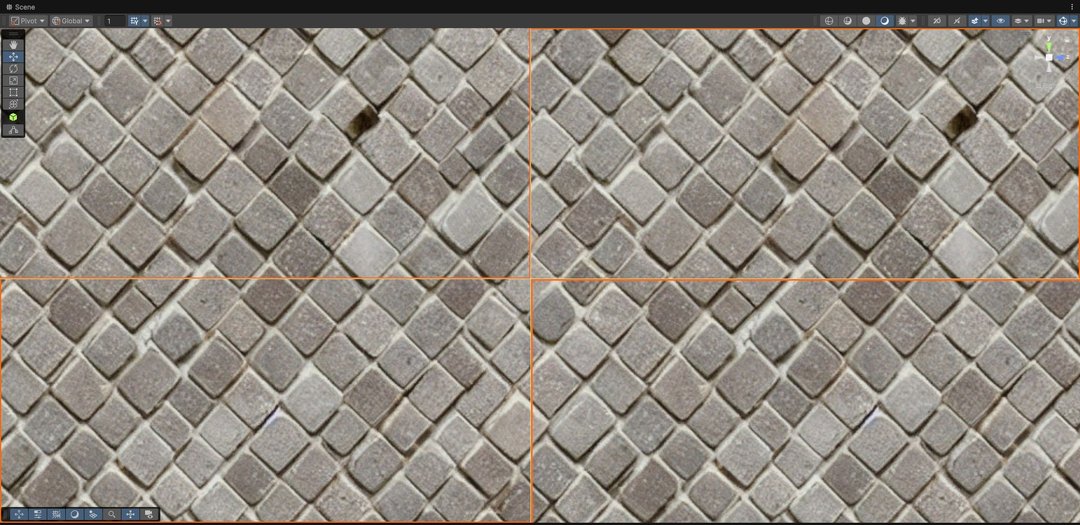
Now zoom in on the textured cubes. The pattern is misaligned at the seams between them, because the texture is not continuous. That is the next problem to solve.
Generate a seamless color map
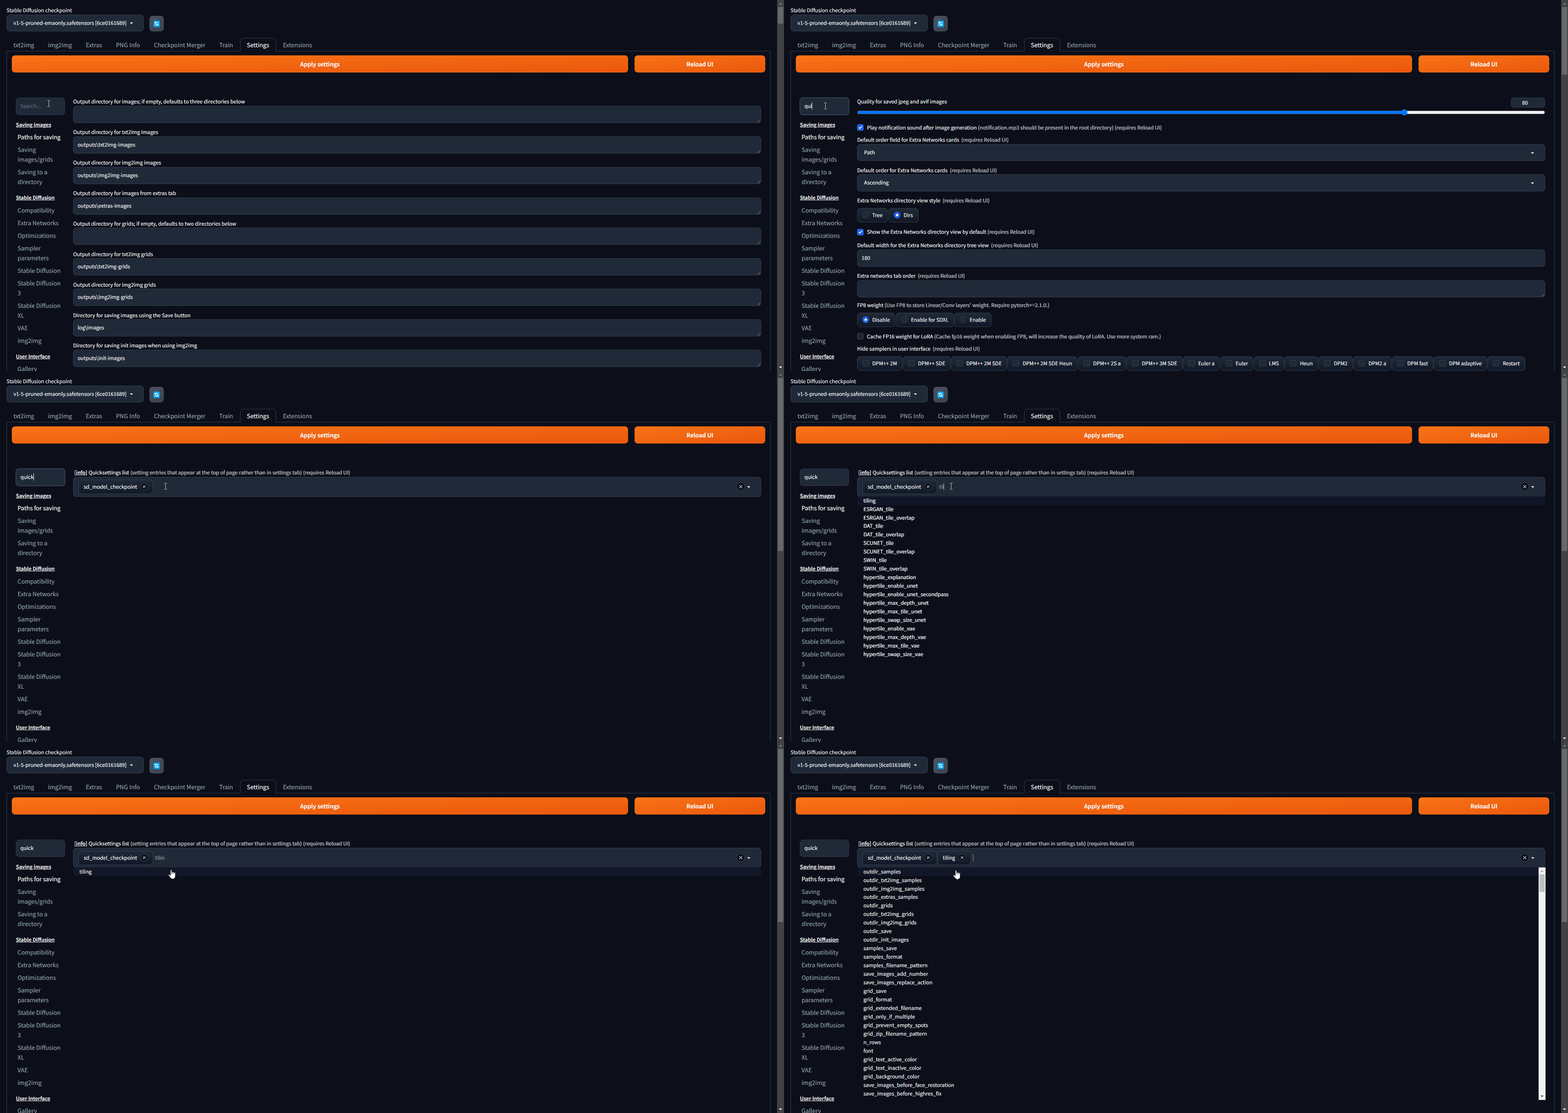
Stable Diffusion Web UI has a built-in option for generating seamless images, but after one update it was hidden, so you have to turn it back on.
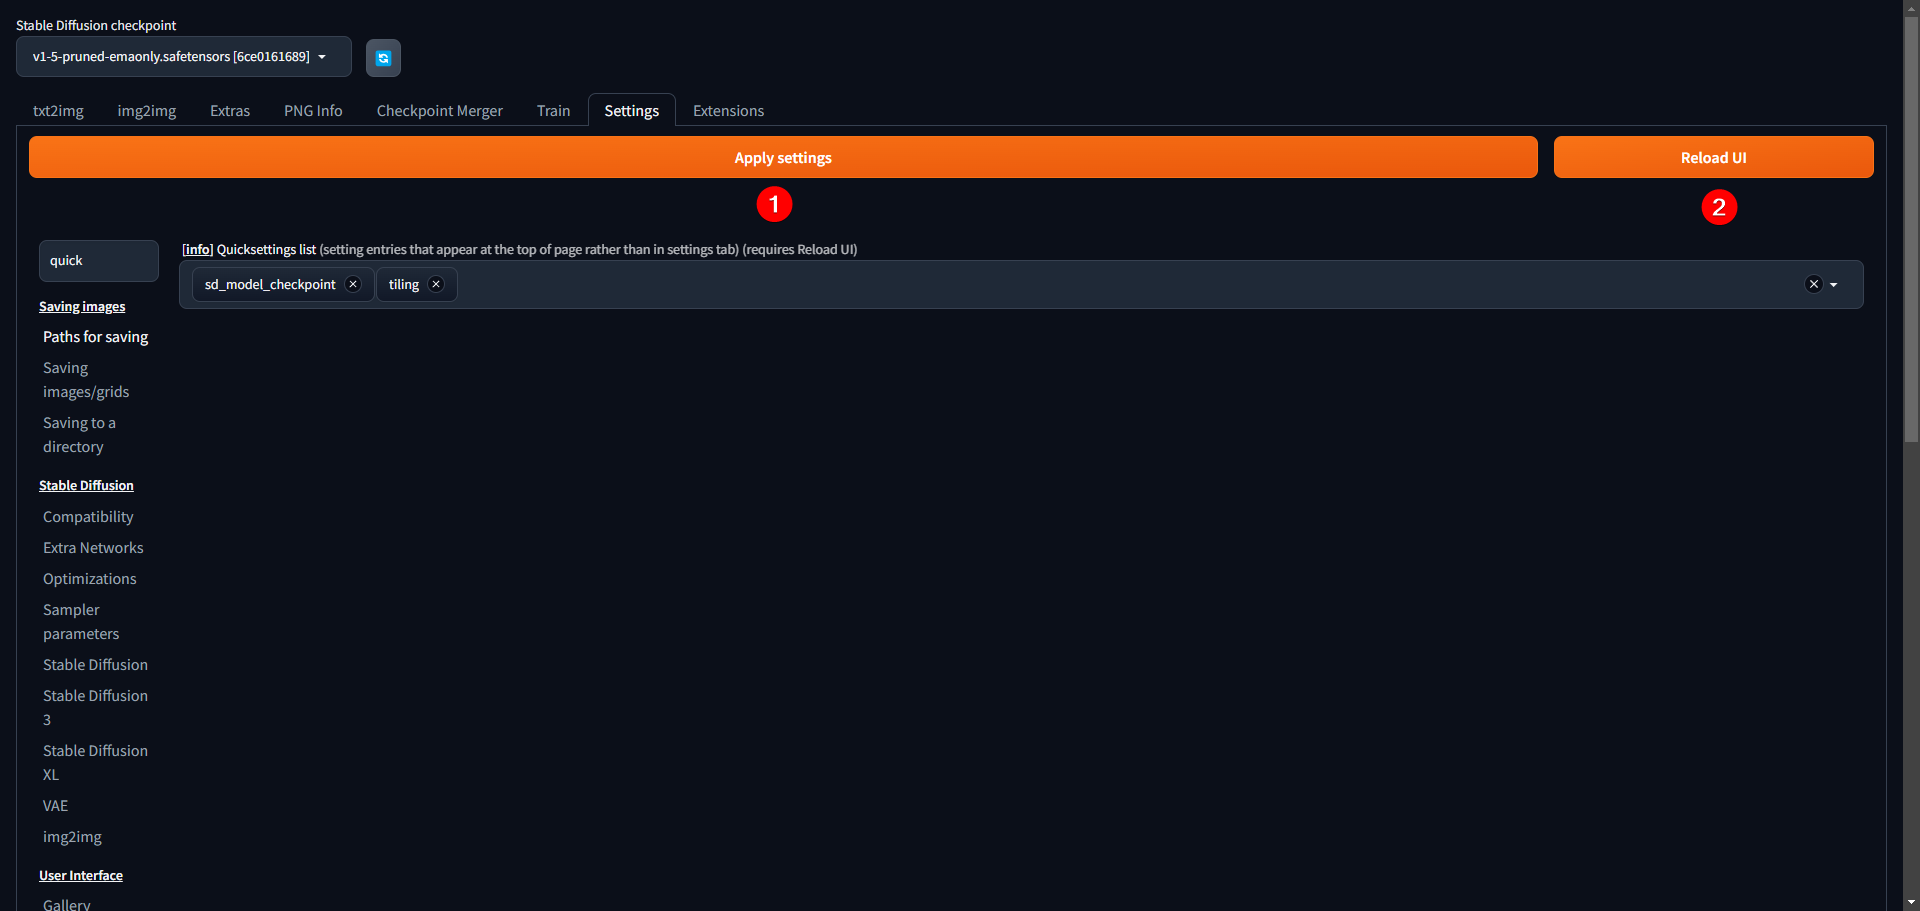
First switch to the Settings tab at the top, type “quick” in the search box at the top left, and the Quicksettings list option appears on the right. Type “tiling” in its input box and click it to add it.
Generate normal and height maps
Install the Depth Maps extension
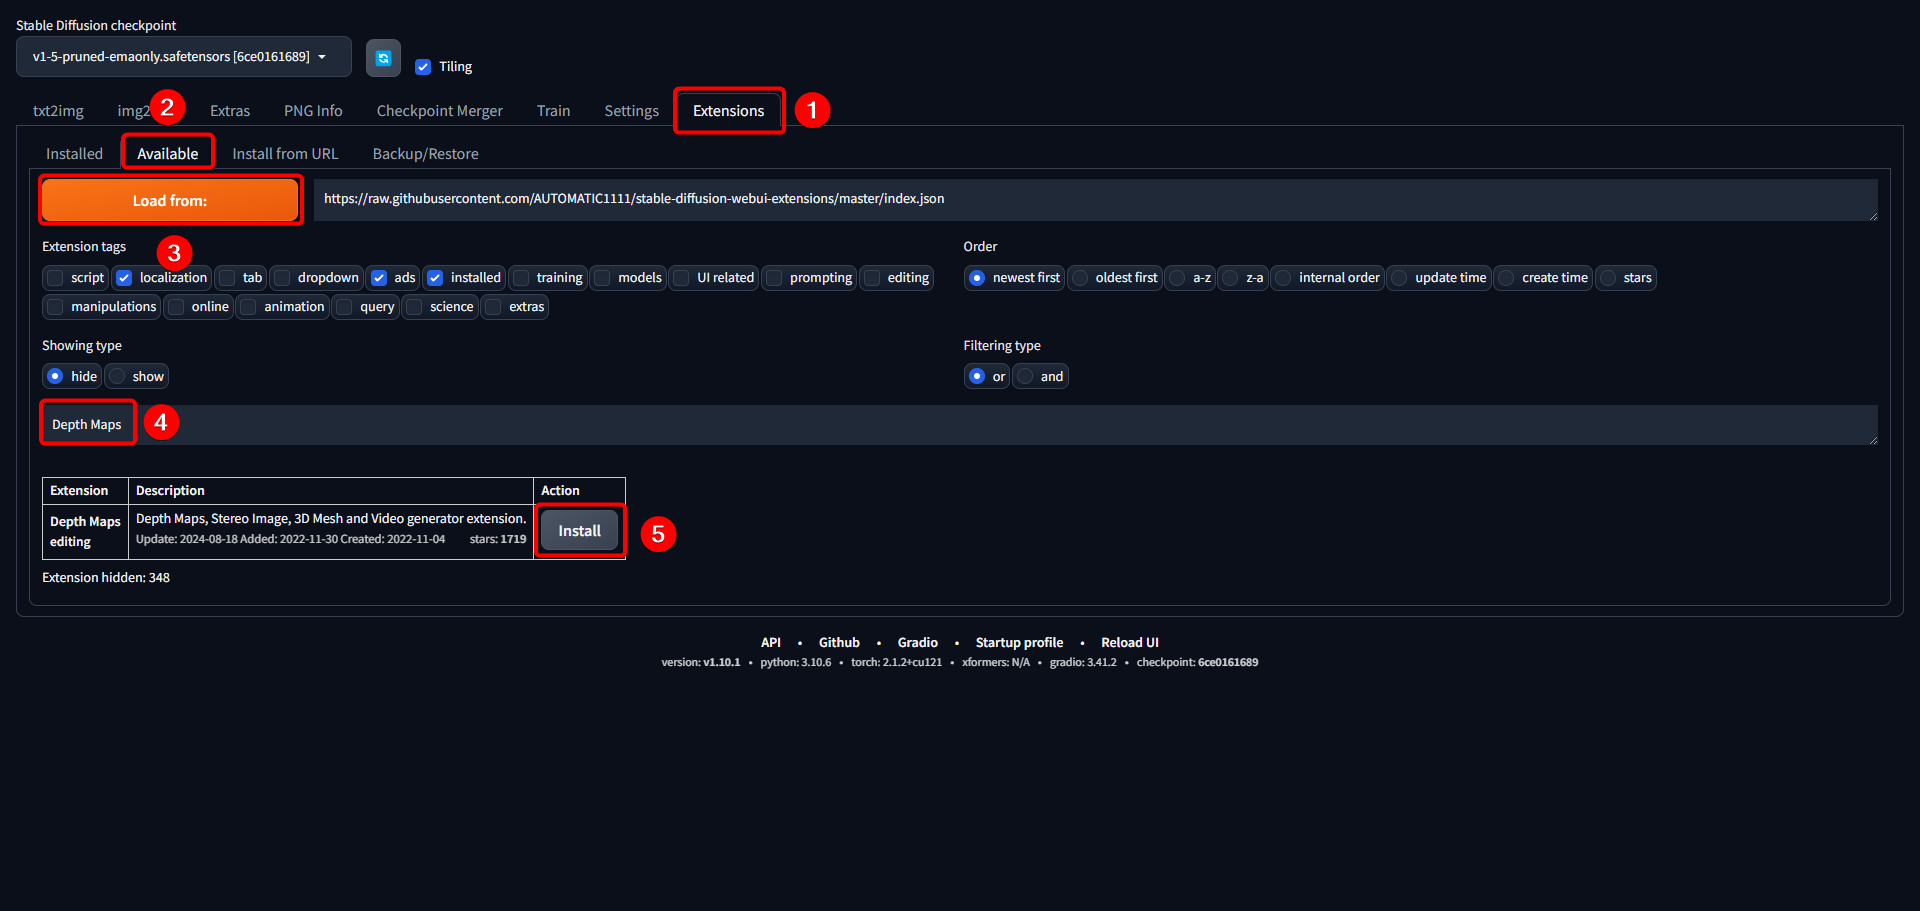
First switch to Extensions > Available and click Load from to load the extension list. Then type “Depth Maps” in the search box in the middle, and click Install to install the Depth Maps extension.
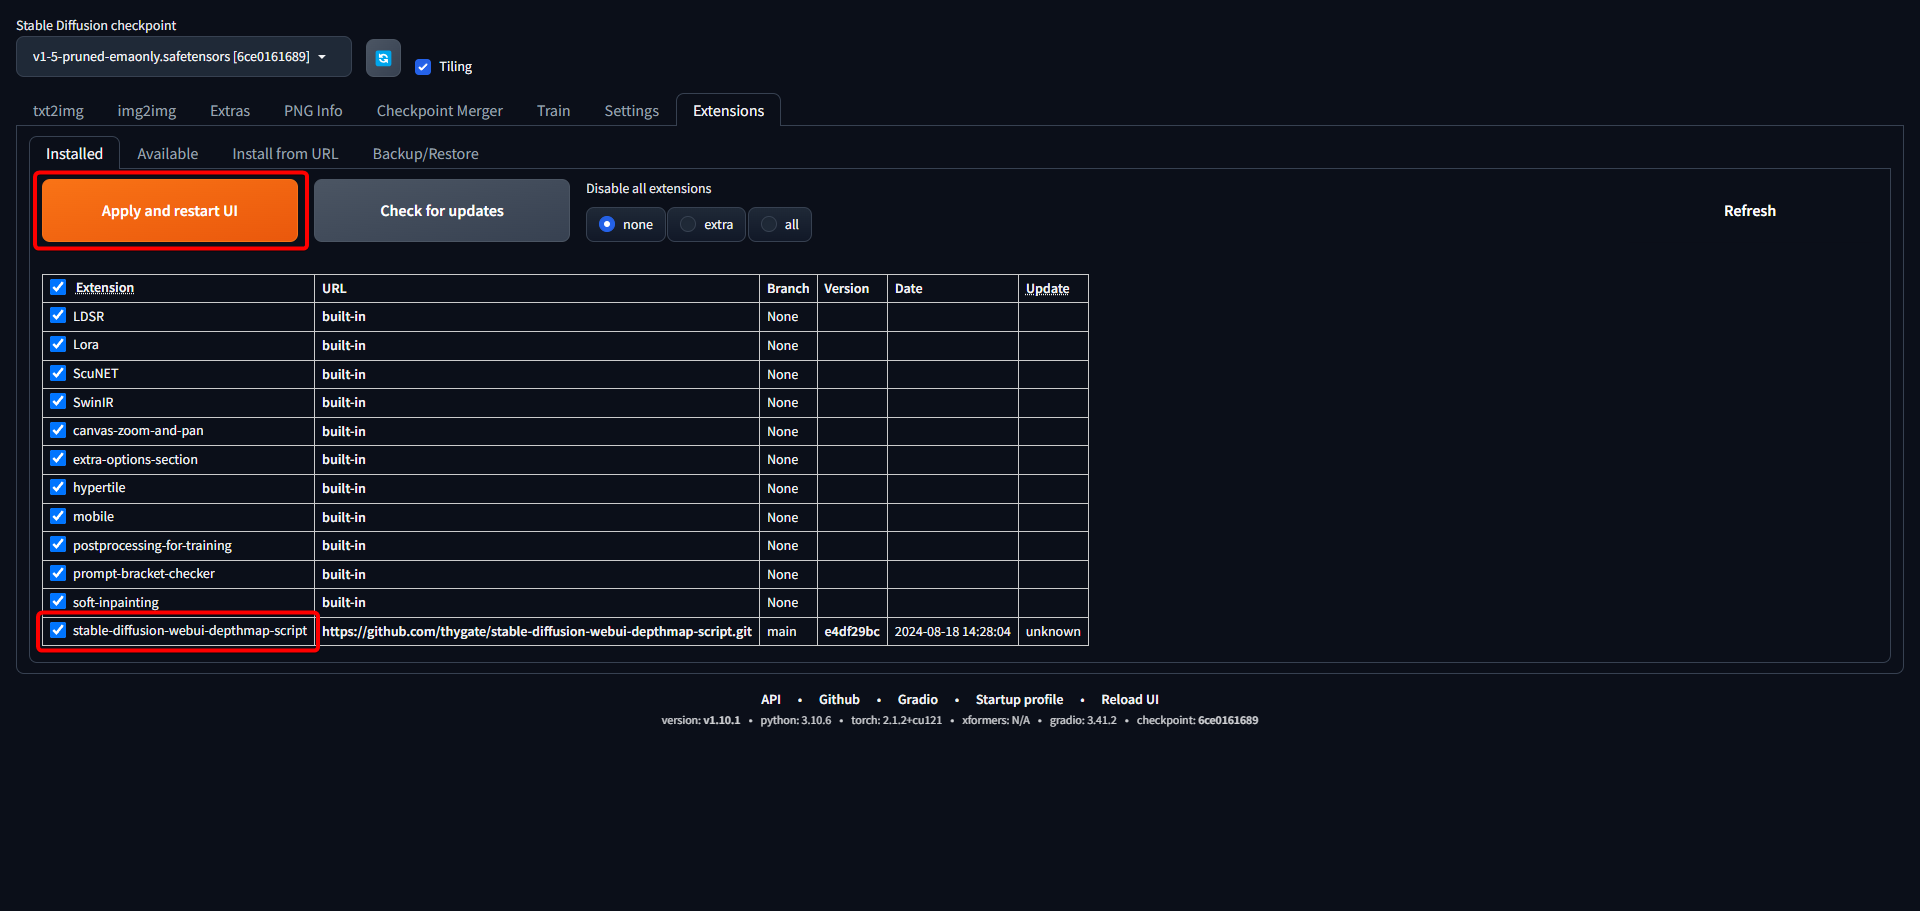
A Web UI extension can run third-party code on your computer, so before installing, check that the source is thygate/stable-diffusion-webui-depthmap-script. Do not leave --enable-insecure-extension-access on for long just to install extensions remotely, and do not expose an unprotected Web UI to the public internet.
Generation settings
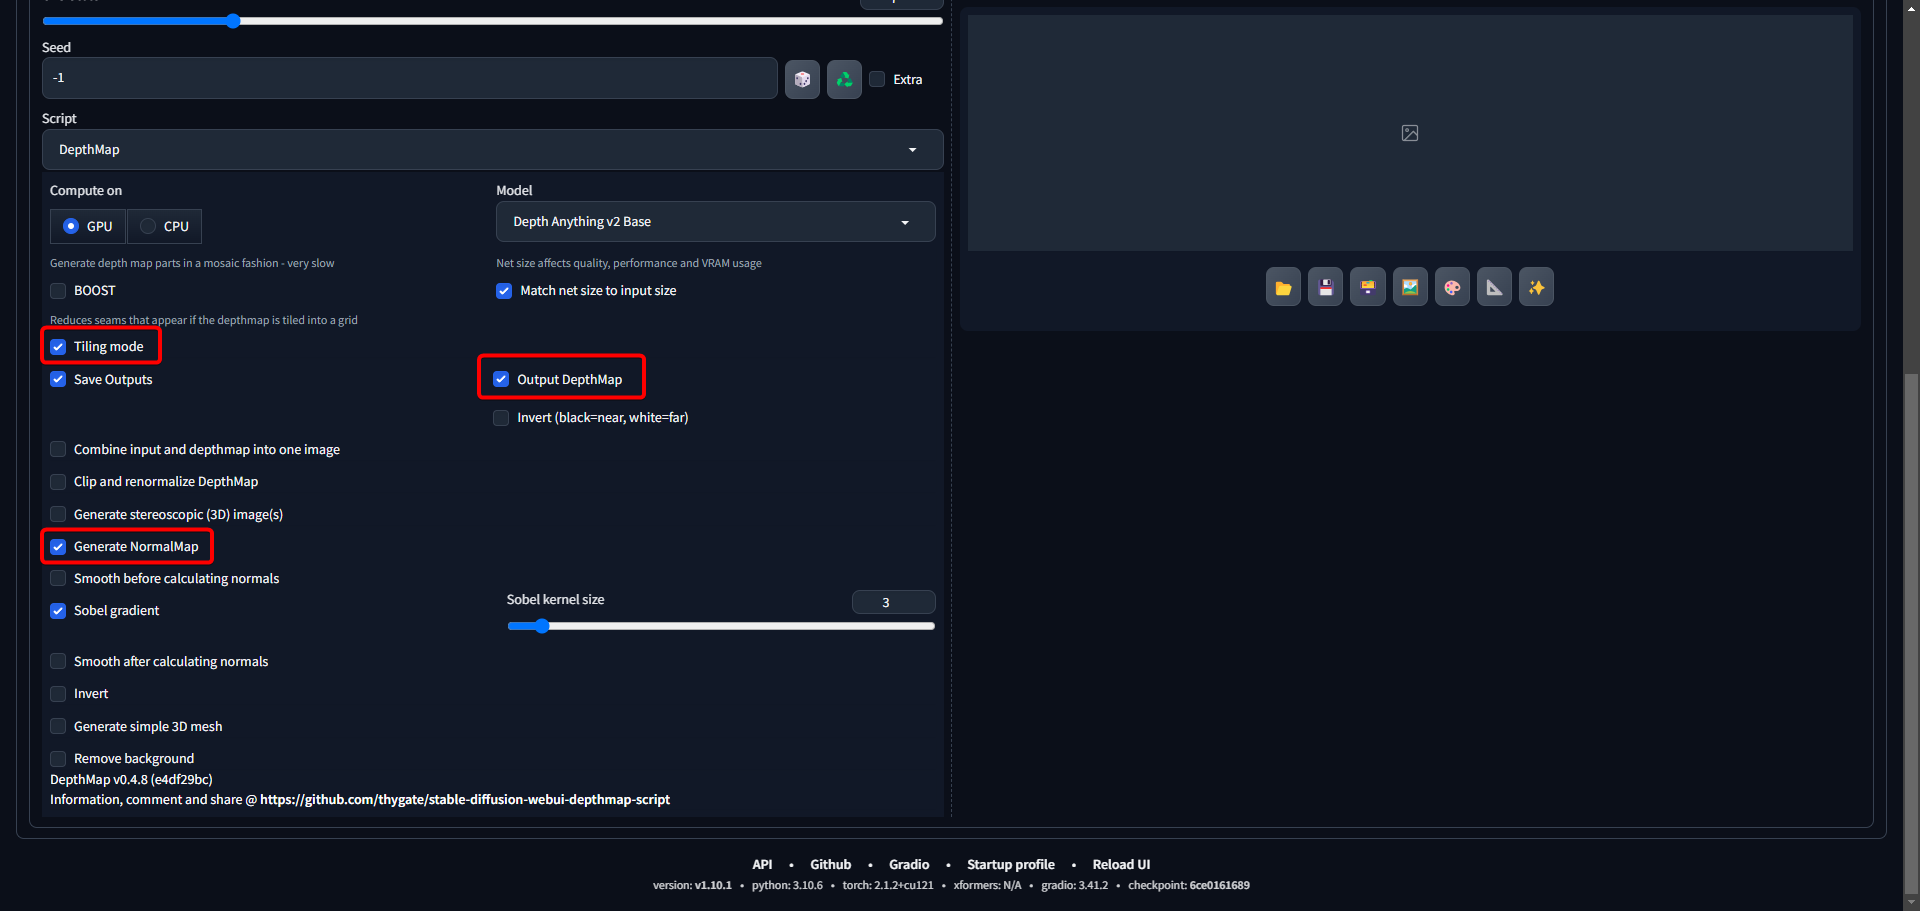
After Stable Diffusion Web UI restarts, enter the positive and negative prompts again, check tiling, and change Script from None to DepthMap at the bottom left. A group of options appears below, and you set those next.
Use the AI-generated textures
Remember that Unity created a material automatically when you dragged a texture onto a scene object? Now import the color map, height map, and normal map you just generated into Unity, and drag the color map onto the scene object.
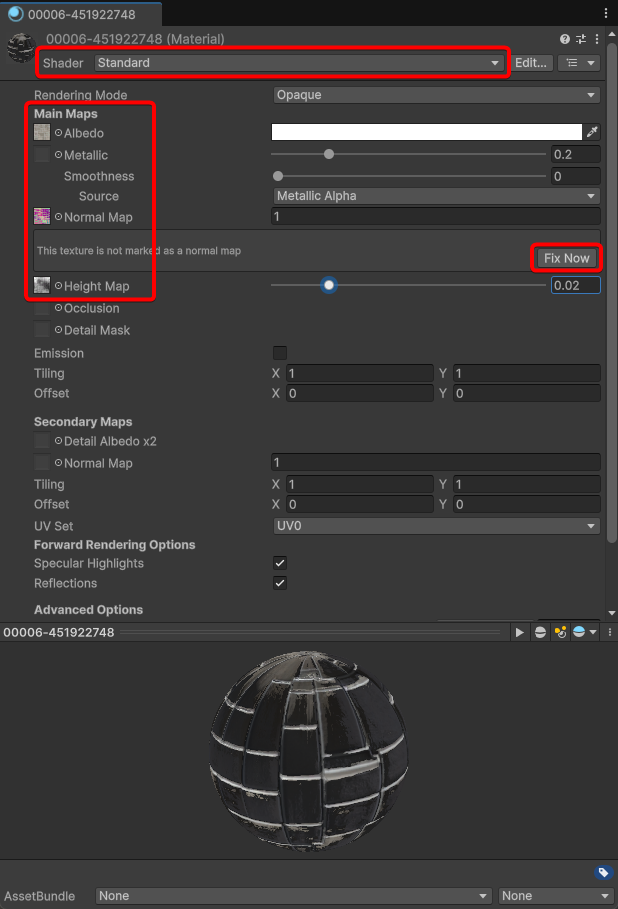
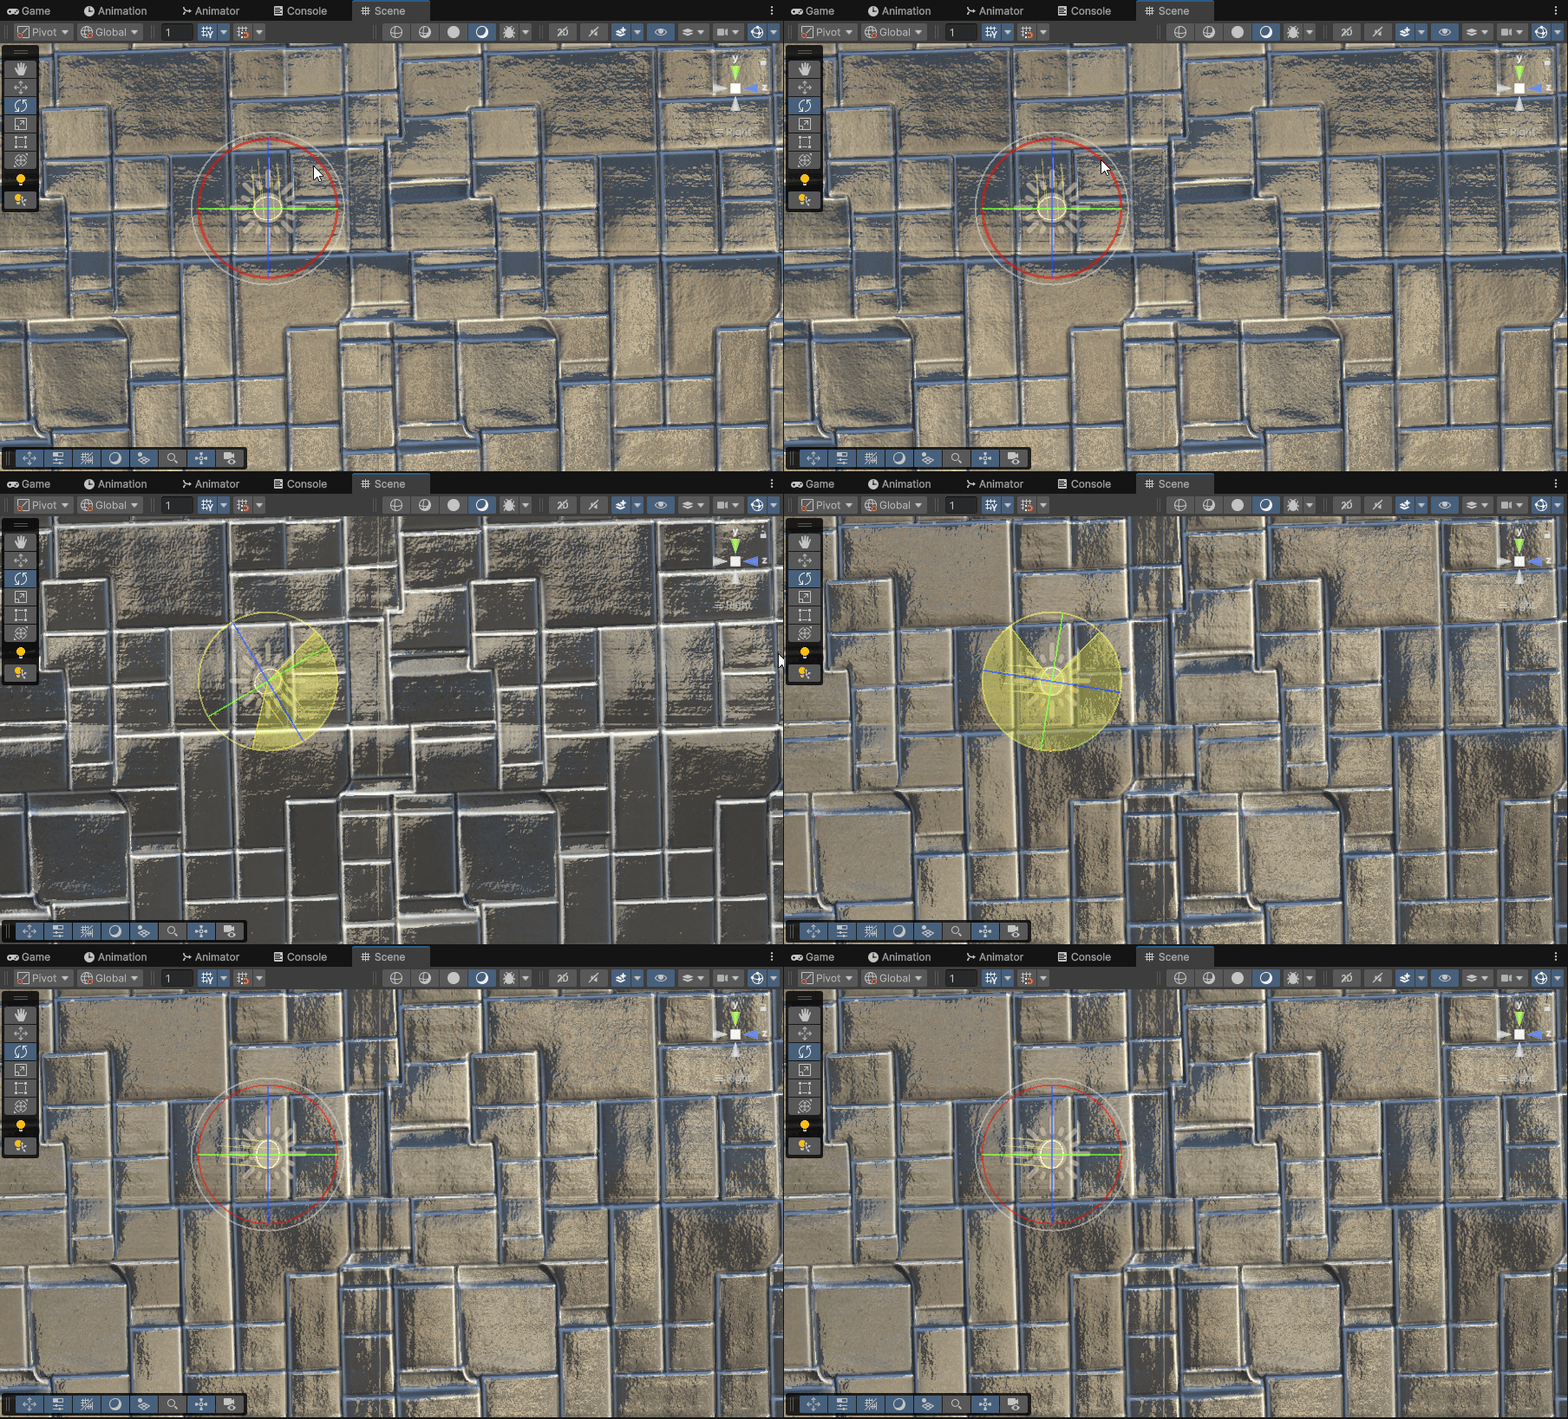
Next, open the Inspector of the new material. First change Shader to the basic Standard, then drag the normal map into Normal Map and the height map into Height Map.
A warning may appear under Normal Map. Click Fix Now and Unity fixes it automatically.
Checking the result and troubleshooting
Check the color map on several adjacent cubes to look at the seams. Do not judge only by the preview in the Web UI. If the corners where four faces meet still show an obvious break, first confirm that tiling was checked before generating. After you import the normal map into Unity, you should be able to use “Fix Now” to turn it into a Normal Map, and the shading of the surface should change as you rotate the light. If nothing changes at all, check whether the Normal Map, Height Map, and Shader fields of the material really use the images you just imported.
If the Web UI does not open at 127.0.0.1:7860, go back to the run.bat terminal and read the first error before you click around. If the DepthMap option disappears, go to Installed, confirm the extension is enabled, and restart the UI. If it only broke after an update, keep the folder and models that worked, and do not overwrite your only environment over and over.
If you no longer use the Depth Maps extension, stop the Web UI first, then disable or remove the extension from Installed. To restore completely, use the Web UI folder you kept from before the install. Before you delete anything, save your models and your own generated images somewhere else, so you do not remove your results along with the program.
Summary
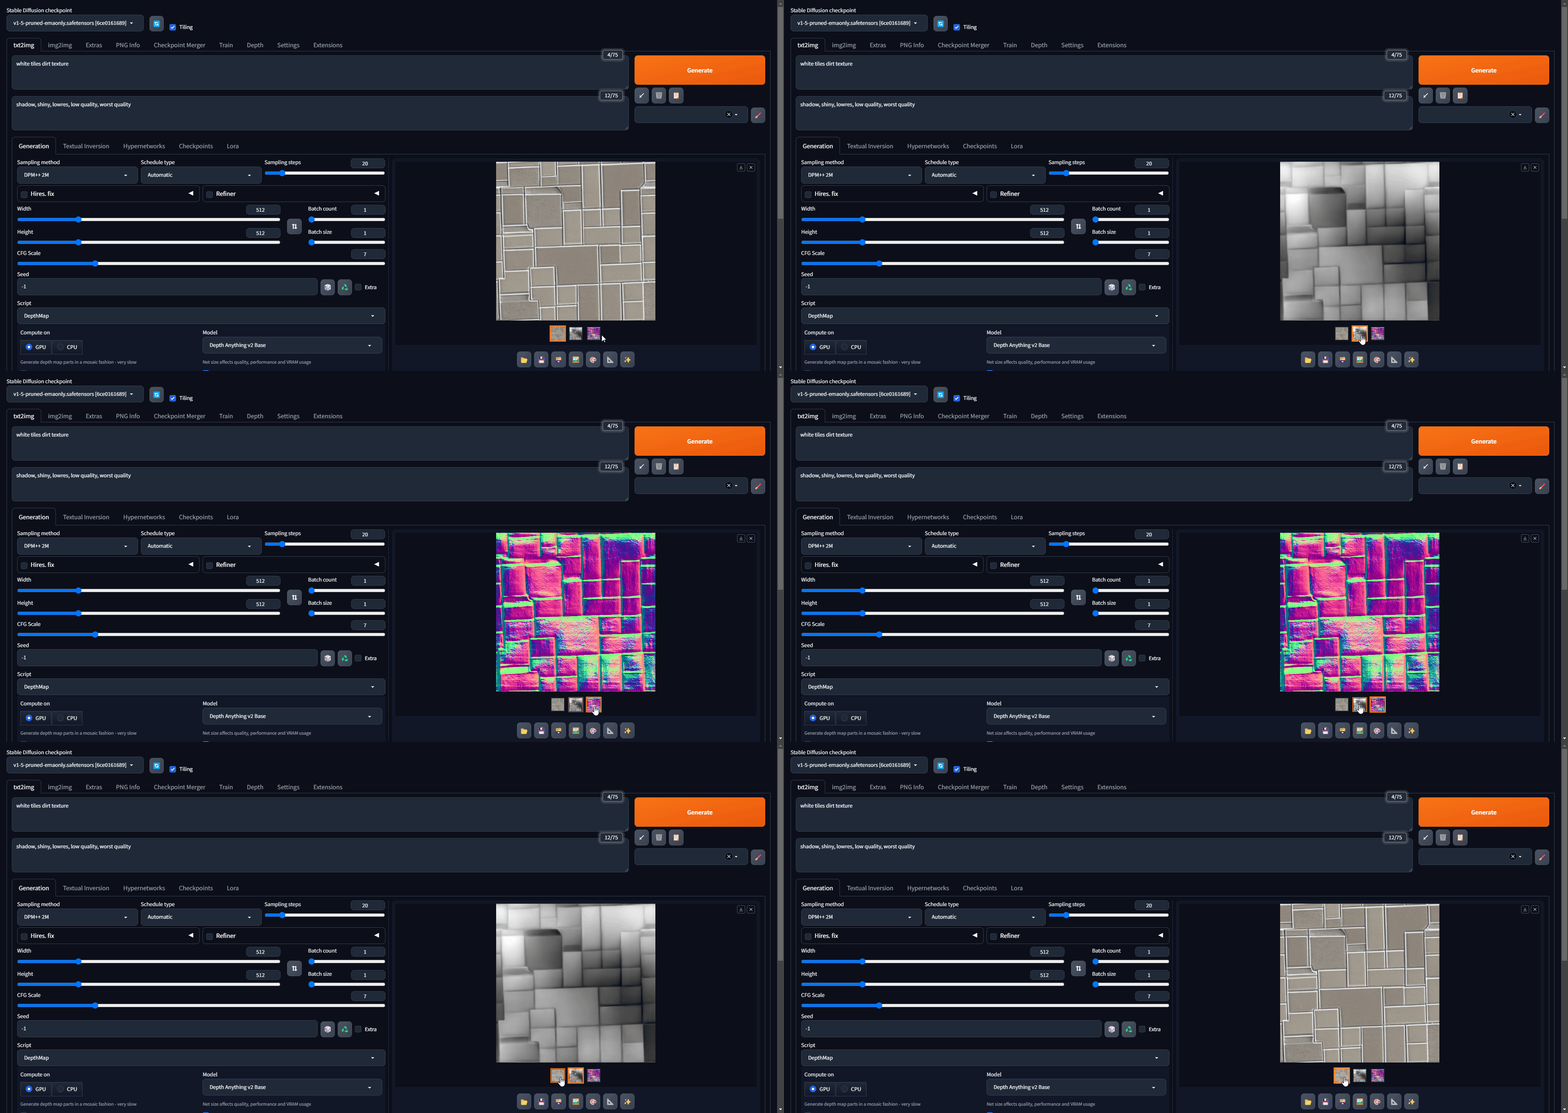
Following the steps above, you generate a seamless color map with Stable Diffusion, and the DepthMaps extension generates the matching normal map and height map.
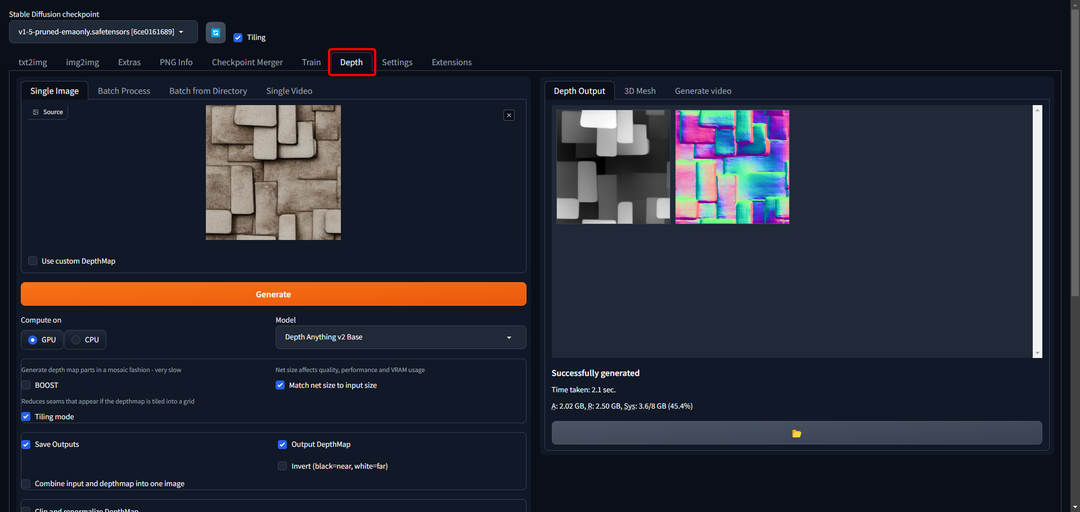
The core feature of the DepthMap extension is generating a normal map and a height map for an input image. If you already have a color map but lack the matching normal and height maps, you can also generate them from the Depth tab. (Check Tiling mode, Output DepthMap, and Generate NormalMap below.)
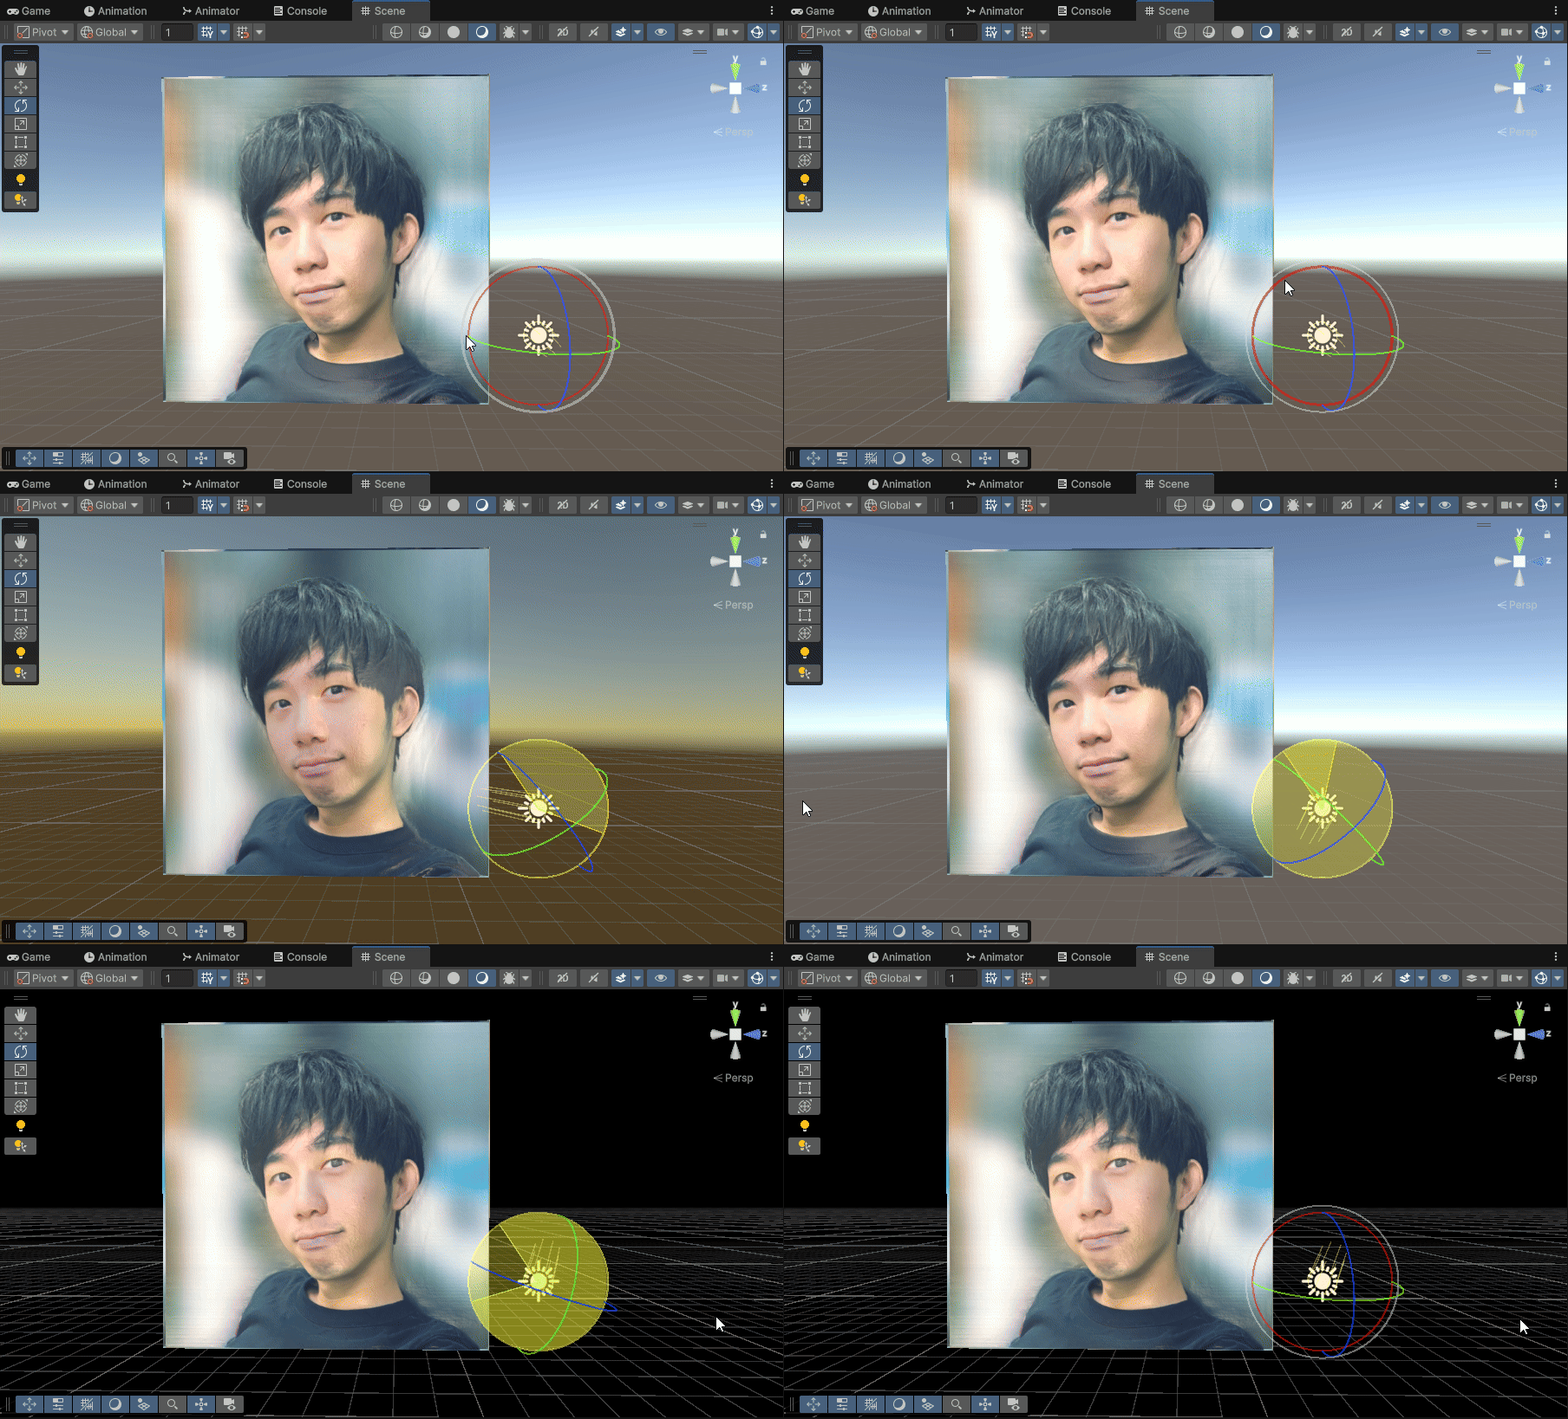
Try it yourself! Give it a photo and render the result in Unity. It looks very cool.
References
- How to Make Seamless Textures with AI (Stable Diffusion) - Next Diffusion
- [Bug]: Tiling option disappeared - GitHub
- Normal Maps for Stable Diffusion - YouTube
- High Resolution Depth Maps for Stable Diffusion WebUI - GitHub