Table of contents
In ComfyUI, image generation is a workflow. Loading a model, entering a prompt, sampling, and saving are each a node, and every parameter on a node is a value you can change. Claude Code cannot generate images itself, but it can read and edit a workflow, which means it can drive ComfyUI from code. After I connected ComfyUI’s official comfy-mcp, I described the logo I wanted in plain text. Claude Code edited a workflow from a template, downloaded the models that were missing, and handed the workflow to the local ComfyUI to render the image. If you do not like the result, you can describe it again, or open the same workflow in ComfyUI and adjust the nodes yourself.
I tested on Windows 11 with an RTX 3070 (8 GB), installing ComfyUI from scratch and using the MOSS-Image model. The request was text only, with no reference image: a 1024 × 1024 logo with a dark background, a cat-shaped logo in the upper center, and the text VerveCode below it.
Architecture
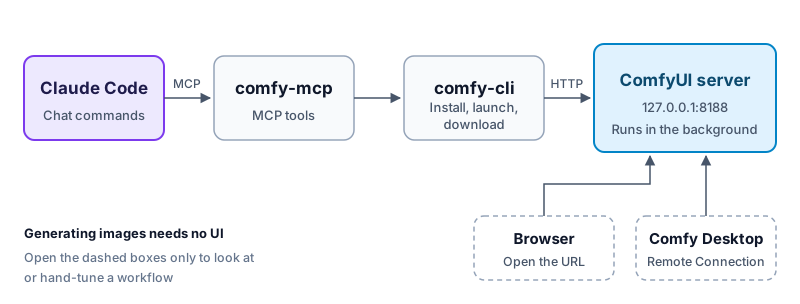
Claude Code does not talk to ComfyUI directly. comfy-mcp and comfy-cli sit in between. The browser and Comfy Desktop are only views onto the same server, and you can generate images without opening either of them.
| Component | What it does |
|---|---|
| comfy-cli | Installs a ComfyUI workspace, starts and stops the server in the background, and downloads models |
| comfy-mcp | Wraps the features of comfy-cli as tools that Claude Code can call |
| ComfyUI server | Runs workflows and also serves the full web interface |
| Browser, Comfy Desktop | Let a person look at a workflow and adjust it by hand |
The README of comfy-mcp lists every tool and parameter, and the official Comfy MCP documentation explains the installation and workspace settings.
Before you start
- Claude Code, Git, and uv are already installed.
- You use an NVIDIA GPU whose driver supports PyTorch built for CUDA 13.0. To see which version your driver supports, run
nvidia-smias described in how to choose the PyTorch CUDA version. Other GPUs need differentcomfy installoptions, which this article does not cover. - You have disk space for the ComfyUI workspace and the models. The models used here total about 13 GB.
Install comfy-mcp and comfy-cli
Install comfy-mcp with uv. This also installs comfy-cli and puts its command on your PATH:
1uv tool install comfy-mcp --with-executables-from comfy-cli
After this, both the comfy and comfy-mcp commands work directly. If the terminal cannot find a command, run uv tool update-shell and open a new PowerShell window.
Create ComfyUI with comfy install
The project folder in this article is E:\comfy-quick, and Claude Code opens its session there. The ComfyUI workspace goes in the ComfyUI folder under it:
1comfy --workspace E:\comfy-quick\ComfyUI --skip-prompt install --nvidia --cuda-version 13.0 --version latest
--skip-prompt skips the interactive questions and uses the defaults. --nvidia and --cuda-version 13.0 set the GPU and the CUDA version, and --version latest installs the newest ComfyUI.
The install took 6.9 minutes and gave me ComfyUI 0.43.2, Python 3.12.13, and PyTorch 2.14.1. comfy-cli remembers this workspace as the most recently used one, so you do not have to give the path again, and comfy-mcp can find it too. This step installs only ComfyUI. The models are downloaded later by Claude Code, based on the template.
If you already have a ComfyUI workspace, you do not need to reinstall. The official documentation says to run comfy set-default <workspace path> to make it the default workspace, and comfy-mcp will then use that one.
Connect comfy-mcp to Claude Code
Run the official registration command in the project folder:
1cd E:\comfy-quick
2claude mcp add comfy-mcp -- comfy-mcp
This registers comfy-mcp in the local scope of Claude Code. Only sessions opened in E:\comfy-quick load it, so you do not need to write a .mcp.json file. Run claude mcp get comfy-mcp. If you see Status: √ Connected, the registration worked.
After registering, fully restart Claude Code and open a session in E:\comfy-quick. Only then does comfy-mcp appear in the tool list.
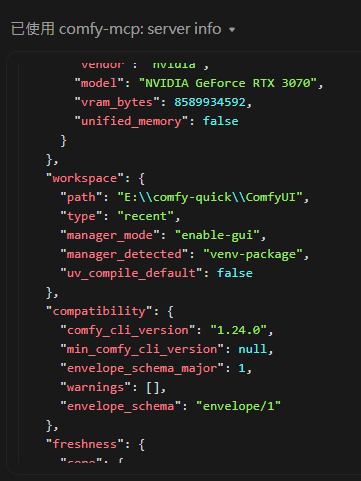
After the restart, ask Claude Code to run server_info once. If workspace.path in the result is E:\comfy-quick\ComfyUI and type is recent, the connection works. The server has not been started yet, so server.running in the result is false.
The screenshot is from a Traditional Chinese Claude Code. Its header reads “已使用 comfy-mcp: server info”, which means the tool call comfy-mcp: server info was used. The rest of the output is JSON:
Start ComfyUI and download the models
All the following steps happen in Claude Code, in conversation. The request I gave was roughly this (translated from the Chinese I typed):
1Use comfy-mcp to start ComfyUI, get the image_moss_image_t2i_bboxes template,
2download the models it is missing, then change it into a 1024×1024 VerveCode cat logo:
3dark background, a cat-shaped main logo in the upper center, the text VerveCode below it, colors #111111 and #C8102E.
Claude Code writes the request as an English prompt and fills it into the template. The settings it actually filled in are in the next section. It did these things, in this order:
- It called
launch_comfyuito start ComfyUI in the background. About 39 seconds later,127.0.0.1:8188accepted connections. The server keeps running after you close Claude Code. To stop it, ask Claude Code in a new session to callstop_comfyui. - It used
search_templatesandfetch_templateto get theimage_moss_image_t2i_bboxestemplate (MOSS-Image: Layout-Guided Text to Image, called the Layout template below). This template lets you place the logo and the text with bounding boxes. - It used
download_modelto download the three models listed by the template at the same time, which took about 6 minutes.
The three models are stored in these folders under the workspace:
| Model | Folder | Size |
|---|---|---|
moss_image_sft_int8_convrot.safetensors |
models\diffusion_models |
5.41 GB |
qwen3.5_9b_w4a8_gptq.safetensors |
models\text_encoders |
7.34 GB |
flux2-vae_small.safetensors |
models\vae |
0.25 GB |
Before the models are downloaded, fetch_template reports that the template cannot run. The first sentence of the response suggests updating ComfyUI, but what is actually missing is the models. The template runs once all three models are downloaded.
Change the node parameters and generate the image
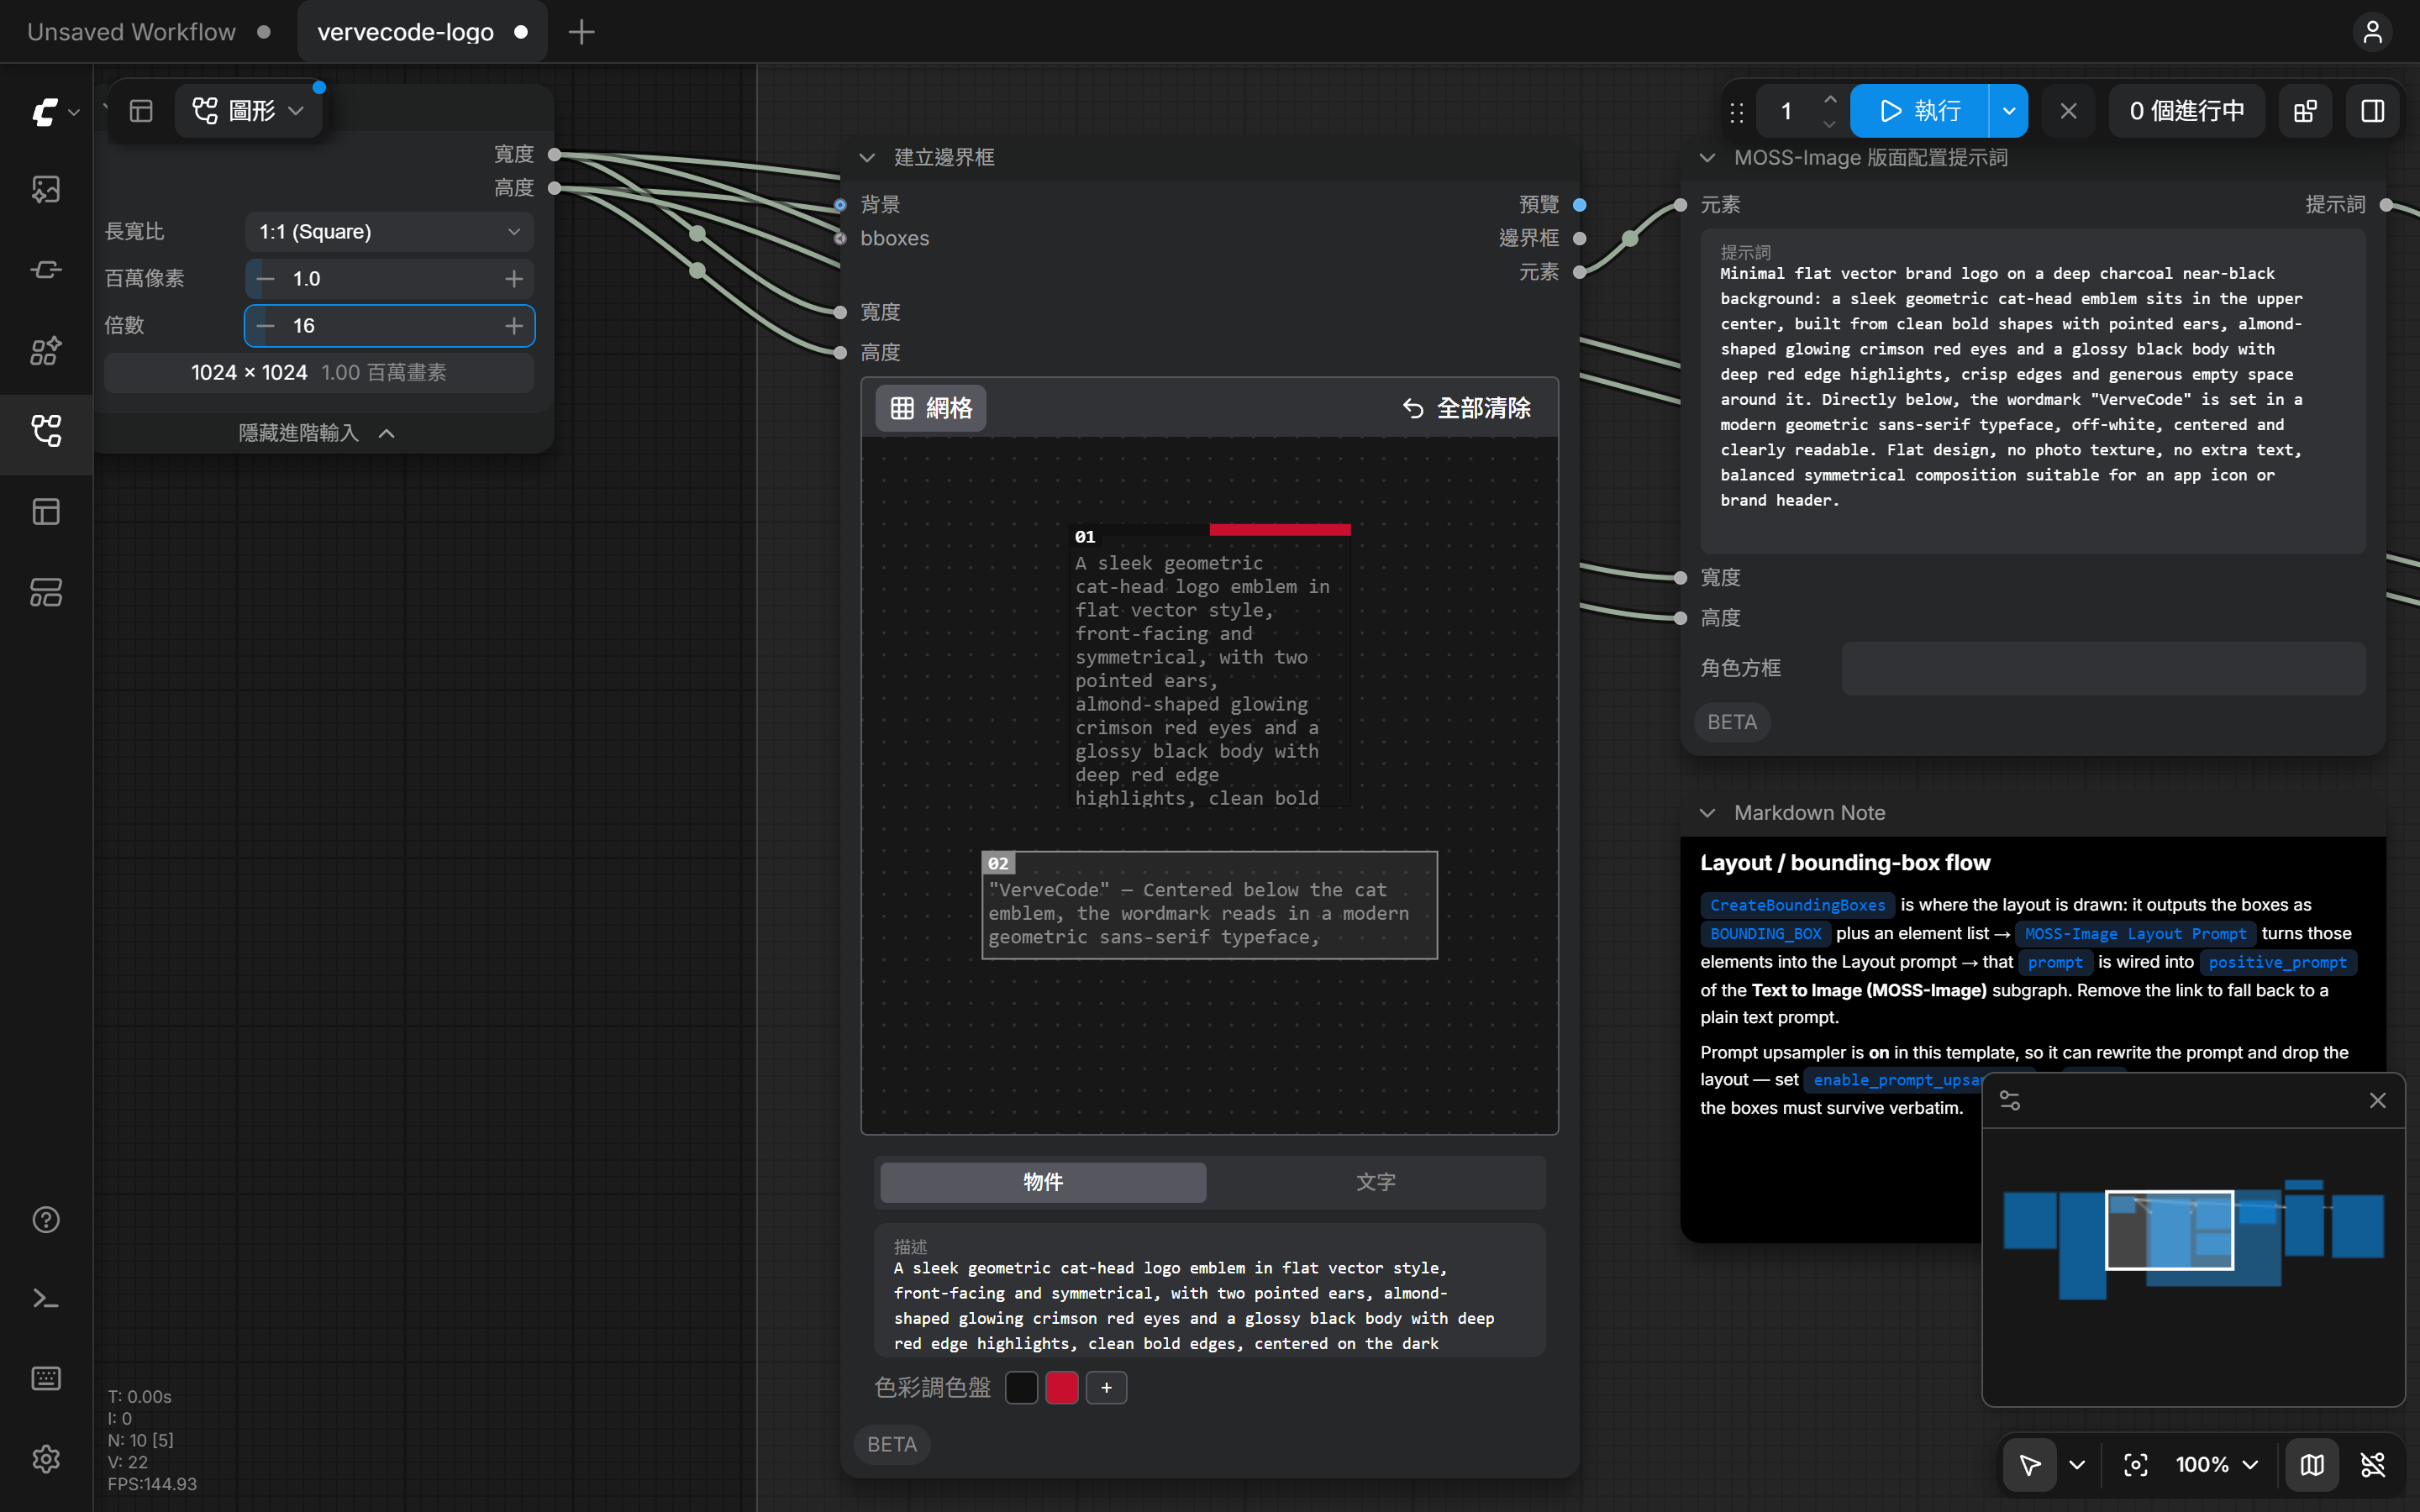
comfy-mcp calls a node parameter that you can change in a workflow a slot. Claude Code first listed the slots of the template with list_workflow_slots, then changed six of them with set_workflow_slot. The bounding boxes count as two of the six. Everything else keeps the template defaults (1024 × 1024, 25 steps, CFG 2.5):
| Item | Node and parameter | Setting |
|---|---|---|
| Layout prompt | Node 27, prompt |
An English prompt that describes the dark background, a black geometric cat head with red eyes and a deep red rim light, and the VerveCode wordmark |
| Bounding boxes | Node 25, editor_state and last_incoming |
Cat head box at x 304, y 128, 416 × 416. Text box at x 176, y 608, 672 × 160. Each box has its own description, and the color palette of the cat head box is #111111 and #C8102E |
| Character boxes | Node 27, character_boxes |
The template ships with one character box. This logo has no character, so I set it to empty |
| Seed | Node 18, seed |
571710880652220 |
| File name prefix | Node 9, filename_prefix |
vervecode_logo |
A note node in the template says the prompt upsampler may rewrite the prompt and drop the layout. I left it alone this time. In the ComfyUI execution log, the prompt sent to the model was still the original layout prompt, and both boxes were drawn at their positions.
After the changes, Claude Code checked the workflow with validate_workflow, ran it with run_workflow, waited for it with job, and finally fetched the image with fetch_outputs. That is the image at the top of this article. ComfyUI also saves the image in the output folder of the workspace, with a file name that starts with vervecode_logo. Running the same settings a second time gave two identical outputs. On the RTX 3070 (8 GB), the execution time ComfyUI logged for the first run, which includes loading the model, was 55.53 seconds.
Open the workflow in the browser
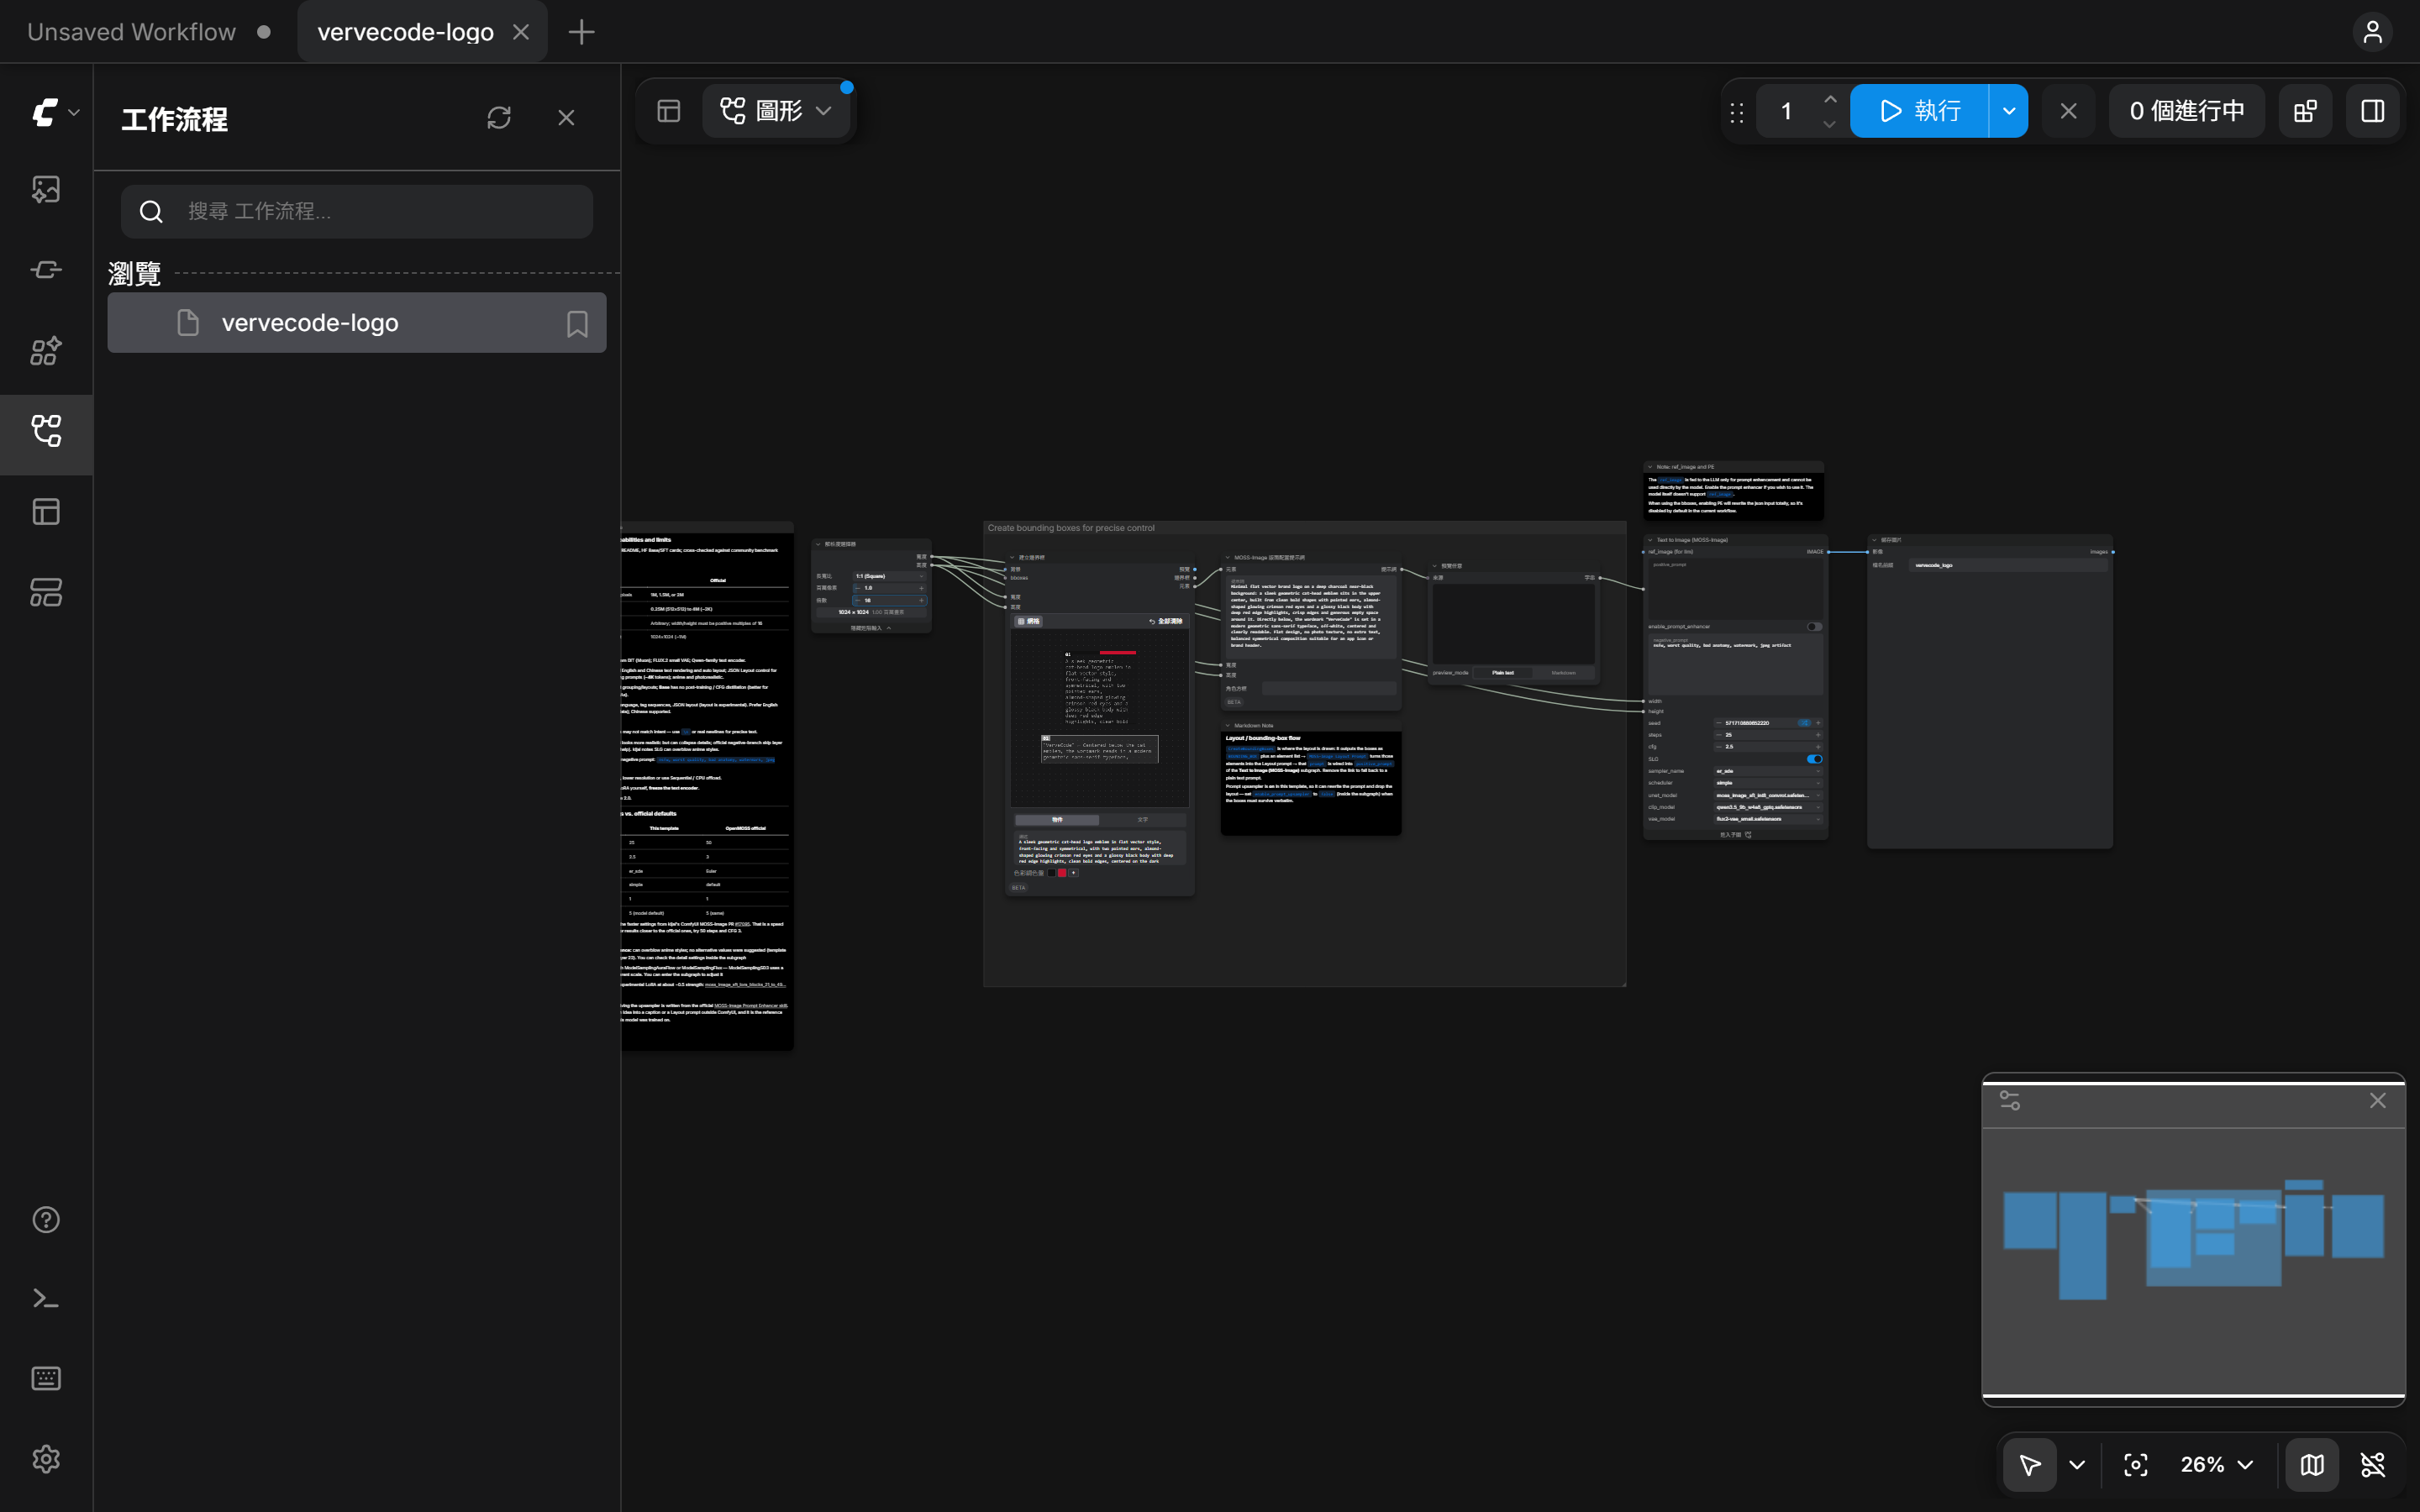
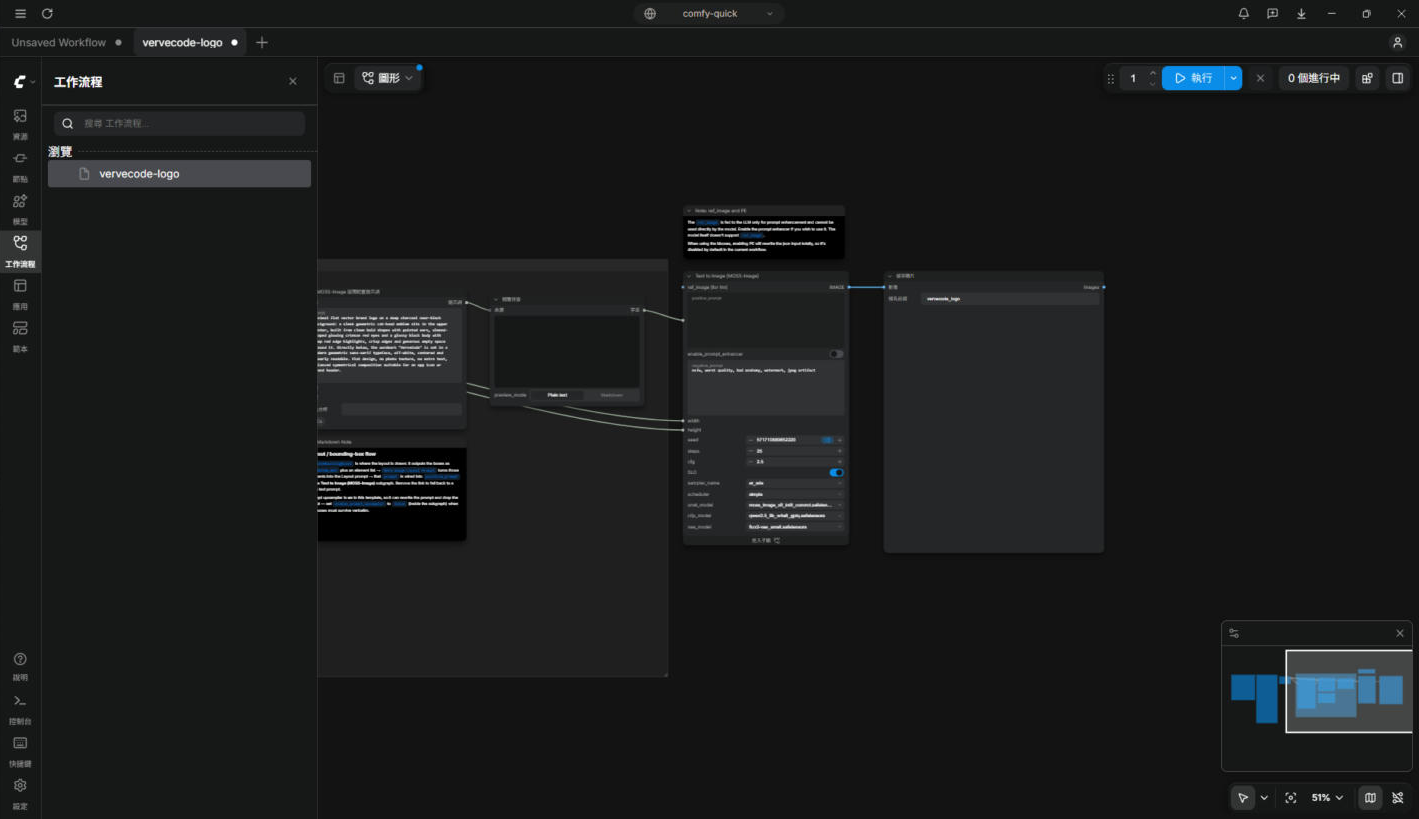
comfy-mcp edits the workflow file and sends it straight to the ComfyUI queue, so it never appears on any screen. To see what Claude Code did, ask it to copy this workflow into ComfyUI\user\default\workflows, for example as vervecode-logo.json. Then open http://127.0.0.1:8188 in the browser. The Workflows panel on the left lists it. Open it and you get the version Claude Code set up, which you can adjust and run directly.
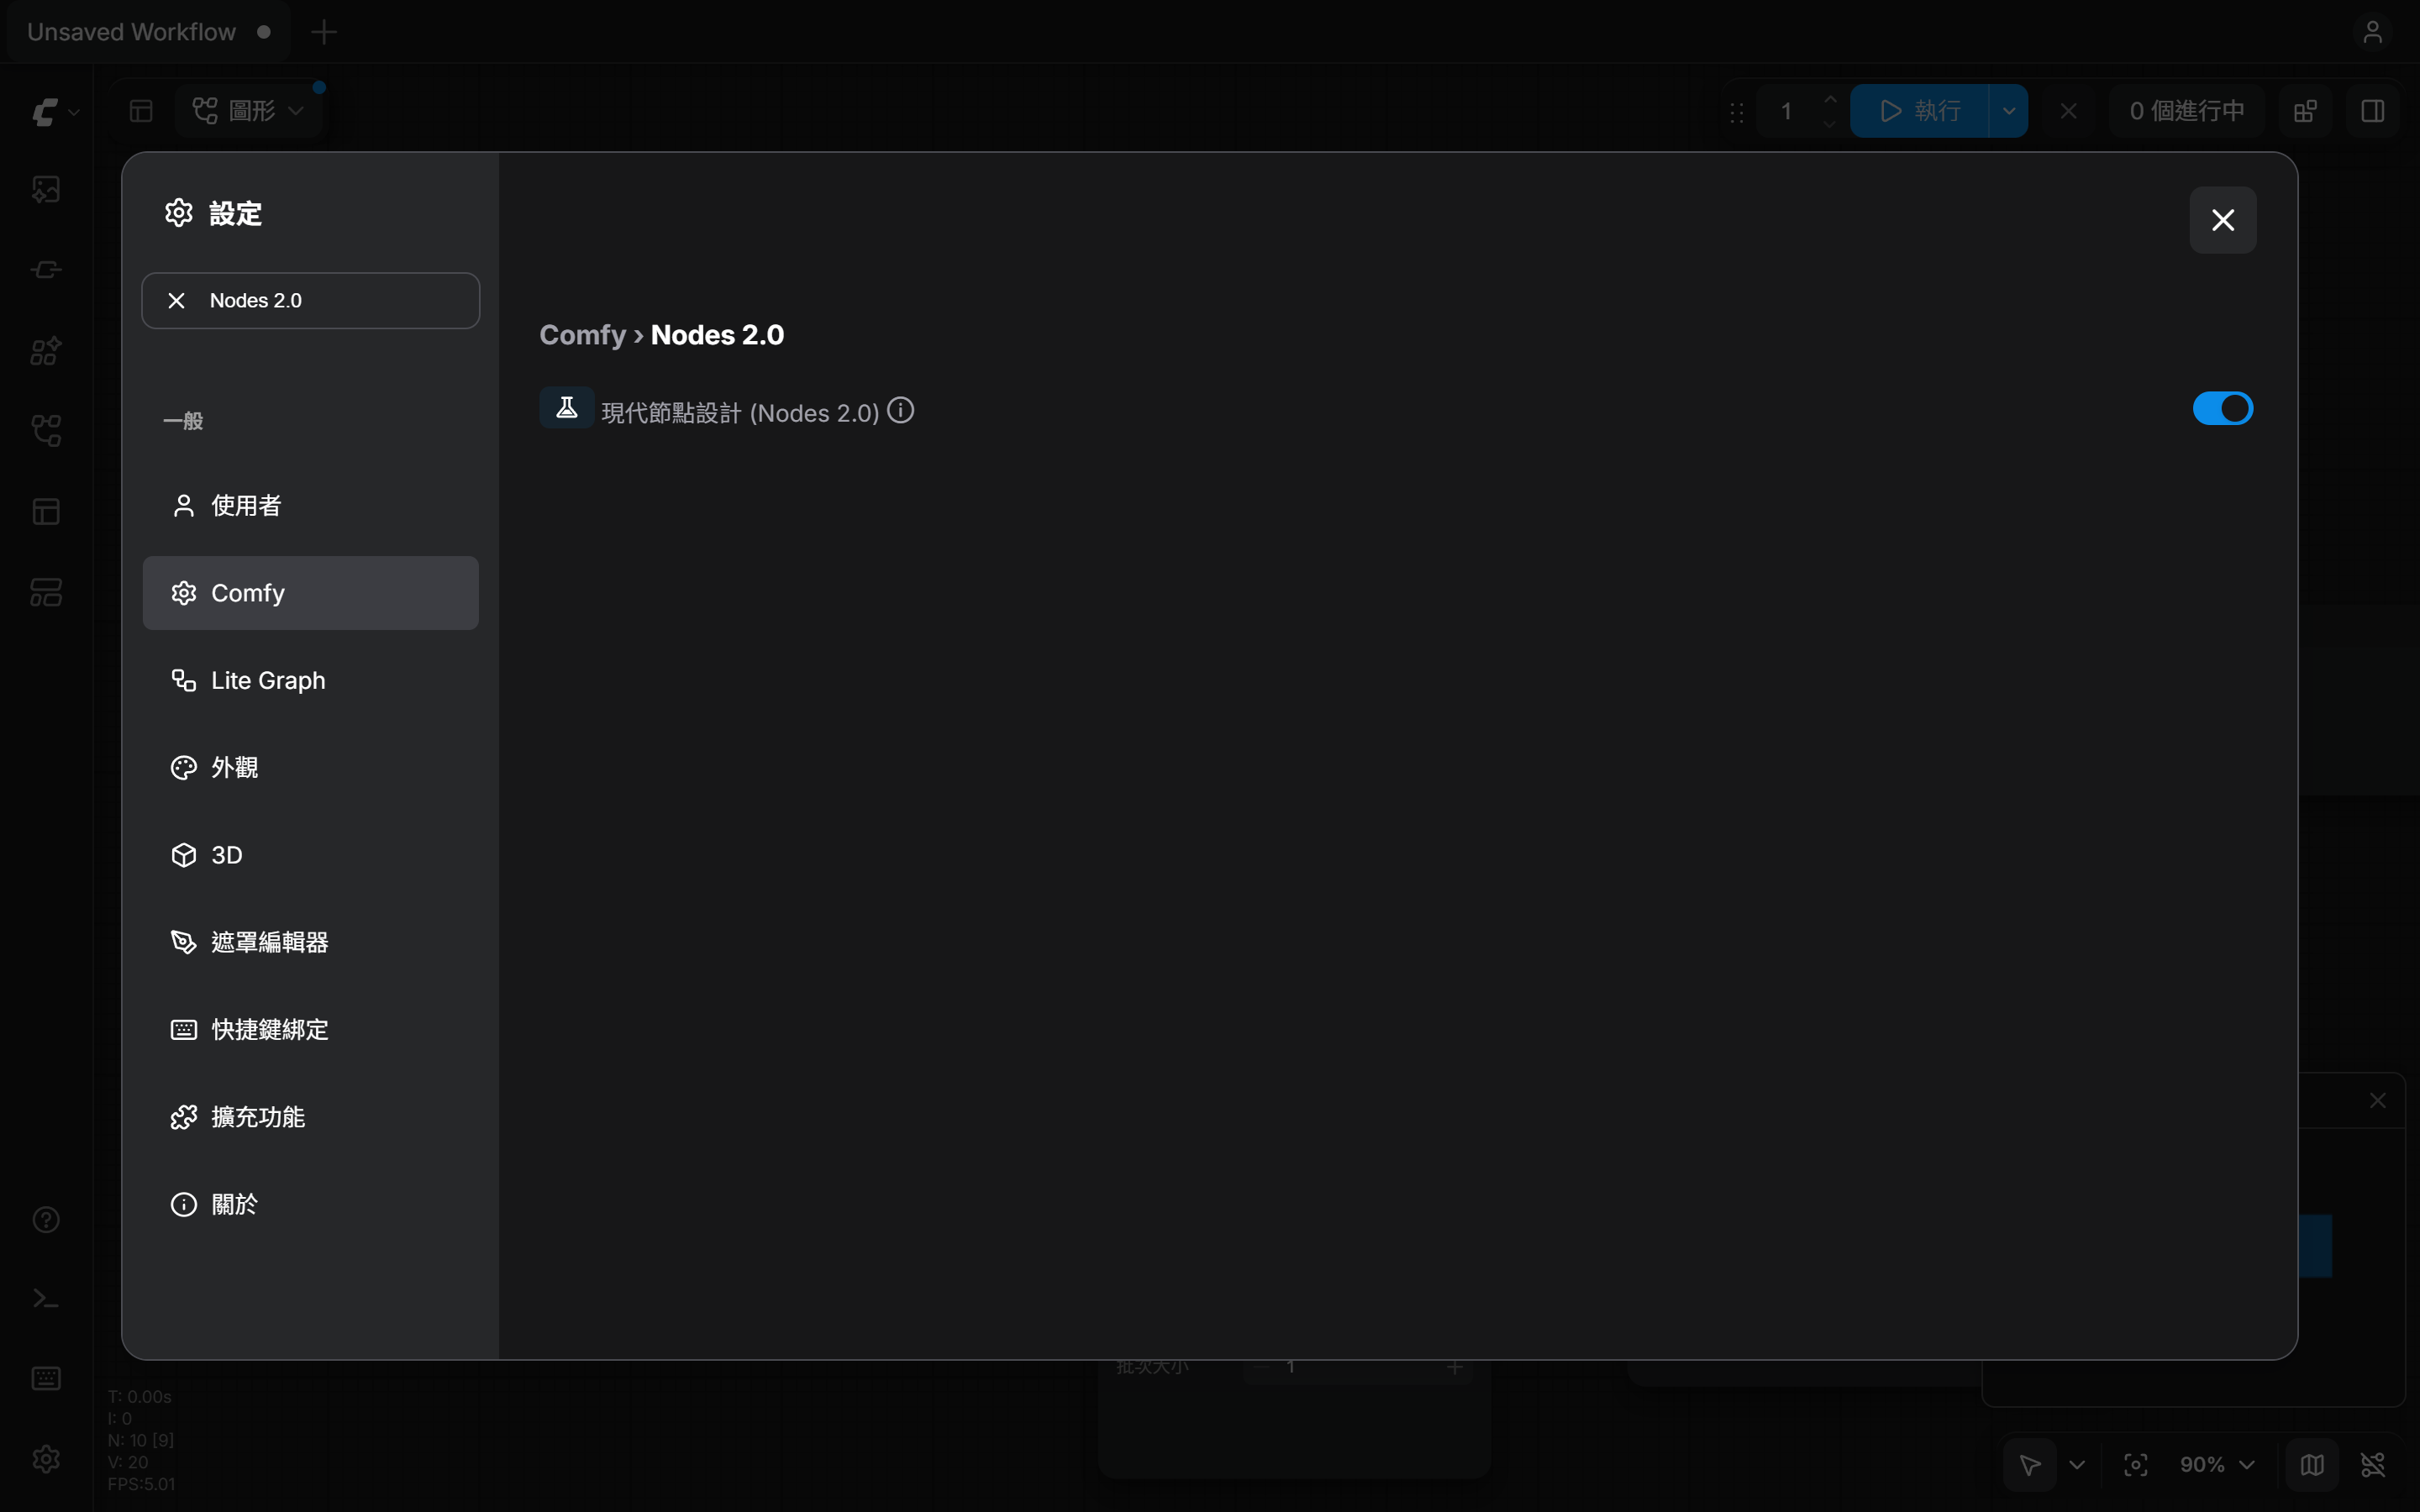
The ComfyUI screenshots in this article use the Traditional Chinese interface, so each one is described with the English names. The panel on the left is Workflows (工作流程), the Run button at the top right is Run (執行), and the graph button at the top left is Graph (圖形):
Connect Comfy Desktop to the same server
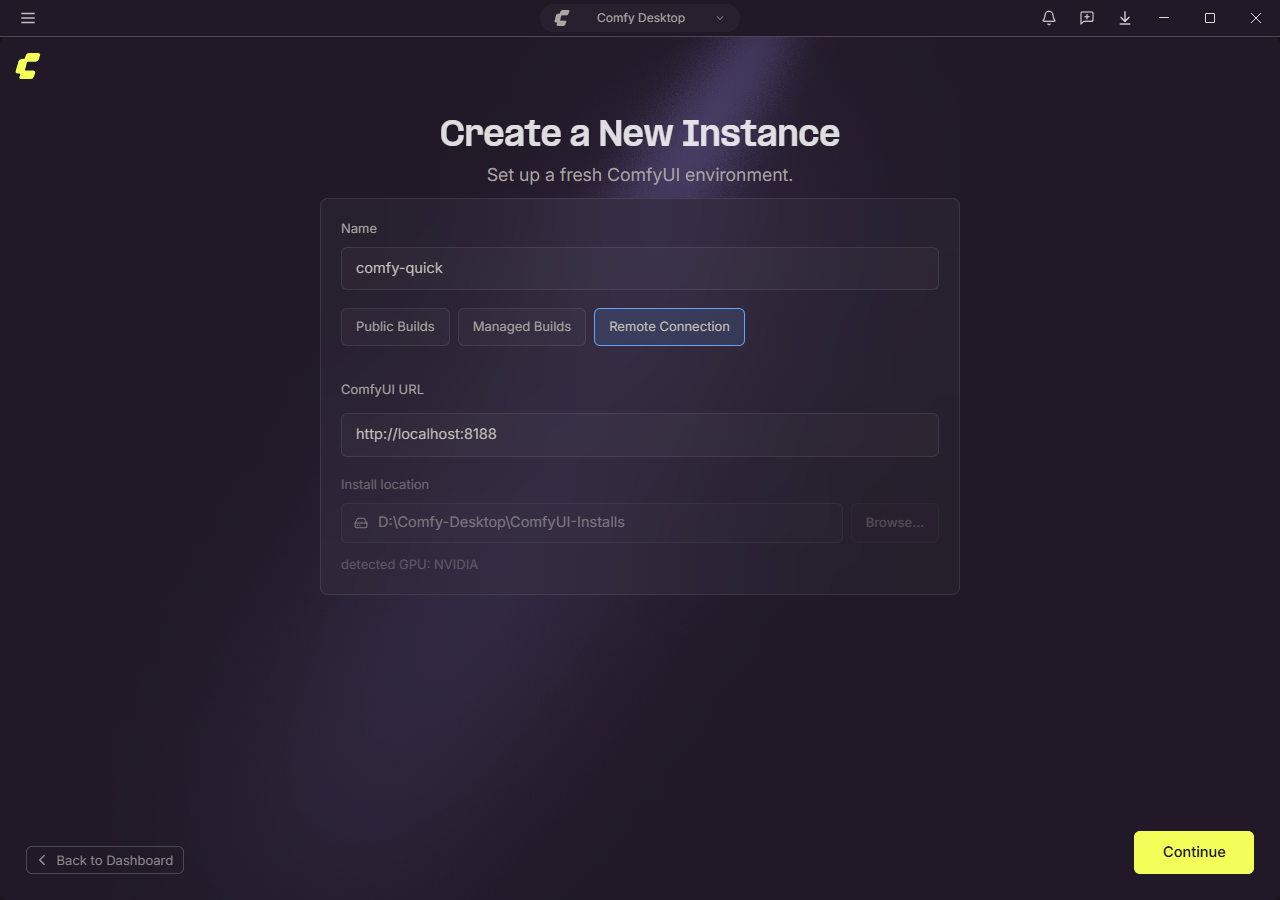
An Instance that Comfy Desktop creates from Public Builds installs a separate copy of ComfyUI, which shares neither workflows nor outputs with the copy that the comfy-cli of Claude Code uses. To see the workflows Claude Code edits in Desktop, use Remote Connection to connect to the server that comfy-cli started. You do not need to install another ComfyUI or download the models again.
In Desktop, click New Instance and switch to Remote Connection. Enter any name, keep the default ComfyUI URL http://localhost:8188, and click Continue:
Summary
On an RTX 3070 (8 GB), starting from nothing, installing ComfyUI took about 7 minutes, Claude Code downloaded the models in about 6 minutes, and the first image after the workflow was ready took 55.53 seconds. In this test, Claude Code only changed node parameters of an official template and did not wire up a new workflow from scratch. The prompt and node parameters are stored in the workflow file, so the same settings give the same image, and you can keep editing from that workflow.