Table of contents
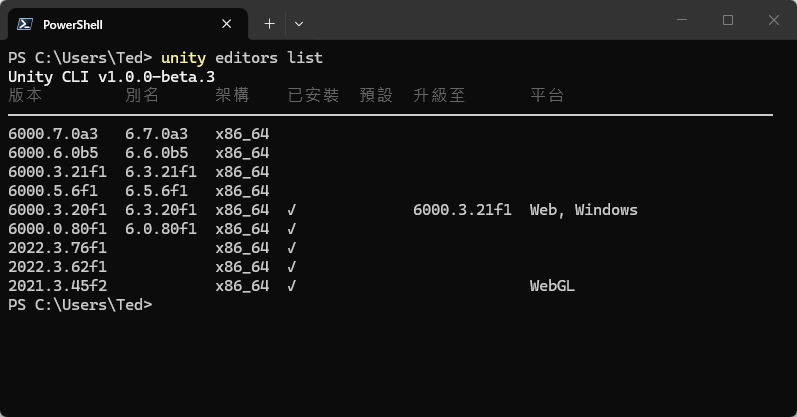
Unity CLI is Unity’s official command-line tool. unity install installs Unity Editors and modules without opening Unity Hub. After that, run unity setup claude, and Claude Code can use the same commands to install Editors and open projects for you.
Unity CLI is still in beta, and the commands below are based on 1.0.0-beta.14. I tested the Windows and WSL sections on Windows 11, and the Linux section in Ubuntu 26.04 inside WSL. If a command changes in a later version, follow the Unity CLI documentation and unity <command> --help.
Choose your environment
Unity CLI works differently on Windows, WSL, and Linux. The difference is where the CLI is installed and which system’s Editors it manages. All three environments need a Unity account.
| Environment | How to install | Editors it manages | System requirements |
|---|---|---|---|
| Windows | winget | Windows Editors | Windows 10 21H1 or later |
| WSL | Calls the Windows version, no separate install | Windows Editors | Same as Windows |
| Linux | Install script | Linux Editors | Ubuntu 22.04 or later, or RHEL 9, with glibc 2.34 or later |
Install Unity CLI
Windows
Install it with winget in PowerShell:
1winget install Unity.CLI
After it installs, reopen PowerShell and run unity doctor to confirm the CLI is on the PATH and is not installed twice:
1cliVersion              1.0.0-beta.14
2check.binary-on-path    pass
3check.path-duplicates   pass
Upgrade from the old script
If you installed with the older official script (install.ps1), check.path-duplicates shows warn, because the old unity.exe is still in %LOCALAPPDATA%\Unity\bin. With the old copy there, the terminal can run the old file, so delete it and remove that folder from your user PATH:
1$old = "$env:LOCALAPPDATA\Unity\bin"
2Remove-Item $old -Recurse -Force
3$path = [Environment]::GetEnvironmentVariable('Path', 'User') -split ';' | Where-Object { $_ -and $_ -ne $old }
4[Environment]::SetEnvironmentVariable('Path', ($path -join ';'), 'User')
Delete only the bin folder. The Editor, licenses, and config folders next to it hold the Editor’s logs, license, and settings, and deleting them affects the Editor. After you reopen PowerShell and run unity doctor again, you are done when check.path-duplicates shows pass.
WSL
WSL needs no separate install. Once Unity CLI is installed on Windows, change the command name from unity to unity.exe in WSL, and you run the Windows CLI:
1unity.exe --version
2unity.exe editors -i
The listed Editor locations are Windows paths, which shows that the command was handed to the Windows version. The versions depend on which Editors are installed on each computer:
11.0.0-beta.14
2version       location
36000.3.20f1   C:\Program Files\Unity\Hub\Editor\6000.3.20f1\Editor\Unity.exe
42018.3.5f1    C:\Program Files\Unity\Hub\Editor\2018.3.5f1\Editor\Unity.exe
Linux
On Linux, install with the official install script. The CLI goes to ~/.local/bin/unity:
1curl -fsSL https://unity.com/install.sh | bash
2source ~/.bashrc
3unity --version
Unity CLI has no stable release yet, so the install script automatically installs the latest beta:
1  info  No stable release yet -- installing the latest beta instead.
2  ✔  Unity CLI 1.0.0-beta.14 installed!
The Linux version manages only Linux Editors. After I installed the Linux version in WSL and ran unity editors -i, the result was empty, and none of the Editors already installed on Windows showed up. You have to download a Linux Editor separately (the Editor itself for 6000.3.27f1 is about 4.26 GB).
Common steps
The commands below are the same in all three environments. In WSL, replace unity with unity.exe.
Sign in and activate a license
Sign in to your Unity account first, then activate the free Personal license:
1unity auth login
2unity license activate --personal --accept-eula
unity auth login opens a browser to finish signing in, and later commands reuse that sign-in. You can check the current account with unity auth status. --accept-eula means you accept the Personal license terms, and without it the license cannot be activated. If you already have a paid license, replace --personal --accept-eula with --serial <serial number>.
Check versions and the download size
unity releases lists the versions you can install, and a stream of LTS marks a long-term support version:
1version       stream     lts    installed
26000.6.7f1    SUPPORTED  false  false
36000.7.0b6    BETA       false  false
46000.3.27f1   LTS        true   false
56000.0.85f1   LTS        true   false
After you decide on a version, add --dry-run first to see how much it downloads. This option only lists what would happen and does not install anything:
1unity install 6000.3.27f1 -m android --cm --dry-run
Taking the Android module as an example, with the OpenJDK, NDK, and SDK sub-modules that --cm brings in, the total download is 6.68 GB. On my machine the CLI printed the labels in Traditional Chinese: 編輯器 is Editor, 模組 is Modules, 名稱 is Name, 下載 is Download, and 總下載量 is Total download size.
1編輯器
2
3  6000.3.27f1 (x86_64)   3.94 GB
4
5模組
6
7ID                                   名稱                              下載
8android                              Android Build Support           1.44 GB
9android-open-jdk-17.0.18+8           OpenJDK                         112.64 MB
10android-ndk-r27c                     Android NDK                     745.31 MB
11android-sdk-command-line-tools-16.0  Android SDK Command Line Tools  136.84 MB
12(remaining SDK sub-modules omitted)
13
14總下載量:6.68 GB
This table appears only in an interactive terminal. When an AI agent or a script runs the command in the background, the normal output is empty. Add --json and read the totalDownloadSize field instead (in bytes).
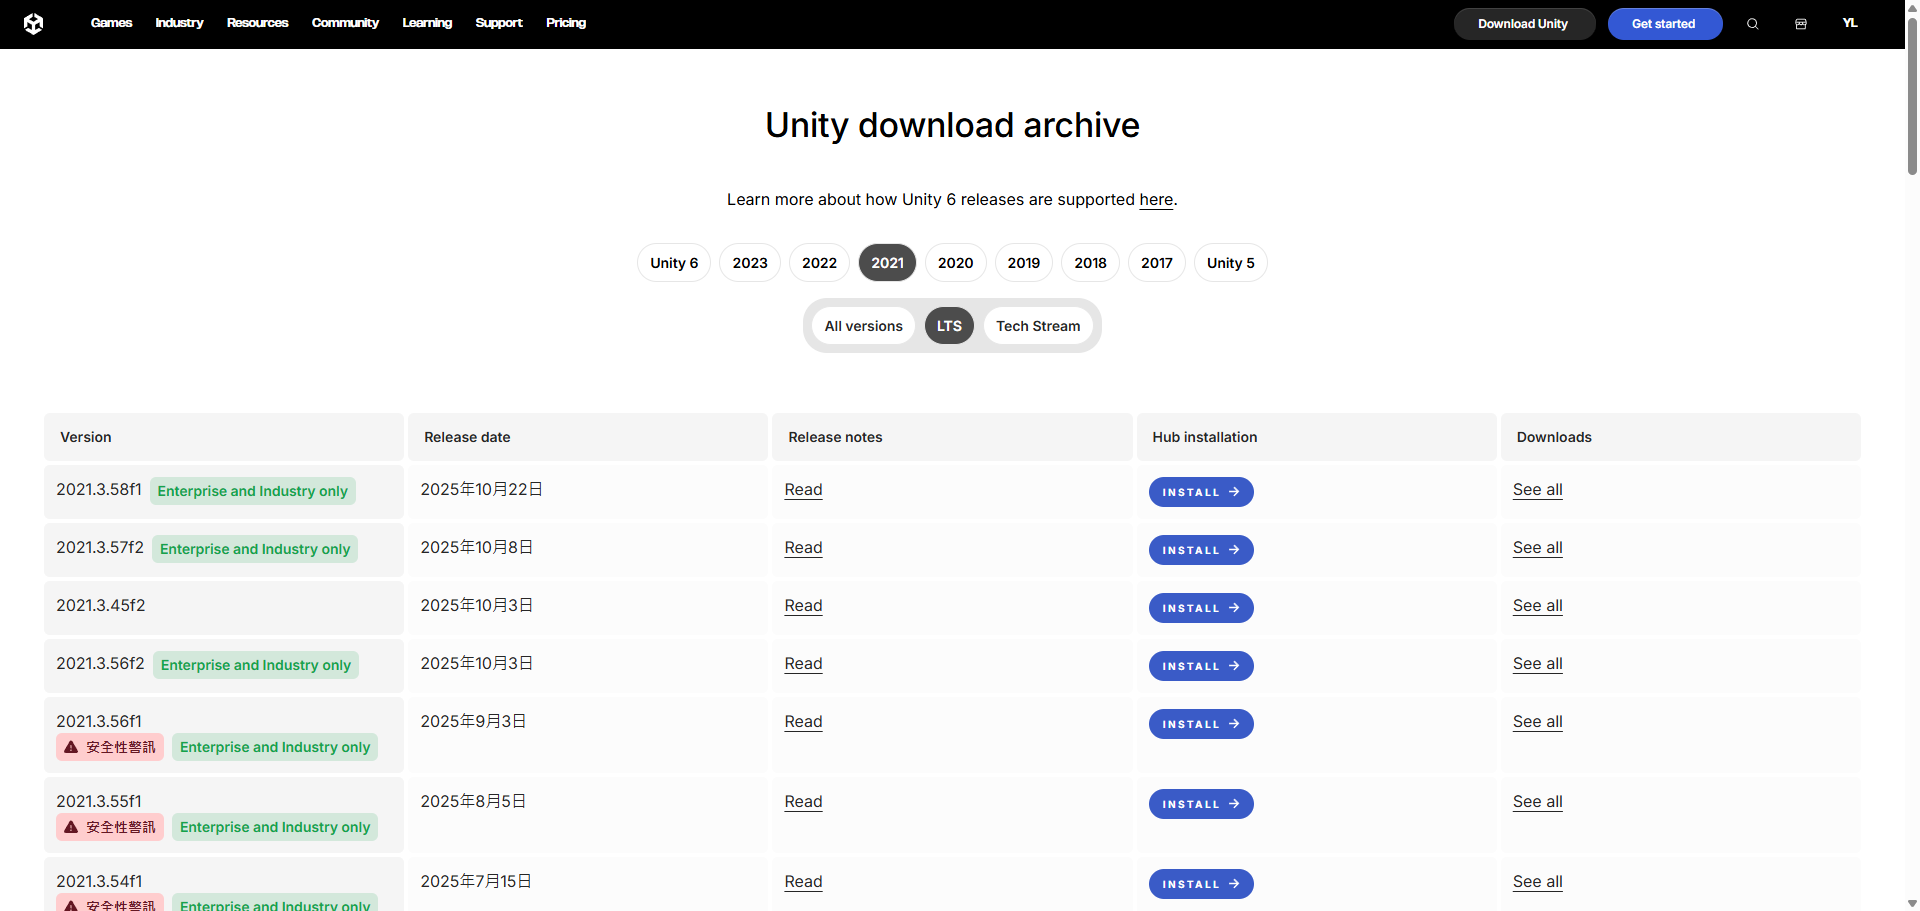
To install an older version such as 2021, first check the license restrictions in the Unity Download Archive. Versions marked “Enterprise and Industry only” are open only to enterprise licenses, and with a Personal license they install but the Editor will not start. The screenshot below was taken in a browser with a Traditional Chinese interface, so the date and the warning banner in it are in Chinese:
Change the install location
One Editor with the Android module takes almost 7 GB, so if the default location does not have enough space, you can move to another drive. Editors install by default to C:\Program Files\Unity\Hub\Editor on Windows or ~/Unity/Hub/Editor on Linux. Before you change it with unity install-path -s, create the target folder, or you get an error that the directory does not exist (「此目錄不存在」 in the Chinese output):
1mkdir D:\Unity\Editor
2unity install-path -s D:\Unity\Editor
When it succeeds, it shows the new location. The Chinese message below means “All Unity Editors will be installed to D:\Unity\Editor”:
1所有 Unity Editor 將安裝至 D:\Unity\Editor
This setting is the same as Unity Hub’s install location, so after you change it, Unity Hub installs to the new location too. To go back, use -s again with the original path. If you only want to install one version into a specific folder, add -d <folder> to unity install. That leaves the install-location setting alone, and the Editor you install is not registered with Unity Hub.
Install an Editor and modules
Remove --dry-run to start the install:
1unity install 6000.3.27f1 -m android --cm
After -m comes a module ID, and you can list several, such as -m android webgl. --cm also installs sub-modules, and it is what brings in the SDK, NDK, and OpenJDK that Android needs. If you are not sure of a module ID, look it up with unity install 6000.3.27f1 --list-modules. If the Editor is already installed and you want to add modules later, use unity install-modules:
1unity install-modules -e 6000.3.27f1 -m webgl --cm
When the install finishes, run unity editors -i. If the list shows 6000.3.27f1 and the modules column includes the modules you chose, the install worked.
Remove an Editor
Check the full version number with unity editors -i first, then remove it:
1unity uninstall 6000.3.27f1
Connect Claude Code to Unity CLI
Unity provides an official plugin for AI agents, and Unity CLI wraps the install steps into one line:
1unity setup claude
This actually runs two Claude Code commands, and you can see them first by adding --dry-run:
1claude plugin marketplace add anthropics/claude-plugins-official --scope user
2claude plugin install unity@claude-plugins-official --scope user
It installs the Unity plugin from Anthropic’s official plugin marketplace at user scope, so every project can use it. The plugin’s unity-cli skill tells Claude Code how to use Unity CLI to install Editors, open projects, and operate a running Editor, and the new-unity-project skill asks you step by step what you need before it creates a new project. You are done when claude plugin list shows unity@claude-plugins-official as enabled. To remove it, use claude plugin uninstall unity@claude-plugins-official.
If Claude Code is installed in WSL, unity.exe setup claude configures Claude Code on Windows, and WSL has no unity command. In that case, run the two claude plugin commands above directly in WSL to install the plugin, and then create a unity link that points to unity.exe, so the unity commands written in the skill also run:
1mkdir -p ~/.local/bin
2ln -s "$(command -v unity.exe)" ~/.local/bin/unity
If you use Codex, run unity setup codex instead. For other supported agents, look them up with unity skill install --list, and to configure only the MCP server, use unity mcp configure.
Other commands you will use
Commands the steps above did not cover but you will use regularly:
| Command | Purpose |
|---|---|
winget upgrade Unity.CLI |
Update the Windows CLI |
unity self-update |
Update a CLI installed with the install script |
unity license |
Show the licenses activated on this machine |
unity open ./MyProject |
Open a project with the Editor version the project specifies |
Troubleshooting
| Symptom | What to do |
|---|---|
The terminal cannot find unity |
Reopen the terminal, then run unity doctor to check the PATH |
unity install-modules cannot find the Editor |
An Editor copied in by hand cannot get extra modules. Reinstall that version with unity install |
-a, -y, or --timeout from the old script behave differently |
Since 1.0.0-beta.14, -a is --architecture, -y is --yes, and --timeout accepts only whole seconds |
Summary
Windows and WSL share the Unity CLI and Editors on Windows, and WSL only needs to call unity.exe. The Linux version manages only Linux Editors, so you download a separate set. Add --dry-run before installing to see the download size, and use unity install-path to move to another drive when space runs short.