Table of contents
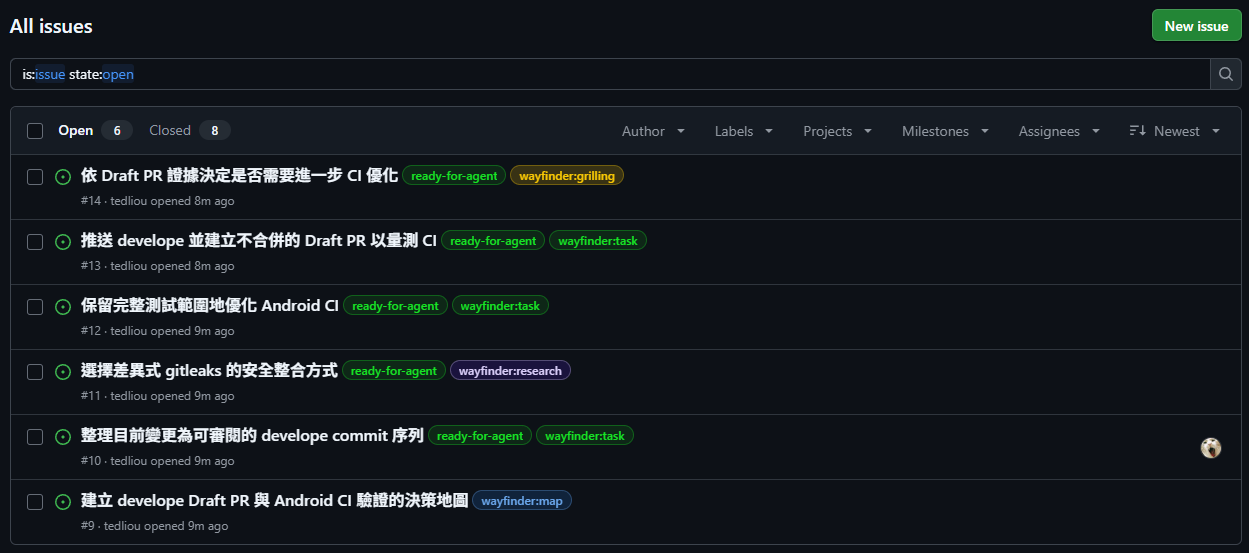
If you hand an agent a requirement and let it start writing the feature, you often find out at acceptance that you and the agent had different behavior in mind. With Matt Pocock Skills, you first discuss the requirement with /grill-with-docs and keep the result in writing, then turn it into a spec with /to-spec, split it into tickets with /to-tickets, and implement the tickets one at a time with /implement.
Matt Pocock Skills is developed by Matt Pocock. Each skill can be used on its own or chained into the flow above. This article uses the skills in Claude Code, manages tickets in GitHub Issues, and follows an Android app example from requirements discussion to implementation.
Install the skills
You need Git and the GitHub CLI, and the GitHub CLI must be logged in to an account that can work with the target repository. The setup step later edits the project’s agent instruction file, and it needs to be able to create issues in that repository. The skills install as a plugin, and both Claude Code in the terminal and the Claude desktop app can use them.
To install from the terminal, follow the official README and install the whole set from the official plugin marketplace:
1claude plugin install mattpocock-skills@claude-plugins-official
By default the plugin is installed at the user level, so every project can use it. To limit it to one project, run the command in the project folder with --scope project, and the setting is written to the project’s .claude/settings.json.
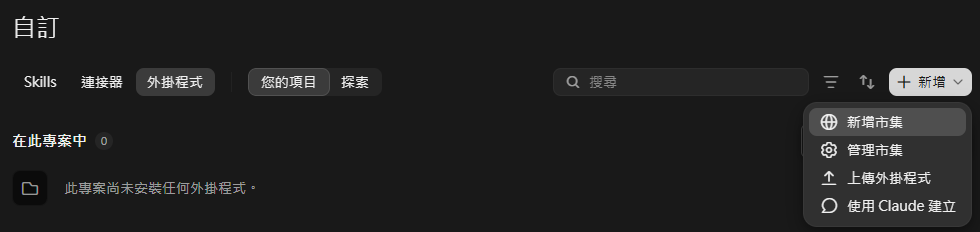
In the Claude desktop app, open the Plugins tab under Customize, choose Add marketplace from the Add menu at the top right, and then choose Add from repository. The screenshots below show the Traditional Chinese interface:
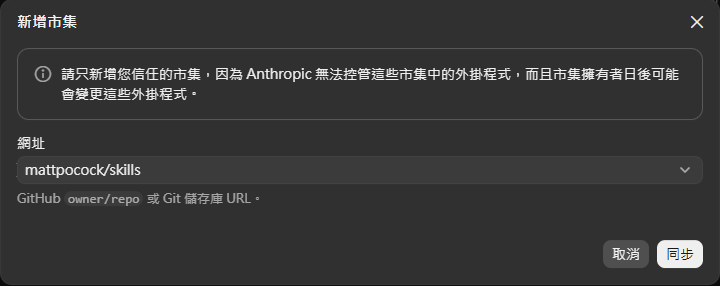
Enter mattpocock/skills as the URL and select Sync:
When the sync finishes, switch to Explore and select Add to this computer next to Mattpocock skills:

When it finishes, open a new conversation and confirm that the agent can find setup-matt-pocock-skills before you set up the project. If you also installed another plugin with skills of the same name, such as to-spec or to-tickets, Claude Code may call the other plugin’s skill. In that case, prefix the command with the plugin name, as in /mattpocock-skills:to-spec.
Set up the project
First tell the agent where tickets go and what format the project documents use. In the target project, call Setup Matt Pocock Skills, and include requirements for the language of the documents and the conversation:
1/setup-matt-pocock-skills This project uses GitHub Issues to manage tickets, and documents and communication are in English. First confirm the current repository and the existing agent instructions, and keep the existing project rules.
Setup checks the repository, the existing instruction files, and the documentation layout, and then proposes a configuration for you to confirm. What you need to check is whether the GitHub repository is right and which instruction file it plans to write the settings to. If the project already has an AGENTS.md or CLAUDE.md, keep using the existing arrangement.
When setup is done, the ticket location is recorded in docs/agents/issue-tracker.md, and the domain documentation layout in docs/agents/domain.md. If Triage is installed, the ticket labels are set up as well. Later skills read these settings, so you do not need to say again where tickets should be created.
Clarify requirements with Grill with Docs
Suppose you want an Android app that shows a website in a WebView. Start by giving the behavior you want to /grill-with-docs, and let the agent confirm the undecided parts step by step:
1/grill-with-docs Build an Android app that opens a full-screen WebView and loads https://vervecode.dev by default. Links to the same domain stay in the WebView, and links to other domains open in Custom Tabs. Use Android Gradle and Kotlin. First check the current environment and the official compatibility documentation, and propose a version combination that works. We need local unit tests, Android device tests, and a GitHub Actions build. Discuss in plain, easy-to-follow English, attach a suggested answer to each question, and record the confirmed terms and important decisions in the project documents. Finish the requirements discussion in this stage and do not start implementing.
The agent breaks the requirement into rounds of questions. It checks the facts it can find in the environment or the code, and leaves the behavior you have to decide for discussion. Whether “other domains” includes subdomains, whether the back button should go to the previous page or leave the app, and what to show when the connection drops all affect what you end up with.
You can accept a suggestion or describe the behavior you want. If a question is unclear, ask it to restate it as a concrete scenario, such as “After a user taps an external link and presses back, where do they land?” Once the behavior is settled, move on to the next round.
According to the official Grill with Docs definition, this skill combines requirements interviewing with domain modeling. Confirmed terms are written to GLOSSARY.md, and only important decisions whose trade-offs should be kept are recorded separately as ADRs. GLOSSARY.md is a glossary. The full functional specification comes in the next step.
Before the discussion ends, ask the agent to summarize in one paragraph what is going to be built and what is still undecided. When you agree you both understand it the same way, you can turn this conversation into a spec.
Write the spec with To Spec
In the same conversation, run /to-spec so the agent builds on the confirmed requirements and decisions:
1/to-spec Turn the Android app requirements we just confirmed into a spec and publish it to this project's GitHub Issues. Include the user scenarios, the implementation and testing decisions, and what is out of scope this time.
According to the official To Spec definition, this step organizes the existing conversation and does not run the requirements interview again. It still confirms at which level the feature should be tested, and then publishes the spec to the configured ticket tracker.
Open the spec issue it produced and walk through the real flow: launch the app, open a page on the same domain, follow an external link, and press back. This behavior should match the earlier discussion, and you should be able to see what is out of scope. For example, if offline caching was never discussed, a full offline reading feature should not suddenly appear in the spec.
If something is missing, fix the spec before you split tickets. Even if you start a new conversation later, you can give the agent the spec issue link and it will read the confirmed content.
Split the spec into tickets with To Tickets
Once the spec is confirmed, run /to-tickets with the link to the issue you just produced. Replace the content in angle brackets with your own link:
1/to-tickets <spec issue link>
The agent first proposes how to split the work, listing the behavior each ticket delivers and the dependencies between them, and creates the issues only after you confirm the granularity. According to the official To Tickets definition, a typical feature is split into small, complete flows that can be demonstrated or verified on their own.
For this app, the first ticket can go as far as “load the default site when the app starts”, including the necessary project setup and tests. A later ticket adds sending external links to Custom Tabs. This way each finished ticket gives you something you can actually operate, and it is easier to tell which step a problem came from.
When you check the split, make sure the acceptance criteria are concrete and the dependencies make sense. Handling external links needs a working WebView first, so it should depend on the earlier ticket. After you confirm, let the agent create the issues. Tickets get the ready-for-agent label by default.
Decide the next step from the issue label
After the tickets exist, look at the labels first and decide whether to keep discussing or hand the ticket to the agent. According to the official Triage definition, bug and enhancement mark the type of work, and the other five state labels say who needs to do what now. The table lists the default issue labels. If you renamed them during setup, check the project’s docs/agents/triage-labels.md.
| Issue label | Meaning | Suggested action |
|---|---|---|
needs-triage |
Waiting for a maintainer to assess the requirement, scope, and approach. | Assess the issue with /triage. If the requirement is still unclear, clarify it with Grilling and add the decisions, then move it to a suitable state. |
needs-info |
Information from the reporter is missing, so the issue cannot be judged or implemented yet. | Fill in what the ticket asks for, such as reproduction steps, error messages, or expected behavior, then reassess with /triage. |
ready-for-agent |
The spec is clear enough to hand to an agent. | Confirm that every “Blocked by” ticket is done, then use /implement with this ticket’s link. |
ready-for-human |
Needs human work and is not yet suitable for an agent to finish directly. | Read the reason in the ticket, and handle the judgment, external access, or manual verification it needs. When the rest can go to an agent, reassess the state. |
wontfix |
A decision was made not to handle this request. | Read the reason for declining and do not schedule it. When new requirements or evidence appear, discuss again first whether to handle it. |
bug |
An existing feature is broken. | Confirm how to reproduce it and what the expected result is, then handle it by its current state label. bug alone does not mean it is ready to implement. |
enhancement |
A new feature or an improvement to an existing one. | Confirm the requirement and acceptance criteria, then handle it by its current state label. enhancement alone does not mean it is ready to implement. |
For example, a ticket labeled both enhancement and needs-triage means the improvement still needs assessment. Enter the command below to have the agent read the ticket and the earlier discussion and then confirm what decisions are still missing:
1/triage Assess <issue link>, and confirm the requirement, acceptance criteria, and current state. If design decisions need to be added, take me through Grilling and write the confirmed conclusions back to the ticket.
Move it to ready-for-agent only when the requirement is complete and suitable for an agent. Questions that were already confirmed do not need a new round, and a ticket that lacks information from the reporter stays at needs-info until the information is filled in and it is assessed again. Each issue that has been through Triage should have one type of work and one state, and if the states conflict, sort that out first.
Unless there is a reason not to, I handle tickets one at a time, so the scope of each implementation and acceptance stays clear.
Implement one ticket at a time with Implement
First confirm that the current branch is the development branch you expect, then open a new conversation and give it one ticket that is ready to work on:
1/implement <implementation ticket link> Read the ticket and its parent spec, confirm that the prerequisites are done, implement only the scope of this ticket, run the tests against the acceptance criteria, and report the results.
The official Implement definition asks the agent to use TDD where it fits, run type checks and the relevant tests along the way, run the full test suite at the end, and call Code Review. When it finishes, it commits to the current branch, so confirm the branch before you start, and do not expect it to open a new one for you.
When the implementation is done, check the test results, and also try the behavior against the ticket’s acceptance criteria. Android device tests need an emulator or a real device. If the environment cannot run them, list them explicitly as unverified, and call the ticket done only after you have added the tests. Then review and merge according to your project’s process, check the issue state, and move on to the next ticket whose dependencies are cleared.
If you need to change the requirements midway, stop and discuss first, update the spec and the affected tickets, and then continue. If you change them only in the implementation conversation, the next conversation will still read the old spec.
Summary
I use this skill set at work all the time. The agent organizes requirements, writes code, and runs tests, and you confirm the direction at three outputs: the spec, the tickets, and the implementation results. When requirements change, you also know which one to update.