Table of contents
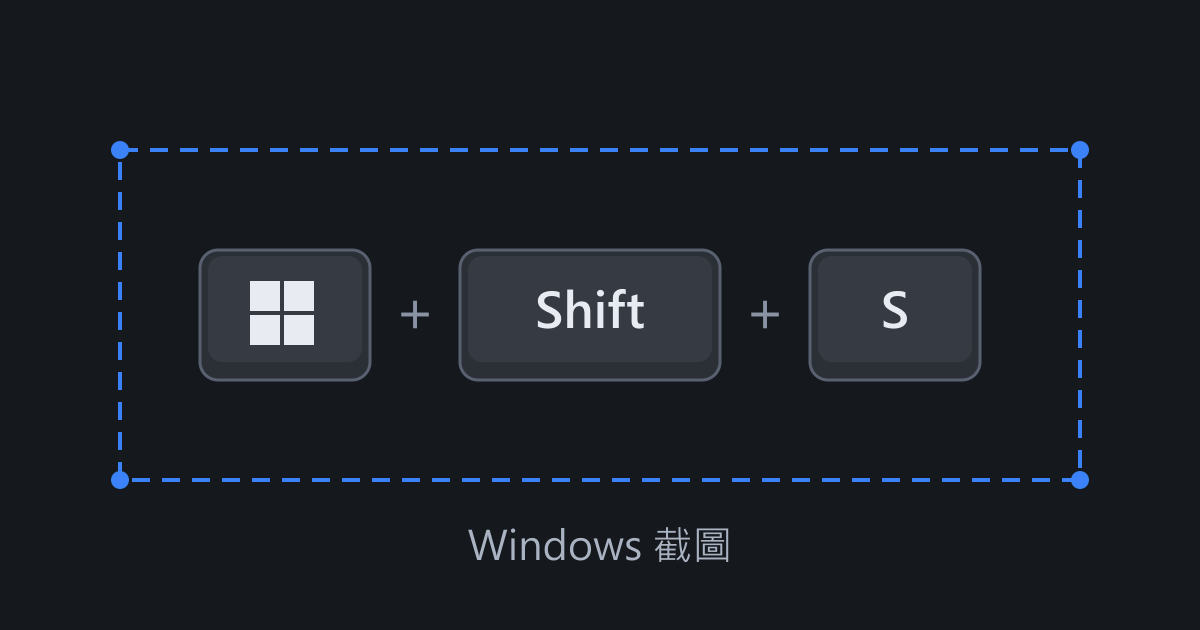
The most common screenshot shortcut in Windows 11 is Win + Shift + S. After you select an area, the image is copied to the clipboard and also saved automatically in the “Pictures > Screenshots” folder. If you press Alt + PrtSc, or PrtSc after you turn off its setting, the image exists only on the clipboard, and you have to press Ctrl + V where you want to paste it before you can see it.
I tested the built-in shortcuts on Windows 11 with Snipping Tool 11.2607. The second half covers the capture and save settings of ShareX 21.0, PicPick 7.6.1, and Snipaste 2.11.3.
Built-in screenshot shortcuts
| Shortcut | What it captures | After the capture |
|---|---|---|
Win + Shift + S |
A rectangle, window, full screen, or freeform area | Copied to the clipboard and saved automatically |
PrtSc |
The whole screen | Copied to the clipboard, or opens Snipping Tool (see the setting below) |
Alt + PrtSc |
The active window | Copied to the clipboard only |
Win + PrtSc |
The whole screen | Saved directly as a file |
Win + Shift + S: select an area with Snipping Tool
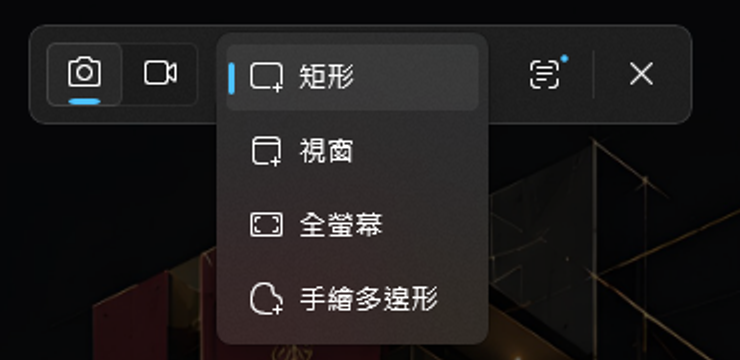
Press Win + Shift + S and the screen dims, with the Snipping Tool toolbar at the top. The mode menu on the toolbar switches between “Rectangle”, “Window”, “Full screen”, and “Freeform”. The default is Rectangle, and you drag to select the area.
This screenshot is from Traditional Chinese Windows. The mode menu on the toolbar lists the four modes, which are Rectangle, Window, Full screen, and Freeform (the last one is labeled as a freehand polygon in the Chinese interface).
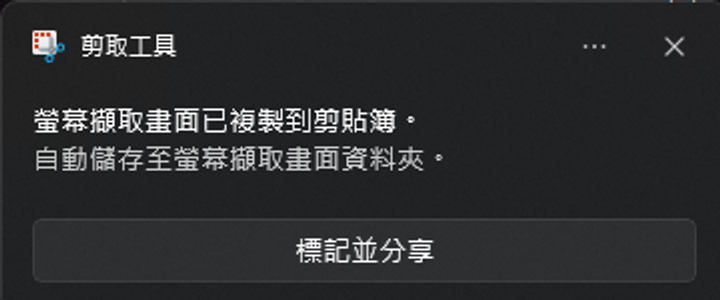
The notification in this screenshot is in Traditional Chinese. It says the screenshot was copied to the clipboard and saved automatically to the Screenshots folder.
PrtSc and Alt + PrtSc
When I pressed Alt + PrtSc with Notepad in front, the clipboard held an image the size of the Notepad window only, and no new file appeared in the folder.
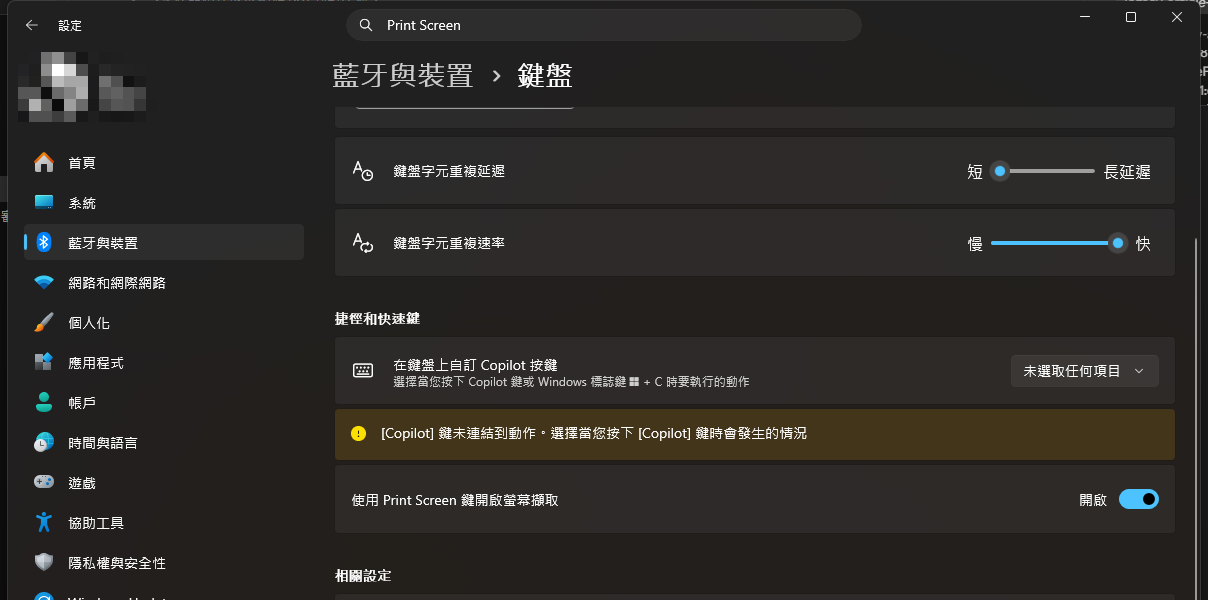
The behavior of PrtSc is set under “Settings > Bluetooth & devices > Keyboard” by “Use the Print screen key to open screen capture”. After a Windows 11 update this option is on by default, and PrtSc opens screen capture in Snipping Tool. A PC where you changed it by hand keeps its earlier setting. When the option is off, PrtSc captures the whole screen to the clipboard and does not save a file.
The Settings page in this screenshot uses a Traditional Chinese interface. The “Bluetooth & devices > Keyboard” page shows “Use the Print screen key to open screen capture” turned on.
PrtSc while ShareX or PicPick was running, and in both cases the app took the screenshot and Snipping Tool did not appear.
Win + PrtSc and where files are saved
If your keyboard has no PrtSc key, Microsoft’s print screen shortcut documentation says you can press Fn + Win + Space bar instead of Win + PrtSc. Files from this shortcut have sequentially numbered names such as Screenshot (1).png. Files that Snipping Tool saves automatically are named by date and time, for example Screenshot 2026-10-03 221438.png. Both go to “Pictures > Screenshots” in File Explorer.
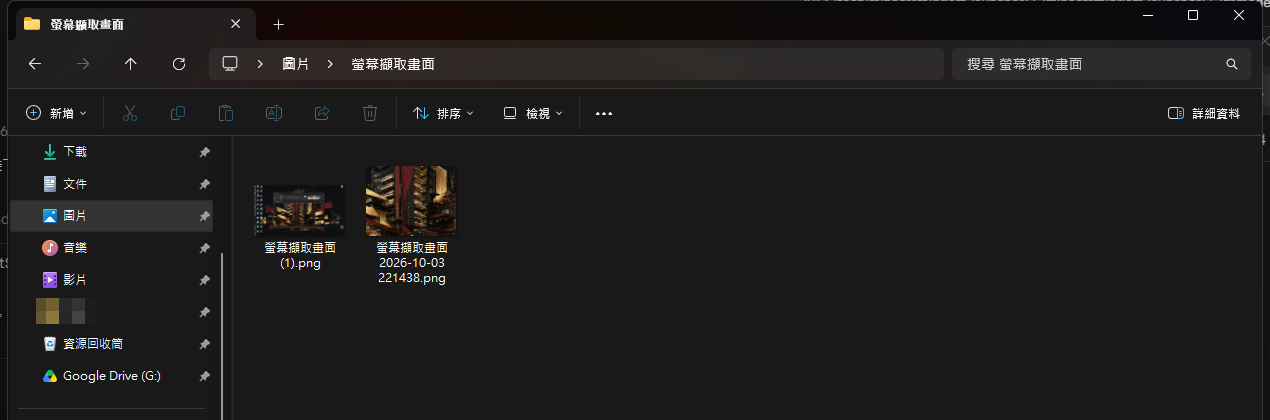
The folder in this screenshot is named in Traditional Chinese Windows, and the files carry the Chinese name prefix. It holds two screenshots, one saved by Win + PrtSc and one by Win + Shift + S.
This screenshot of Snipping Tool settings is in Traditional Chinese. In the snipping section, “Automatically save original screenshots” is on, and below it are the save location and the Change link.

ShareX: save automatically and run follow-up actions
ShareX is an open-source screenshot tool. After each capture it can run a chain of actions you configure, such as saving, copying, opening an editor, or uploading. Install it with WinGet:
1winget install --id ShareX.ShareX -e --source winget
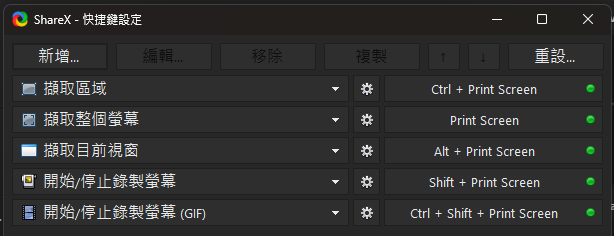
“Hotkey settings” on the left of the main window lists the capture methods. Print Screen in the interface is the PrtSc key. The defaults are Print Screen for the entire screen, Ctrl + Print Screen for a region, and Alt + Print Screen for the active window. A green light on the right means the hotkey is registered.
This ShareX screenshot uses a Traditional Chinese interface. The hotkey settings window lists the capture region, capture entire screen, capture active window, and screen recording hotkeys, all with green lights on the right.
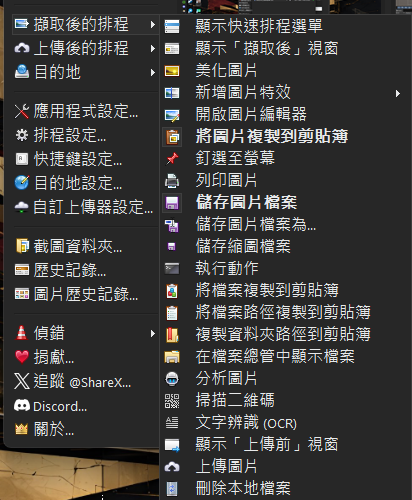
In this Traditional Chinese interface, the after capture tasks menu shows “Copy image to clipboard” and “Save image to file” in bold, which means they are checked.
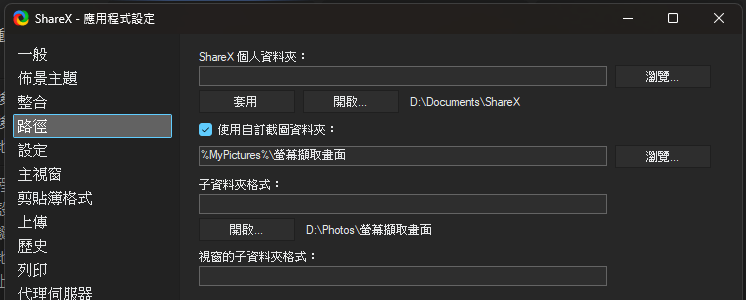
Screenshots folder under the “ShareX personal folder”. To change the location, go to “Application settings > Paths”, check “Use custom screenshots folder”, and enter a path. The actual folder is shown below the field.
The Paths page in this screenshot is in Traditional Chinese. “Use custom screenshots folder” is checked, and the path is %MyPictures%\螢幕擷取畫面, which is the Chinese name of the Screenshots folder.
PicPick: open the editor right after capture
PicPick opens its built-in image editor right after a capture, so you can add text, arrows, shapes, or a mosaic at once. Install it with WinGet:
1winget install --id NGWIN.PicPick -e --source winget
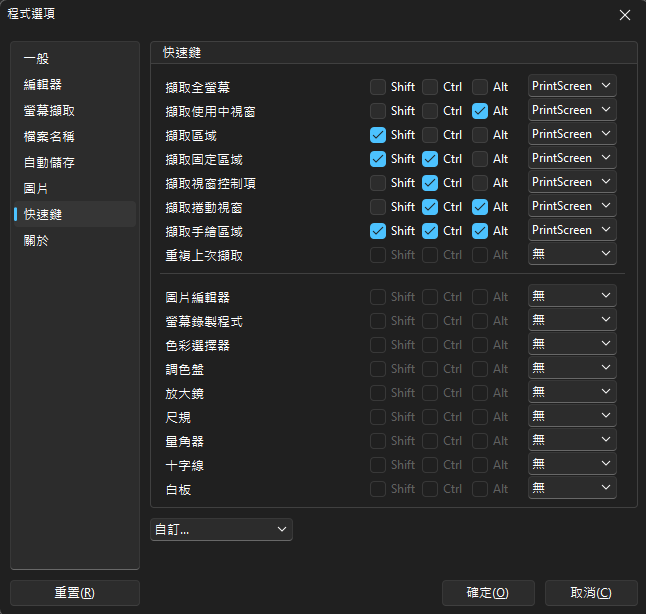
The hotkeys are under “Program Options > Hotkeys”. After this installation, the defaults were PrtSc for the full screen, Alt + PrtSc for the active window, and Shift + PrtSc for a region. Other capture methods, such as fixed region and scrolling window, also use PrtSc with a modifier key.
This PicPick screenshot uses a Traditional Chinese interface. The hotkeys page of the program options shows that the combinations for capturing the full screen, active window, and region all use PrintScreen.
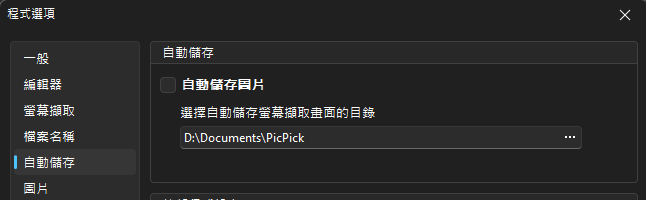
In this Traditional Chinese interface, the auto save page of the PicPick program options shows the automatic image saving option unchecked, with the save directory below it.
Snipaste: copy, save, or pin on screen after you select an area
Snipaste is the screenshot tool I mainly use now. At home and in other places I use both Windows and macOS devices, and Snipaste has a version for each system, so I get the same capture workflow and hotkeys on whichever device I use.
Besides capturing, Snipaste can pin a screenshot above everything else on the screen, which is handy when you work while looking at a reference. The Windows version is available from the website or the Microsoft Store, and you get the macOS version as a DMG from the official download page. According to the official Snipaste Pro documentation, the free 2.x version is for personal use only, and commercial use requires Snipaste Pro or version 1.x.
According to the official Snipaste documentation, F1 starts a capture by default. After you select an area, a toolbar appears below it. The first part of the toolbar holds the annotation tools, and the buttons at the far right decide what happens to the screenshot:
- Copy to the clipboard:
Ctrl + CorEnter - Save as a file:
Ctrl + S - Pin to the screen:
Ctrl + T - Cancel:
Esc
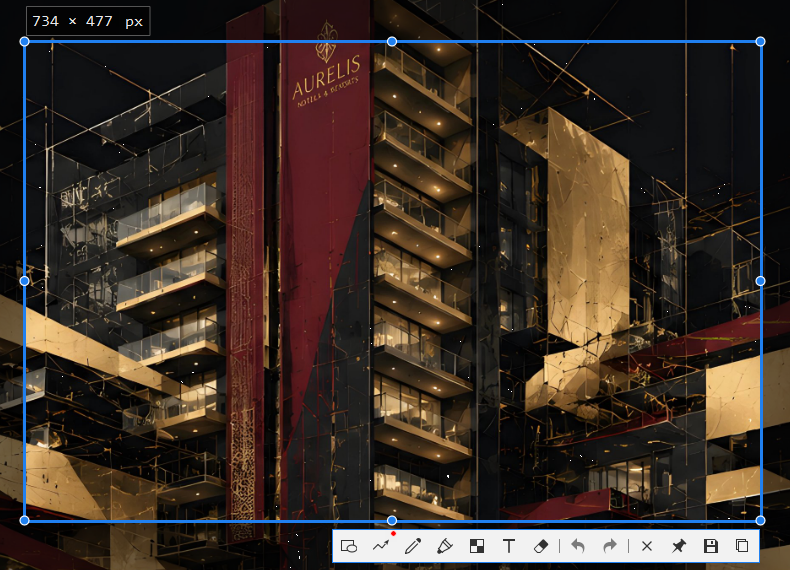
Ctrl + C or Ctrl + S, deciding right then what to do with the image. For an image I only want to send to someone, I press Ctrl + C to put it on the clipboard and paste it into Discord or LINE. For an image I need later, I press Ctrl + S to save a file. Snipaste does not save automatically by default. If I press Esc to cancel without copying, saving, or pinning, no image file is left behind, so the folder does not fill up with screenshots I sent only once.
Summary
Among the built-in Windows 11 shortcuts, only Win + Shift + S both copies and saves automatically. Switch to ShareX, PicPick, or Snipaste when you want fixed hotkeys, automatic saving, or editing right after capture.