Table of contents
When a player runs into land nobody has visited, the Minecraft server has to generate new chunks (a chunk is a 16 × 16 block unit of the map) on the spot. When several players explore at once, chunks may not arrive in time, and the map shows holes. Chunky is a plugin that pregenerates chunks. You set a center and a radius, and it generates that area before players enter it.
I tested on Windows 11, an i7-12700, Java 25, and Paper 26.3. All commands in this article go in the server window. If your server still runs Spigot, you can migrate it to Paper first.
What pregeneration changes
With one player, pregeneration makes almost no difference, so you do not need to bother. With four players exploring at once, a world that is not pregenerated has chunks that fail to arrive. The weaker the computer and the faster the players move, the more obvious it is. After pregeneration, all chunks arrive. If the server lags even when nobody is exploring, chunk generation is not the cause, and you should find the source of the lag with spark.
Install Chunky
You can download Chunky from Modrinth or Hangar. Version 1.5.66 supports Paper 26.1 through 26.3, and the file is Chunky-Paper-1.5.66.jar. Your world and server.properties stay untouched:
- Type
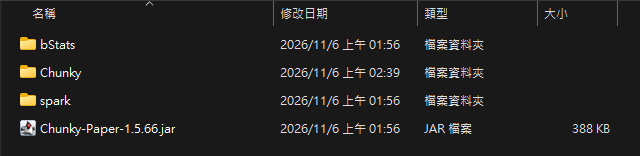
stopin the server window and wait for the server to stop. - Put the downloaded jar in the
pluginsfolder inside the server folder, as shown below. - Start the server, then type
plugins. If Chunky appears in the list, the installation is done.
The File Explorer screenshot in this article uses a Traditional Chinese interface. The file and folder names are the same in English.
Choose a radius
By default, Chunky generates a square, and the radius is the distance from the center to an edge, so a radius of 1000 means 2,000 × 2,000 blocks. These are the world sizes and times after generating the overworld:
| Radius | Area covered | World size | Time |
|---|---|---|---|
| 500 | 1,000 × 1,000 blocks | 55 MB | 19 seconds |
| 1000 | 2,000 × 2,000 blocks | 173 MB | 1 min 5 s |
| 2000 | 4,000 × 4,000 blocks | 632 MB | 4 min 2 s |
On a weaker computer, the time gets longer. When I limited the server to 4 CPU threads, a radius of 2000 took 16 min 18 s. Chunky’s official documentation suggests starting with a smaller radius. When you want a larger area later, set the new radius and generate again. In my test, chunks that already existed were skipped, and the original blocks were still there.
Generate the overworld
After you decide on a radius, type these three lines in the server window, and Chunky starts generating. You can replace the center with the coordinates you want, for example chunky center 100 -50:
1chunky center 0 0
2chunky radius 1000
3chunky start
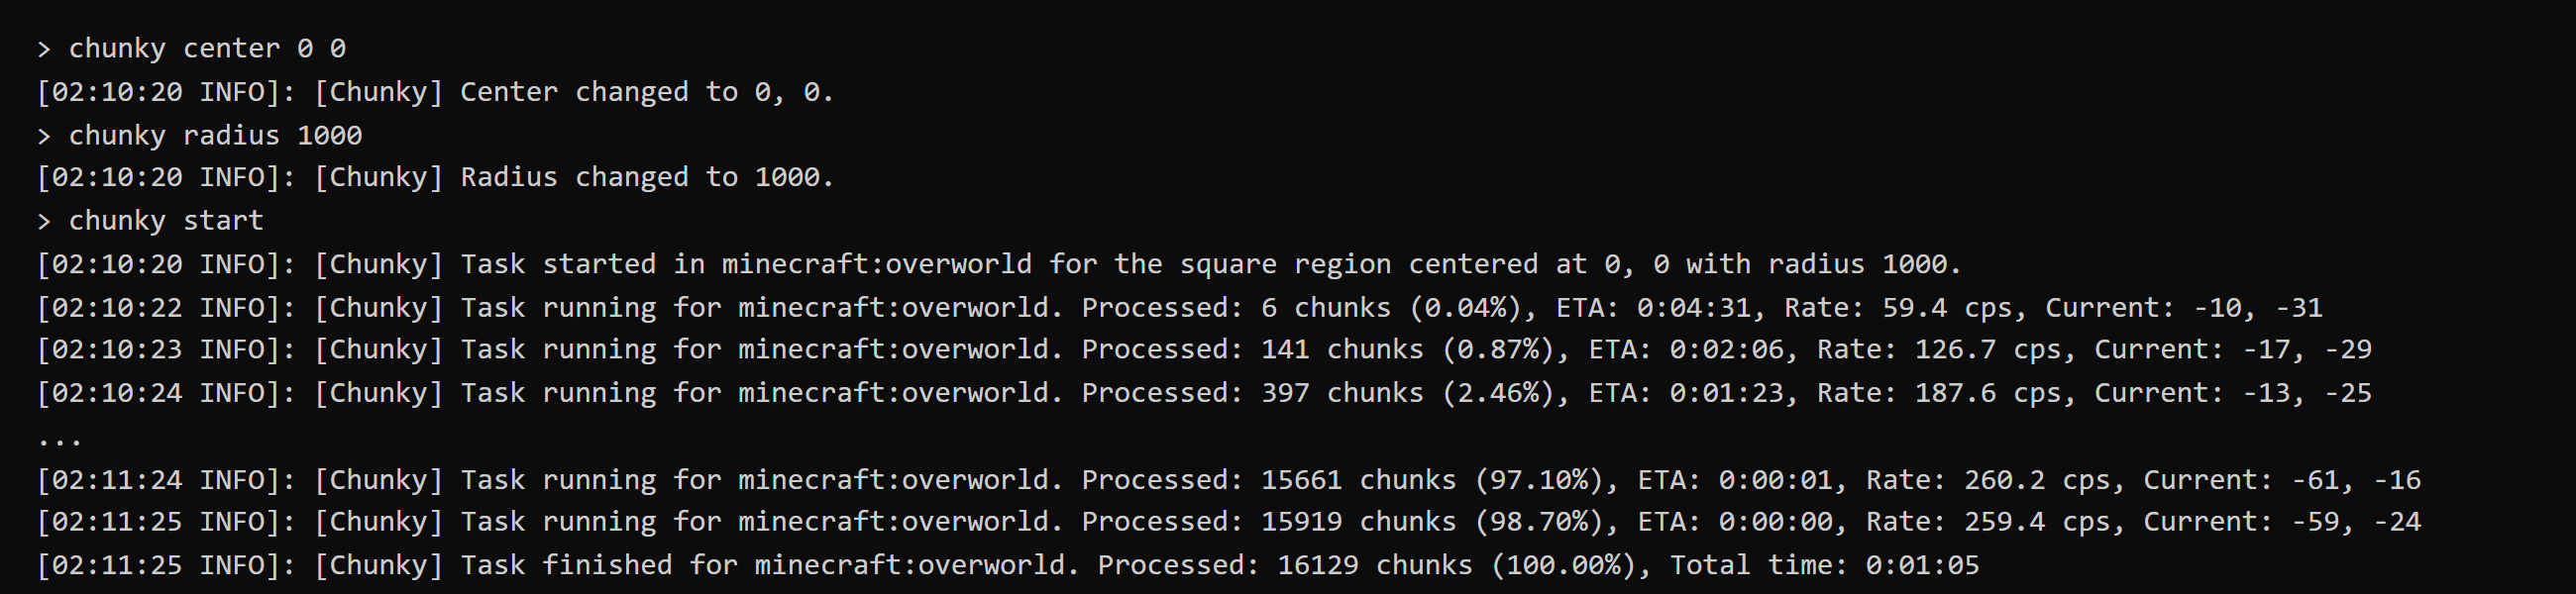
After it starts, the console prints one progress line per second. When it prints Task finished with 100.00%, it is done:
ETA is the estimated time left. It is high at the start. For example, the screenshot first shows 4 min 31 s, while the task actually took 1 min 5 s. While a task runs, you can control it with these commands:
| Command | Use |
|---|---|
chunky progress |
Prints the current progress |
chunky pause |
Pauses the task and keeps the progress |
chunky continue |
Continues from the saved progress |
chunky cancel |
Cancels the task. Type chunky confirm to confirm |
You can stop the server in the middle of generation. After you restart it, type chunky continue and the task resumes.
The Nether and the End
After the overworld is done, switch dimensions with chunky world. The center carries over, and you set the radius again for each dimension. The Nether is 1:8 in distance compared with the overworld, so a radius of 1000 in the overworld corresponds to a radius of 125 in the Nether:
1chunky world the_nether
2chunky radius 125
3chunky start
After you see Task finished for minecraft:the_nether, generate the End:
1chunky world the_end
2chunky radius 1000
3chunky start
Write the dimension names as the_nether and the_end. If you type world_nether, Chunky prints World world_nether not found and lists the available names.
Set a world border
Chunky only generates chunks. It does not limit where players can go, and when a player walks outside the generated area, the server still has to generate on the spot. To keep players inside the area, use the vanilla world border. The number in worldborder set is the side length, which is twice the radius. After you set the border, chunky worldborder reads the border as the center and radius:
1worldborder center 0 0
2worldborder set 2000
3chunky worldborder
4chunky selection
5chunky start
If chunky selection shows Radius: 1000, it read the border correctly. Each dimension has its own border, and typing worldborder in the server window only changes the overworld.
Test notes
I measured the radius comparison in new worlds with the same seed and no players connected. The times above are from the 20 threads of the i7-12700. The exploring players in the comparison are a test program I wrote. It logs in to the server with the vanilla protocol and sends movement packets, and it has no game view. I alternated the combinations for 3 runs each, and the world that was not pregenerated was a new world every time. This is the share of chunks in view distance that did not arrive. The pregenerated world was 0% in all these combinations:
| Players and speed | CPU threads | World not pregenerated |
|---|---|---|
| 1 player, 30 blocks per second | 20 | 0% |
| 4 players, 30 blocks per second | 20 | 9% |
| 4 players, 10 blocks per second | 4 | 35% |
| 4 players, 30 blocks per second | 4 | 97% |
Other programs were also running on the same computer during the tests, so the results fluctuate. For example, with 4 players and 20 threads, the three runs gave 23%, 3%, and 0.3%.
Summary
For pregeneration, choose the radius from your disk space and the time you have, and then handle the three dimensions in order. In my test with one player, pregeneration made almost no difference, and with four players the world that was not pregenerated had chunks that did not arrive in time.