Table of contents
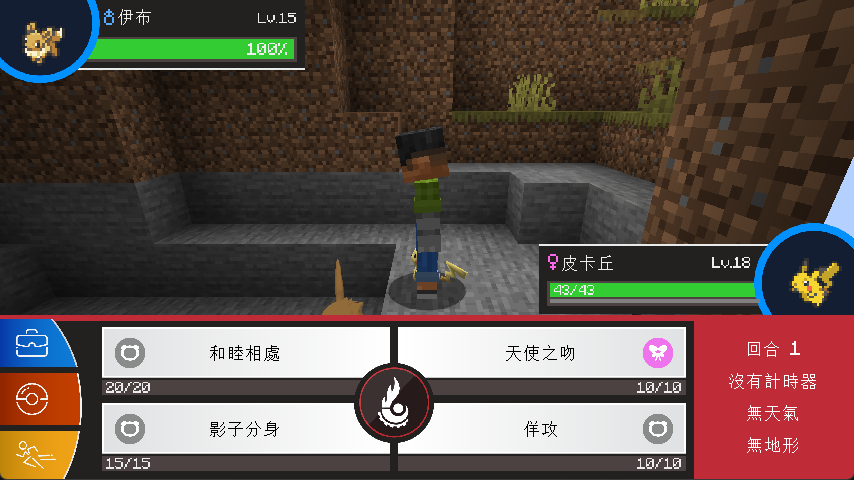
Pixelmon is a mod that adds Pokémon to Minecraft. After you have played it on your own computer, you may want to set up a server and play with friends, but players cannot connect when the server and the player have different versions. If you move the mods your game uses onto the server, your friends can join the same world once they install the same versions.
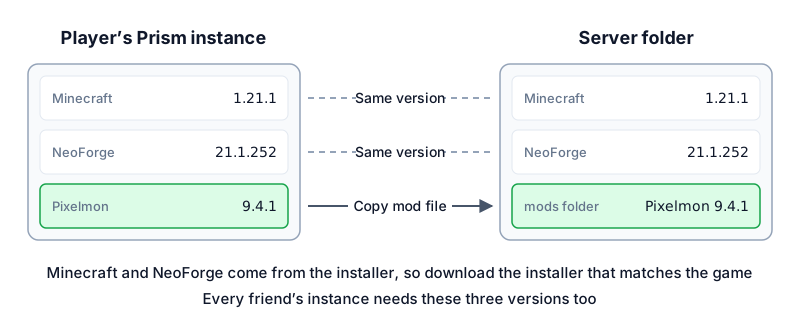
I tested on Windows 11, with the same versions as in the tutorial for installing Pixelmon on your own computer: Minecraft 1.21.1, NeoForge 21.1.252, and Pixelmon 9.4.1.
Versions that must match
In Prism, right-click the instance, choose “Edit…”, and open the “Version” page to see the Minecraft and NeoForge versions. The File Explorer screenshot in this article uses a Traditional Chinese interface, but the file names are the same as on an English version of Windows. In the screenshot below, Minecraft is 1.21.1 and NeoForge is 21.1.252:
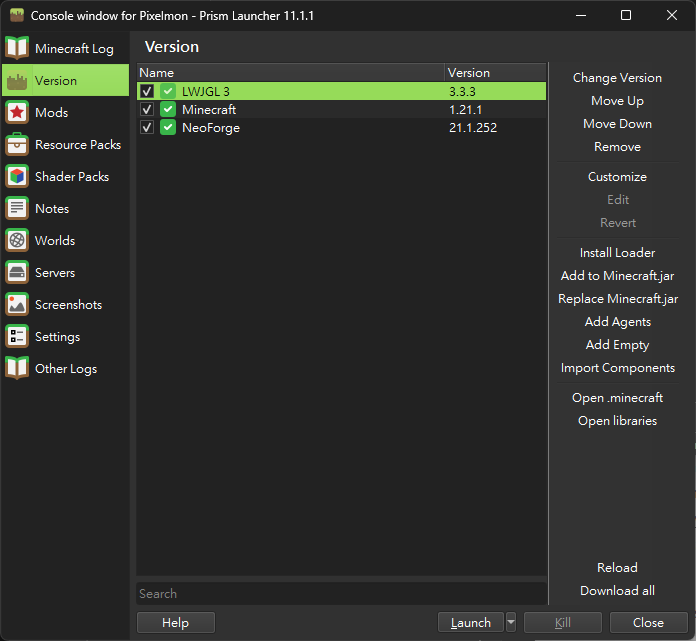
mods folder. For example, Pixelmon-1.21.1-9.4.1-universal.jar is 9.4.1. The server has to use the same versions, and you can copy the Pixelmon file straight from your game. The version comparison looks like this:
Install a NeoForge server
After you confirm the versions, create a new empty folder as the server folder, for example pixelmon-server. Then download the NeoForge installer with the same version as your game. In the URL, replace 21.1.252 with the NeoForge version shown on Prism’s Version page:
1https://maven.neoforged.net/releases/net/neoforged/neoforge/21.1.252/neoforge-21.1.252-installer.jar
Put the downloaded jar in the server folder, open Command Prompt in this folder, and run the install command from the NeoForge documentation:
1java -jar neoforge-21.1.252-installer.jar --installServer
The installer downloads the Minecraft server and the libraries it needs, and finally prints The server installed successfully. The folder now has libraries, run.bat, and user_jvm_args.txt. You can delete the installer itself after installation.
Set Java and memory
run.bat starts the server with the computer’s default java, and both NeoForge and Pixelmon require Java 21 for Minecraft 1.21.1. Open Command Prompt in the server folder and type java -version. If the first line starts with 21, you do not need to change Java.
If it shows another version, you do not need to install anything else. Prism already downloaded Java 21 when it installed Pixelmon. The file is at java\java-runtime-delta\bin\java.exe under the Prism folder, and you can make the server use it directly, without touching the computer’s default Java.
Open run.bat in Notepad and replace the java at the start of the second-to-last line with this full path. Leave the other lines alone. Whether or not you changed Java, add nogui after win_args.txt, so you can type commands in this window. After the change, the line looks like the one below. Replace the path with your own Prism folder, and keep the quotation marks around it:
1"E:\minecraft\tools\PrismLauncher\java\java-runtime-delta\bin\java.exe" @user_jvm_args.txt @libraries/net/neoforged/neoforge/21.1.252/win_args.txt nogui %*
Next, set the memory. The official Pixelmon server installation page asks for at least 4 GB. Open user_jvm_args.txt and delete the # at the start of the last line # -Xmx4G. After you save the file, this line takes effect:
1-Xmx4G
EULA and the Pixelmon mod file
Double-click run.bat. The first start creates mods, config, and eula.txt, and then stops. The window shows You need to agree to the EULA in order to run the server. Press any key to close the window. Read the Minecraft EULA, and if you agree, open eula.txt in Notepad and change eula=false to eula=true.
This start did not generate a world yet, so add Pixelmon now. When the world is generated for the first time, it then includes the Pixelmon structures and villages:
- Open
minecraft\modsin the Prism instance folder. - Copy
Pixelmon-1.21.1-9.4.1-universal.jar. The game still needs it, so copy it and do not cut it. - Paste it into the
modsfolder of the server folder. Do not extract it. When you are done, it looks like the screenshot below.

mods folder only needs this one jar.
Confirm Pixelmon is loaded
After you put the mod in place, double-click run.bat again. Pixelmon takes longer to start than vanilla. When the last line shows Done, the startup is finished. During startup, many WARN lines and a few ERROR lines scroll by, for example Couldn't load tag pixelmon:spawning/drowned. If Done appears at the end, you can ignore them:
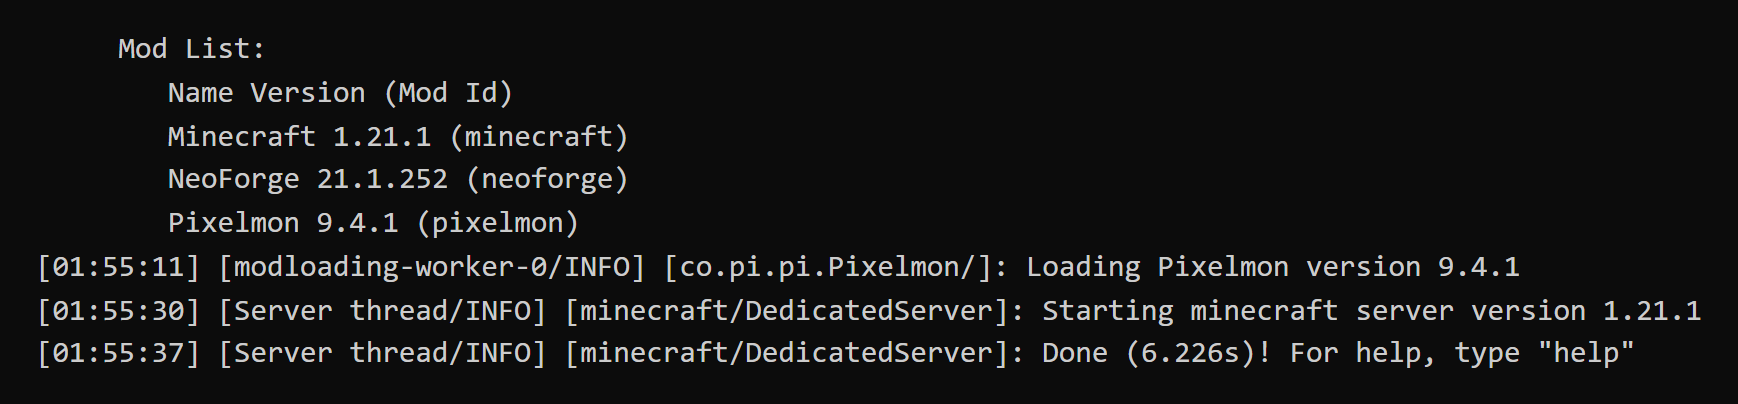
neoforge tps list then includes Pixelmon’s dimension pixelmon:ultra_space, and pokespawn pikachu answers Server successfully spawned Pikachu:
1neoforge tps
2pokespawn pikachu
If pokespawn answers Unknown or incomplete command, this server did not load Pixelmon. Go back and check that the jar is in the mods folder.
Connecting and version errors
After the server shows Done, you can connect with the Prism instance that has Pixelmon installed. How to enter the address and the firewall tips are in the connection steps for a vanilla server, and they work the same for a Pixelmon server. Friends who are not on the same local network can only connect through port forwarding on the router.
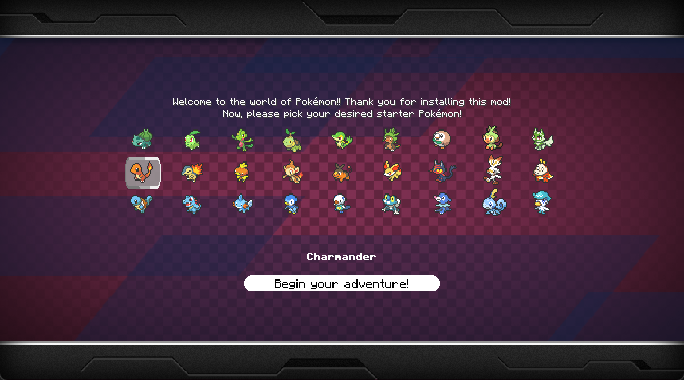
The first time you enter the world, the game shows the starter selection screen. When you see this screen, the connection works:
| Message or situation | Cause | What to do |
|---|---|---|
The game shows “Connection Lost” and Channel of mod "Pixelmon" failed to connect |
The player and the server have different Pixelmon versions | Switch both sides to the same Pixelmon version |
| The game shows “Incompatible client! Please use 1.21.1” | The player used a game of another Minecraft version | Connect with the Prism instance that has Pixelmon |
| You can enter the world, but there is no starter selection screen | The server did not load Pixelmon | Check the server’s mods folder |
The server window shows Mod pixelmon requires minecraft 1.21.1 |
NeoForge matches another Minecraft version | Reinstall the right NeoForge in a new empty folder |
When you update Pixelmon with Prism later, the server and every friend also have to switch to the same version. The NeoForge minor version does not have to match. I connected with a game on 21.1.252 to a server on 21.1.265, and I could enter normally.
server.properties defaults to white-list=false, so anyone who knows the address can enter. To let only friends in, change it to true and add names with whitelist add <player name>. Other Pixelmon settings are in config/pixelmon in the server folder. To change them, first type stop to stop the server. The official config documentation explains each setting.
Test notes
To test only on my own machine, I set server-ip to 127.0.0.1 and online-mode to false. Do not use these values when you connect with friends. The server finished starting in about 40 seconds. With one player connected, the process used about 1.7 GB of memory, and neoforge tps showed TPS staying at the maximum of 20. The error messages above all came from real connections. The game was 9.4.1 in all cases, and the case of mismatched Pixelmon versions was a connection to a 9.4.2 server.
Summary
For a Pixelmon server, first install a mod loader with the same version as your game, and then copy the mod file from the game to the server. In my test, a 9.4.1 game showed the starter selection screen after connecting, and with one player connected, TPS stayed at 20.