Table of contents
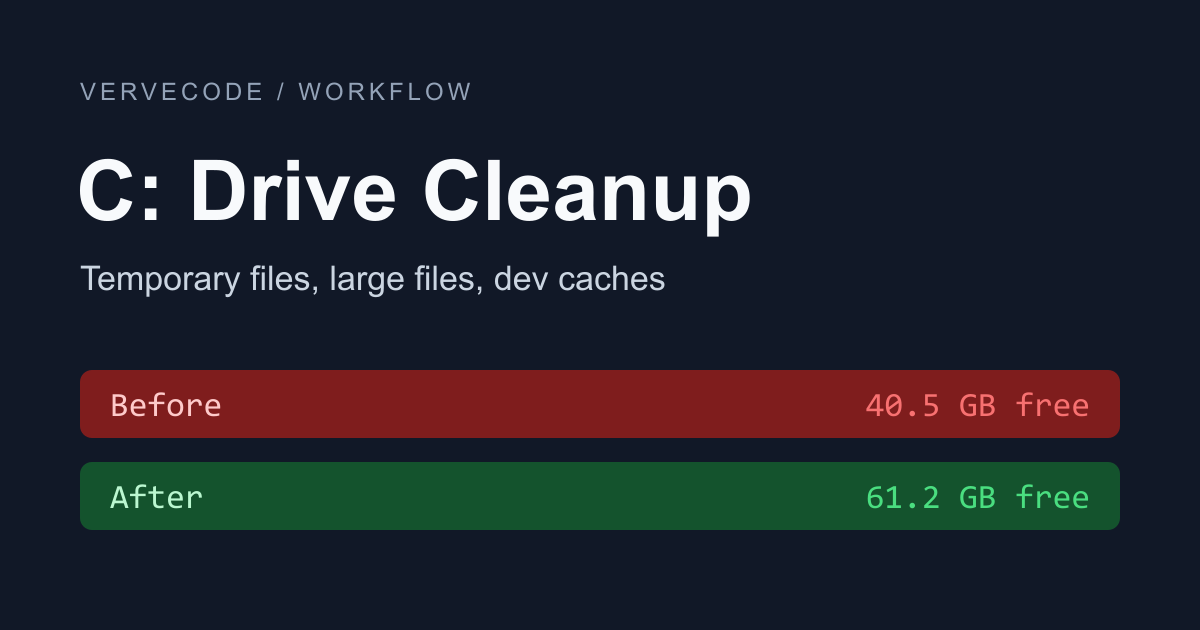
When drive C has little free space, Windows updates and program installs can fail. Temporary files in Windows Settings clears the temporary data Windows recognizes, but it may free little space. On my PC it freed only 233 MB, and the real space was used by a 21.7 GB file in the temp folder. Check each category’s usage first, then clear system temporary files, and look for large files and developer tool caches. These steps show you what is using the space.
I tested on Windows 11 (26H2). Drive C is 464 GB, and only 40.5 GB was free before I started.
Check usage by category
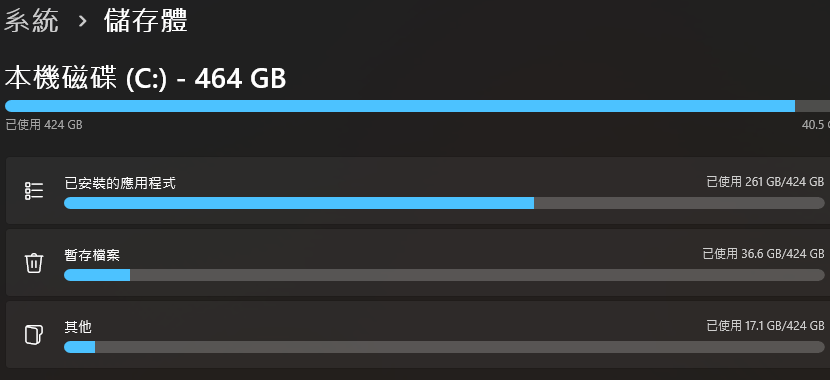
Open “Settings > System > Storage”. The top shows used and free space on drive C, and the categories below list how much each one uses. My Settings runs in Traditional Chinese, so the screenshot shows Chinese labels. The English names are Local disk (C:), Installed apps (261 GB), Temporary files (36.6 GB), and Other (17.1 GB):
Start with the category that uses the most:
| Largest category | What to do |
|---|---|
| Temporary files | The steps in the rest of this article |
| Installed apps | In Settings, open Apps, then Installed apps, change the sort to “Size (large to small)”, and uninstall programs you no longer use |
| Other, or you can’t tell which category | Scan the whole drive with TreeSize Free and go down folder by folder by size |
On my PC, Temporary files is 36.6 GB, so I started there.
Clear system temporary files
Select Temporary files to see the items you can remove, each with its size and a description. The screenshot is again in Traditional Chinese. The English names are Recycle Bin (12.0 GB, unchecked), Thumbnails (213 MB), Delivery Optimization Files (16.0 MB), DirectX Shader Cache (2.20 MB), and Temporary files (1.51 MB):
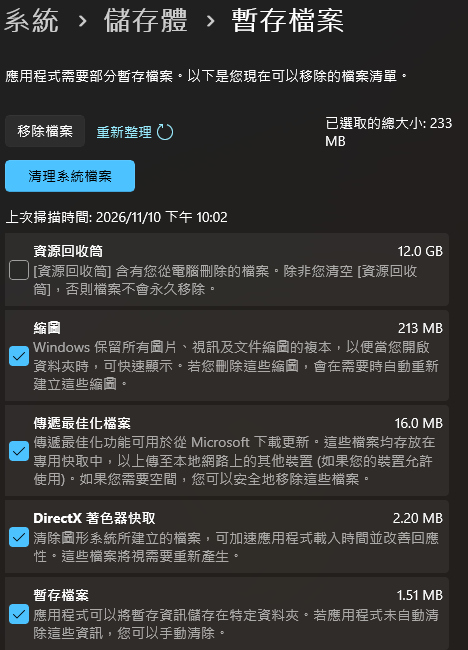
The descriptions for the items checked by default (Thumbnails, Delivery Optimization Files, and DirectX Shader Cache) say they are safe to remove or will be recreated when needed. Recycle Bin is unchecked by default. If you check it, Windows permanently deletes the files in the bin, so open the bin first and make sure nothing there needs to be restored.
After you confirm the checked items, select Remove files. Windows warns that the selected files will be permanently deleted, and you select Continue to start. I kept the default selection, and the removed items added up to 233 MB.
Find large files in the temp folder
In the list above, the Temporary files item is only 1.51 MB, but my user temp folder (%TEMP%) actually uses 24 GB. The extra files are not on the list, so you have to find them yourself. Run the command below in PowerShell. It lists the 10 largest items in the temp folder by size, and a folder’s size is the total of all the files inside it:
1Get-ChildItem $env:TEMP -Force | ForEach-Object {
2  $size = if ($_.PSIsContainer) { (Get-ChildItem $_.FullName -Recurse -Force -File -ErrorAction SilentlyContinue | Measure-Object Length -Sum).Sum } else { $_.Length }
3  [pscustomobject]@{ GB = [math]::Round($size / 1GB, 2); Name = $_.Name; LastWriteTime = $_.LastWriteTime }
4} | Sort-Object GB -Descending | Select-Object -First 10
Here are the top items on my PC. The first is a 21.7 GB zip file named with a hash (the middle of the name is shortened with “…”):
| Size | Name | Last modified |
|---|---|---|
| 21.70 GB | B546C328…684.zip |
2026/11/7 |
| 1.12 GB | claude |
2026/11/10 |
| 0.34 GB | node-compile-cache |
2026/11/10 |
| 0.24 GB | vscode-stable-user-x64 |
2026/11/7 |
If you can’t tell which program left a large file, move it to another drive first. Delete it once you are sure no program needs it. The table below shows drive C usage on the Storage page before and after I cleared system temporary files and moved this zip file:
| State | Used | Free |
|---|---|---|
| Before | 424 GB | 40.5 GB |
| After clearing system temporary files and moving the zip | 403 GB | 61.2 GB |
Free space grew by about 1 GB less than the two actions freed together. I assume other programs were still writing to drive C during the cleanup.
Developer tool caches
Package managers such as uv, pip, and npm keep downloaded packages in a cache folder and reuse them on the next install. By default the cache sits in your user folder on drive C. All three tools have commands to show the cache location and to clear it, and all three can move the cache to another drive:
| Tool | Show cache location | Clear cache | Move to another drive |
|---|---|---|---|
| uv | uv cache dir |
uv cache clean |
Add the user environment variable UV_CACHE_DIR |
| pip | pip cache dir |
pip cache purge |
Add the user environment variable PIP_CACHE_DIR |
| npm | npm config get cache |
npm cache clean --force |
Run npm config set cache <new path> |
After you clear a cache, the next install downloads the packages again. You add a user environment variable in the same window as PATH. The steps are in Add a folder to your user PATH, except that you select New under User variables instead.
I had already moved these caches to drives D and E with the settings above, and uv cache dir shows E:\.cache\uv. When I cleared the caches this time, uv removed 53.4 GB and pip removed 5.3 GB. That shows how much space a cache takes when it stays on drive C. Moving the cache does not delete the old one on drive C. My PC still had 0.25 GB at the old uv cache location, and you have to delete it yourself.
Other common large files
If clearing temporary files and caches is still not enough, these two cases also often use several GB or more on drive C:
- With hibernation on, the root of drive C holds the hibernation file
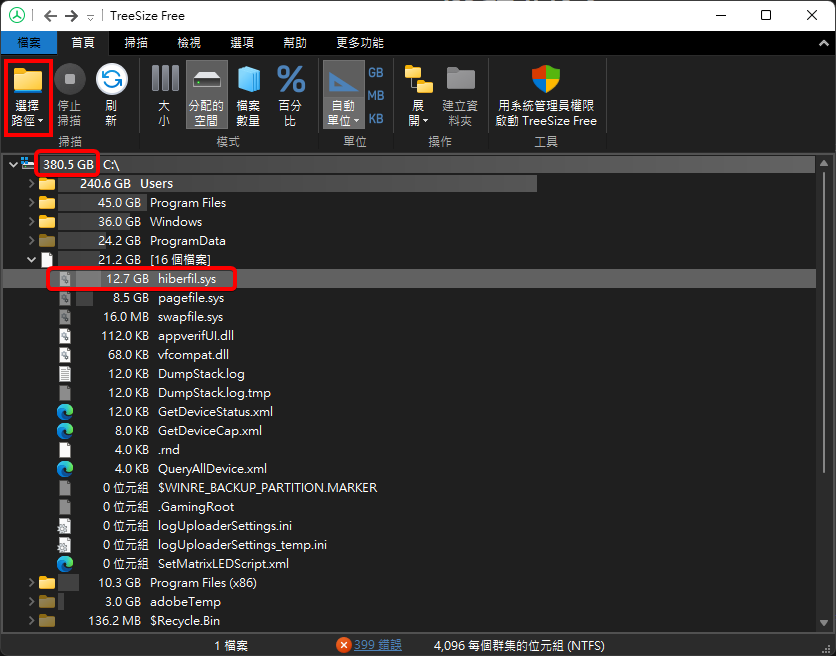
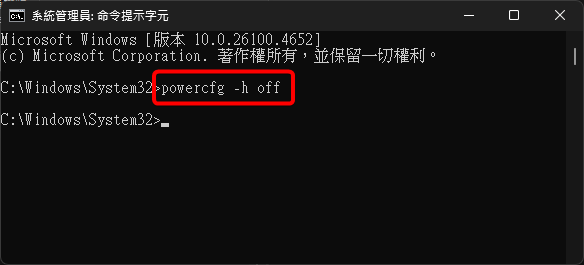
hiberfil.sys, often several GB. On my PC it was 12.7 GB before I turned hibernation off. See Can you delete hiberfil.sys? Turn off hibernation in Windows to free disk space. - If you installed several copies of ComfyUI and each one downloaded the same models, you can share models between ComfyUI installs.
Summary
When drive C is low on space, check each category’s usage in Windows Settings and clear system temporary files. Then look for large files in the temp folder and for developer tool caches, and move any file you can’t identify before you delete it. System temporary files freed only 233 MB in my test. After I also moved the 21.7 GB file out of the temp folder, free space on drive C grew from 40.5 GB to 61.2 GB.
Further reading